Saturday, November 28, 2015

DIY Tutorial | Sewing With Kids, Kids Can Sew!


A really good read about teaching kids how to sew from sewmamasew.com


I love sewing with kids! I’ve taught more Sewing Camps and Sewing Classes than I can count. Even when it’s not a sewing class I sneak in some sewing; kids in my Harry Potter Camp sewed stuffed owls and their own Hogwarts cloaks. My next book– Creature Camp, written with my 10-year-old daughter– is written especially for kids, teaching them how to sew (and design) their own softies.

Kids can sew! And here are ten tips for sewing with them, and having fun while you’re at it.


1. How young can they start? Start when they start asking to sew. A lot of people ask me what’s a good age to start. It depends on the kid, and especially on how much experience they have using their hands. My daughter got her first sewing machine at age 4, but I usually recommend starting machine sewing with help at around age 6. Eight year olds can often sew without supervision. Let your kid be the guide.

Some kids think they want to start on the machine, but then they get pretty nervous about it after we have a safety talk. A good solution is to steer the fabric while they work the pedal. It lets them get a feel for how they can control the speed, without having their fingers near the fast-moving needle. If you do this be very sure they understand to take their foot completely off the pedal the second you say, “Stop.” Make sure they’re looking you in the eye and paying attention while you explain this. I’ve done this with dozens of kids and they’re always ready to steer themselves after a few minutes.


2. Let kids use a real machine. I’ve never worked with a toy machine that wasn’t a complete piece of junk; they are extremely frustrating for kids to use. They don’t always fail spectacularly (my daughter’s went up in smoke– very exciting) but they always fail. Kids can use a real machine.


3. Sew slowly! Kids need to understand that fast sewing isn’t better sewing, and you need to pick a day when you’re feeling patient! Some kids will sew more… slowly… than… you… ever… thought. . . your. . . machine. . . could. . . go. Seriously. It can be painful to just sit back and watch, but don’t rush them.


4. Let them choose. Let them choose the pattern, the fabric, the notions, the thread color– everything. They will choose outlandish fabric combinations and bold prints, and they always want to sew with contrasting thread. Always. And why not? You love picking out fabrics for a project– let them feel that joy too.

When I pointed out to my daughter that the strong black and white print she chose for this bunny would make it hard to see its face, she replied that she would be able see it just fine when she was holding him and that was what mattered to her. Of course, she was right.

One exception to this is steering them away from complicated patterns or fabrics that are tricky to work with. If a kid wants to use velvet (oh, do they love to use velvet) I make sure they’re using a dead simple pattern and I often recommend that they make it first in an easier fabric like fleece or quilting cotton. So help them choose when it’s a question of difficulty, not when it’s a matter of style or taste.


5. Let them make the same thing over and over again. If they have fun making a snake and want to make a snake for everyone they’ve ever met, that’s ok! Their comfort level with that one pattern is going to help all their other skills improve. Plus they’re going to start adding variations, which is extremely fun to watch.

These are just some of a horde of snakes made by a couple of kids in one of my sewing camps. By the time they were ready to move on to something else they were masters at cutting fabric, sewing straight lines, turning corners, sewing on buttons, embedding things in the seams, turning tubes right side out, using a funnel to fill them and sewing up the stuffing opening. That’s a lot of skills from one very simple pattern!


6. Avoid flimsy pattern tissue. Trace all the pattern pieces onto cardboard (cereal boxes are a good weight) and let kids trace around them onto the fabric, then cut the fabric out on the traced lines. Punch holes where they can mark for eyes and other things.

It’s very hard for kids to accurately cut two layers of fabric at once, and very, very hard for them to cut around a pinned or weighted pattern. They need to be able to move the fabric around to get at it with their scissors, so tracing onto the fabric works best.


7. Give young kids real lines to sew on. It’s very hard to sew on imaginary lines. Watching the edge of the fabric to keep it lined up with the throat plate markings is nearly impossible for kids under 8; every instinct is telling them to keep an eye on the flashing needle. For those younger kids I usually draw the stitching line right on the fabric. Kids as young as 4 can sew (slowly) right on that line without any wobbliness at all. It’s amazing. By the time they’re 8 most kids are comfortable using the edge of the presser foot as a guide, and then they easily move on to the throat plate guides.


8. Help them cut fabric efficiently. Have you ever made rolled and cut cookies with kids? You know how they always want to cut the first cookie right out of the middle of the sheet of dough? They do that with fabric too. Every time I teach a class I come home with one very large piece of fabric, with a small pattern piece cut right out of the middle of it. Every time. I’ve found that this is something you can’t simply explain; you have to show them how to position the pieces right at the edges of the fabric.


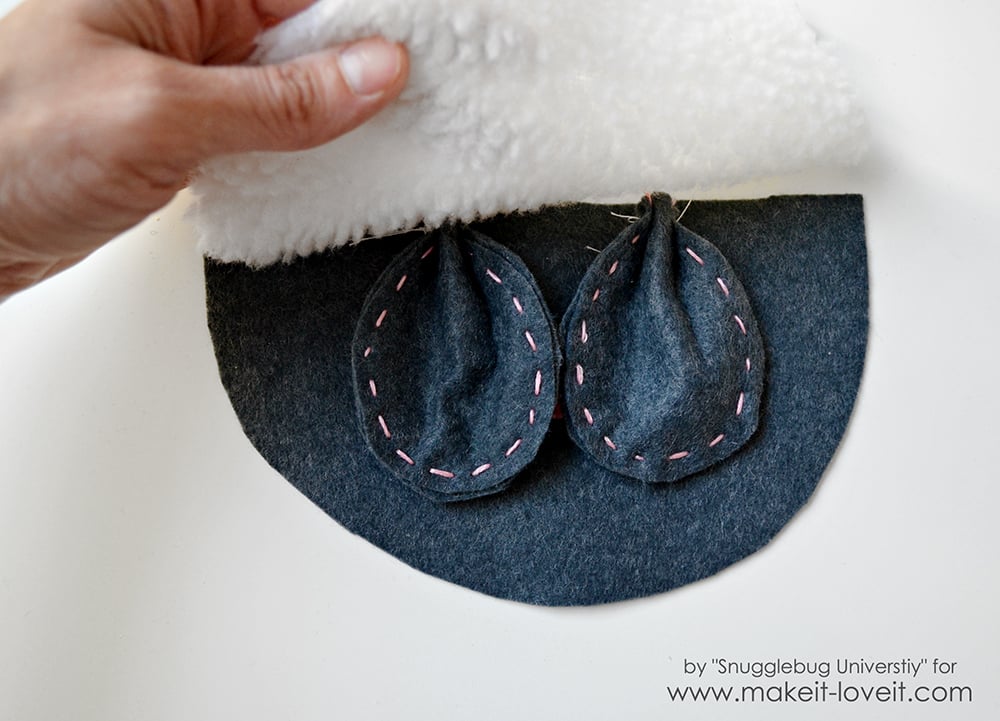
9. Use thick thread for hand work. Use hand-quilting or upholstery thread for hand sewing. It doesn’t tangle as easily as regular thread, and it’s much easier for kids to thread their own needles with the stiffer, thicker thread. I also use embroidery needles instead of sharps; they have larger eyes that are easier to thread. Size #5 works great.


I know this will be controversial, but I don’t tie the thread to the needles or use doubled-up thread – it’s very difficult for kids to fix their mistakes that way. If you thread it like normal they can simply slip the needle off, unpick the bad stitches, re-thread the needle and start sewing again. Show them how to hold things so they don’t pull the needle off the thread, and let them re-thread it themselves when they do. They’ll get the hang of it in no time.


10. Have fun! Their stitches will be crooked and their buttons will be loose and there will be unbelievable snarls of thread hidden inside their first projects, but if you let them do it themselves they’ll have loads of fun and they’ll be so proud! If they have fun, they’ll want to keep sewing, and the more they sew the more their skills will improve.

Friday, November 20, 2015

How To Troubleshoot Your Sewing Machine

How to Troubleshoot Your Sewing Machine
The sewing systems are machines which can malfunction right in the middle of a project that you are doing. This has nothing to do with the quality or the manufacturer of the product as all types of machines could show some wear and tear with time.

The thing that matters here is that how can you troubleshoot your machine without any hassle. There are a number of situations which can exist and can cause trouble in your ongoing project. In this guide, we will have a look at the three most common problems and its troubleshooting which is common to all the modern machines that you use today. 

1. The Bunching of Thread Under The Fabric:This is the most common problem that the beginners face, which is directly related to the machine. A lot of people have false opinions and check a lot of different things such as the bobbin and other similar issues which actually is not the problem. If this thing happens then the first thing that you can do is to lift the presser foot and then re-thread the system.

The problem actually is with the machine tension and that needs to be corrected. In the second step, you are required to lift the lever along with the needle to the top position. This will assure the right and appropriate thread tension of the machine. When you are done with that you can check the issue again by taking a few stitches again. In case you got it right it its fixed you can continue to stitch, if not you should be checking it again or else look for other issues like fabric or thread thickness etc. 

2. Uneven or Skipped Stitching: This is another major issue which is a norm to happen, but at the same time, it is easy to troubleshoot as well. The main reason in this trouble can be a broken, partially damaged or a fully damaged needle. According to the experts, the beginners are advised to replace the needle after every 16 hours of use even if the needle is working properly. Another reason with this issue can be related to the handling of the fabric while stitching.
There is a tendency in a lot of people to pull the fabric which actually works against the feed dogs and the stitches in such situations are skipped. The suggestion here is to improve your hand control when handling fabric in the machine and don’t force it at all.Keeping the cloth in an easy way without too much stretch or strain on it can help you avoid this situation. Just try to keep pace with the speed of the machine and don’t push or pull the cloth too much.

 3. The Regular Needle Breaking:This is again a very common problem which even the professionals also face, but know how to troubleshoot such issues quickly. If this thing happens then you have to ask yourself a question, am I using the appropriate needle? The number and size of the needle compatible to the machine can make a huge difference. Therefore, check if you are using the right size needle or not. For your information, the needles are available in sizes from number 8 to 18. The lower number pins are for delicate fabrics such as silk or chiffon and the high number pins are for quilting and multi layer fabric stitching.Always make sure you have chosen the right needle for your stitching venture as getting a wrong one like a thick needle for a light cloth or a thin needle for a a quilt or thick fabric would lead you to get into the broken needle trouble frequently. 

A Word of Advice:Here we have discussed some general issues to help beginners  troubleshoot their machine in case got in trouble. But there can be other technical issues that people may encounter while working on a sewing machine.All the machines come with a user manual. The users are advised to refer the user manual in case of a problem to find a product specific troubleshooting approach for a particular problem. This will surely make things a lot easier for the beginners to troubleshoot the machine. 


credits to: sewingmachinejudge.com

Tuesday, November 17, 2015

Fashion News | US streetwear label Public School makes debut in Dubai

US streetwear label Public School makes debut in Dubai

New York-based luxe streetwear label Public School chose Dubai for its first international runway show last week.
The Dubai Design District was the venue for the duo behind the brand, Dao-Yi Chow and Maxwell Osborne, to showcase their pre-fall collection which will be rolled out globally next year.
The show took place in front of a host of industry folks from the UAE and their US counterparts, and was held in partnership with Cadillac on the eve of the Dubai Motor Show.
The car maker, which continues to increase its engagement with the fashion community by supporting new and established designers, also unveiled their luxury crossover model XT5 during the event.
Speaking of Public School’s ongoing partnership with the automobile company, Chow says: “When you think of American luxury, you think Cadillac. For us it’s such a strong brand in our lives, everything about it felt really natural. It’s been a natural, familiar progression.”
The designer also revealed why staging the show in Dubai was a must, given the synergies he felt between the city and his brand’s DNA.
“It matches up really well: the contrast between technology and nature, where one ends and the other begins,” he says. “When you think about Dubai, it’s this huge city that’s dropped into a desert. It’s a great example of our concept of how those two slash into one another. A weird mash-up that turned out to be the perfect backdrop for the show.”
Of the collection itself, pieces flitted from charcoal black, pewter and plum to mocha, silver and cream. Luxe streetwear silhouettes for women included satin-trimmed bomber jackets, unstructured trousers and sheer-panel knits.
Monochrome column dresses made an appearance, as did mesh numbers with extra-long sleeves.
The collection was equally wearable for chaps, with Public School’s clean lines, gently tailored sports jackets and deconstructed houndstooth navy prints proving the standouts.
Layering was the order of the day for men and women, with crisp white collars peaking out of kaftan-like tunics and side- tying kimono jackets.
Female models exhibited barely-there make-up of rosebud lips and a flick of mascara, while their hair was slicked down in a low ponytail.
On the accessories front, elasticated boots, chunky-soled shoes and trainers punctuated the collection alongside oversized backpacks in black and white. “We’ve always tried to mix the ideas of high and low, luxury and street, everything that NY is, all in one,” says Osborne. “For example, you can be on a train in NYC and stand next to a billionaire and a homeless person. That’s what Public School is – in the proportions of fabric, the pricing, the layering – everything is about that global citizen.”

credit: thenational.ae


Thursday, November 12, 2015

Tips & Tricks | Your Sewing Machine's Overlock Stitch

Did you know that most regular sewing machines have a special overlock stitch that mimics a serger's stitch? It's true! My Bernina has one, and so have the Pfaff and Brother machines I've sewn on.

Most people without a serger use pinking or zigzagging to finish their edges, sometimes without even knowing they have an overlock stitch on their sewing machines. What makes this stitch different from a zigzag is that it has a special foot with a little pin that helps the stitch wrap around the raw edge of the fabric. It uses more thread and can be pretty slow-going, but it's very secure.

Here's the top view of the stitch on my Bernina 1008, in pink thread. The bobbin thread is yellow.

And here's the back. See how the thread wraps around the raw edge?

This is what the stitch icon looks like on my machine.

Your machine will have a special foot for the overlock function. On a Bernina it looks like this:

The red arrow points to the pin, which you align with the raw edge of your fabric. The pin keeps the fabric flat and allows the thread to wrap around it.

Since my serger needs to go to the shop, I used my overlock stitch to finish the raw edges of some fabric before pre-shrinking it in the dryer. The overlocked edge held up just as beautifully as a serged edge does! 

Wednesday, November 11, 2015

DIY Tutorial | Mouse Slippers, simple to make in any size !

DIY Mouse Slippers.....make these simple slippers in any size! | via Make It and Love It

Are slippers a part of your holiday traditions?  They certainly are in my family!  My kids LOVE to have matching PJ’s and slippers for Christmas morning, and I happily oblige because I love the pictures of them in them!
DIY Mouse Slippers.....make these simple slippers in any size! | via Make It and Love It

Why mice?  I just couldn’t get the “Not a creature was stirring, not even a mouse…” line from the “Night before Christmas” poem out of my head!  I know, I know, it’s only November, but I’m already beginning to feel in the Christmas mood.  (And let’s be honest, if I don’t start making Christmas gifts early, there’s NO WAY they are getting done on time.  I promised myself I’d get started earlier this year, and so far, so good!)
DIY Mouse Slippers.....make these simple slippers in any size! | via Make It and Love It

The mice slippers are lined with sherpa fabric, making them super cozy.  They are made of wool blend felt on the outside.  The bottoms are non-skid utility fabric, so that little feet don’t go sliding as they run about the house.  (I’m pretty sure the word “walk” isn’t in my 4-year-old’s vocabulary.)
DIY Mouse Slippers.....make these simple slippers in any size! | via Make It and Love It

It’s the face though that’s my favorite part.  I love the simple embroidery.
DIY Mouse Slippers.....make these simple slippers in any size! | via Make It and Love It

If mice slippers aren’t really your thing though, you can omit the ears and embroidery to make a basic pair of slippers.  You could use colorful fabric, or even make them quilted. The possibilities are endless!

Alright, are you ready to make some slippers?
SUPPLIES:
  • 1/2 inch thick craft foam
  • “Footie PJ, non-skid” fabric (I found this in the utility section of the fabric store)
  • Sherpa fabric for the lining
  • Felt (I prefer wool-blend)
  • Embroidery floss and needle
  • Sewing machine and basic sewing supplies (here’s a list of common sewing supplies, in case you need a few ideas) 

-Since I was making slippers for kids, a 1/4 yard of each of the above fabrics was more than enough to make the slippers. I was even able to find craft foam cut into small squares on clearance that was just long enough for my kids’ feet.  
I liked the thickness of the foam slippers for kids’ slippers, but you could easily make them thicker.  In that case I’d just go with 1 inch foam and use another “side” piece of fabric to go around the slipper (to accommodate the increased depth.)
***As always, if you need a bit of help with the basic sewing skills used in this tutorial, don’t hesitate to check out the Sewing 101 post for more help.

Alright, let’s get started.
Begin by making your pattern pieces.  Using your child’s shoe as a guide, trace the bottom.  You will add a seam allowance to this template when you cut from your fabric.
mouse slippers (21)

For the top of the slipper, I wrapped a piece of paper over the top of the shoe to estimate how the top should be.  Then I cut a piece to match the curve of the front of the bottom part of the shoe.
mouse slippers (18)
MAKING PATTERN2 copy

Use the templates to cut out your pieces.  Cutting one “right” side and one “wrong” side from your template will give you pieces for the left and right slipper respectively.  For the ears, I just free handed the ear shape.  I cut two pieces of felt per ear so that the ears stood up better on the slipper.
Cut out the foam to be the same size as the shoe bottom (without any seam allowance). Cut one for each foot (not shown below).  Here are all of the pieces except the foam inserts.
mouse slippers (1)

Start by embroidering the face and sewing the ear front and back to each other (using a basic running stitch).  (Here is a good resource for embroidery stitches if you are unfamiliar with embroidery). 
I used a small piece of pink felt for the nose, and stitched that on as well.
mouse slippers (2)mouse slippers (3)

Fold the ears edges over, and sew.  This gives the ears a bit more dimension.
mouse slippers (4)

Now it’s time to incorporate the ears into the slipper front.  Place the ears down on the face piece. Placing the right sides together, sew the outside of the slipper to the inner lining, incorporating the mouse ears into the seam at the same time.
mouse slippers (5)mouse slippers (19)

I turn my slipper right side out and top stitch right along the top of the slipper so that it sits nicely.  Next, we’re going to sew the slipper front to the slipper lining and back.
Start by placing your the slipper front so that it’s sitting on the inside lining of the shoe. This is the same way your slipper will look when it’s finished.
mouse slippers (7)

You will need to fold your slipper a bit so that the ears don’t get caught in the side seams.
mouse slippers (8)

Now, place the bottom of the shoe on top of the mouse face part of the slipper. Sew around the edges, leaving the base open and avoiding catching the ears in your seams.
mouse slippers (9)

Clip curves and turn right side out. Put the foam in.
mouse slippers (10)

Fold in edges around the heel and sew around the edges, securing the foam in place.
mouse slippers (11)

And with that, you’re done with the first slipper and you can just repeat the instructions for your second slipper!
DIY Mouse Slippers.....make these simple slippers in any size! | via Make It and Love It
If you enjoyed this post and are looking for more homemade kid gift ideas, you can find over 30 different kid gift projects here on my blog, including these fairy dollsthis stuffed dog patternthis making faces game, andthese puppets.
Gifts to make for kids

Thank you so much for having me here on Make It and Love It!
–Jill

DIY Tutorial | Reversible Wrap Belt


DIY Reversible Wrap Belt...a quick way to add fun detail to any outfit! | via Make It and Love It

While I can’t say that I’m particularly fashion-minded, I’ve had making a large belt on my mind for a while now. I think wide belts are flattering to the midsection–an area of my body that I’m pretty self conscious about. (Especially since moments of not-sucking in my stomach have resulted in me being mistaken for being pregnant on more than one occasion…so not fun).

These reversible belts are such a confidence booster!  Better yet, after I made them I was able to pull out some items of clothing that I rarely wear, simply because wearing them with the belts was so much more flattering.  I hope you like them and that they help you too!

When I started making this belt I had a vision of a belt with lace, leather, and a rosette (something a bit bohemian, like my fabric headbands), but I wanted a more basic plain belt too. That’s when I realized that making the belt reversible would be like getting two belts in one!
DIY Reversible Wrap Belt...a quick way to add fun detail to any outfit! | via Make It and Love It

And there are so many different design possibilities too!  I made a total of 3 belts, each a little bit different.
One is sleek and modern:
DIY Reversible Wrap Belt...a quick way to add fun detail to any outfit! | via Make It and Love It

Another is more casual with rosettes.  In fact, it’s made from an old pair of jeans!
DIY Reversible Wrap Belt...a quick way to add fun detail to any outfit! | via Make It and Love It

3 belts, with 5 different possibilities!
DIY Reversible Wrap Belt...a quick way to add fun detail to any outfit! | via Make It and Love It

If you want to add large flowers to your belt but still want to make it reversible, all you have to do is add snaps to the embellishments.  This way the belt will sit flat when you have the reverse side showing.
DIY Reversible Wrap Belt...a quick way to add fun detail to any outfit! | via Make It and Love It


Are you ready to make your own wrap belt?

All you really need is some fabric or leather. The belts above are made of distressed microsuede (the brown one), vinyl (the black one), and denim material.
I just used my regular sewing machine and needle to sew all three, but there are special leather needles which might work better for you depending on the thickness and material you are using.  If you decided to make your belt out of vinyl, visit this post for some tips for sewing it without it sticking.  It works so well!
***As always, if you need a bit of help with the basic sewing skills used in this tutorial, don’t hesitate to check out the Sewing 101 post for more help.


Alright, let’s get started!

First you need to measure your waist.  I measured my waist with my clothes on, with the outfit that I was planning on wearing the belt with.  Subtract about an inch to an inch and a half from that length.  You want there to be a little bit of a gap between each side of the belt in the back.  Like this:
DIY Reversible Wrap Belt...a quick way to add fun detail to any outfit! | via Make It and Love It

Length of belt main piece = waist length – 1.5 inches
Make TWO long rectangles this length (and about 4 inches wide).  You can curve the edge of the rectangles inward (as shown below in the next picture).  These two pieces will make both of the two sides of your belt, and you can embellish them differently if you desire.
The thin straps for my brown belt is made from a long rectangle that is about 2.5 inches wide.  Both of the 2 belt straps are cut as one single piece that are folded in half and sewn to make a smaller strap…but I’ll explain more about that below. You can also use narrower pieces of fabric, ribbon or leather.

For the length of each of those straps, I’d recommend getting some yarn and trying out how long you want your belt straps to be.  It really just depends on how many times you want the belt to wrap around you.  Do you want it to just tie up in the back?  Or do you want it to go around once or even twice?

For my brown belt, each strap is (1.5 x waist length) PLUS 2 inches.   My jean belt has the shortest straps, at about (.75 x waist length).  How long you make your belt strap is totally dependent on your personal preference and where you want it to tie.

Here’s what you should have:
reversible wrap belt (18)

Add whatever embellishments you’d like to one side of your main belt.  Add lace, flowers (with snaps!), or whatever else you’d like.
reversible wrap belt (2)

Placing the right sides together, sew along the top and bottom of the main part of the belt (I used a 3/8 inch seam allowance), leaving the ends open.
reversible wrap belt (3)
reversible wrap belt (19)

Turn right sides out and set aside.
reversible wrap belt (5)

Grab one of your narrow strap pieces and fold it in half lengthwise (right sides together) and sew (I used 3/8 inch seam allowance). Turn right side out. I use a safety pin to help with this.  (You can read more about this turning trick here.)
reversible wrap belt (7)reversible wrap belt (9)

Fold in the raw edges of your main belt piece and place your belt straps inside, one at each end.  Sew the seam closed, securing the belt straps at both ends.
reversible wrap belt (8)reversible wrap belt (10)

I continued sewing around the entire belt and straps around the edge to give the belt a more polished look (and finish off the ends of the straps as well).  Then you’re done!
DIY Reversible Wrap Belt...a quick way to add fun detail to any outfit! | via Make It and Love It


I think these belts would make great gifts too!

Until next time, you can find more of my projects on my blog or in my pattern shop!

Thanks so much for having me as a guest contributor on Make it and Love it!

-Jill