Using alternative fabrics such as leather, vinyl and plastic are sometimes scary. We often worry about putting holes in the fabric, getting it “stuck” or even worse, chewed up by our machine. Another big hurdle is how to pin it. Well, I’m here to share my secret weapon and take the “scary” out of these speciality fabrics. Behold, the Teflon Presser Foot. (*Insert sounds of praise in the background.)

This teflon coated foot can be used for both straight and decorative stitching on leather, vinyl, suede, or other fabrics that would stick to a regular presser foot. The coated backing prevents the fabric from tugging against the foot and allows it to glide through the machine with ease.
Teflon Presser Foot

Tips on stitching with alternative fabrics:
Use longer stitch length. This will improve overall strength and reduce fabric tearing.
Consider using a heavier weight thread to reduce breakage and increase seam strength.
If your foot is still sticking, place a layer of tissue paper over the fabric/under the foot and stitch through. Tear away after.
Needle size matters. Use a specialty needle designed specifically for sewing these types of fabrics.
Pinning is not an option. Consider using standard office supplies such as paper clips and binder clips for thicker projects.
The teflon presser foot is also great for all home decor projects with a backer. Think black out drapery, coated cloth, plastic covers and more. This foot will also make quick work of hand bag handles, rain gear and the gripper fabric commonly found on the feet of children’s pajamas and socks.
So, if these fabrics have been scary to you in the past, let’s grab our secret weapon and get stitching. The teflon presser foot will make the process smooth as silk!
credit: thesewingloftblog.com
In my world, there is a difference between homemade and handmade. When I think of homemade my mind lingers towards the negative. I’m not sure why so please don’t judge but I tend to think of a DIY gone bad. But handmade on the other hand screams quality. I think of the countless hours of attention to detail and love the project was made with.

When you wear a garment that you made for yourself, you want it to look original, one-of-a-kind, and tailored to suit your body. You want the people who see you to think you have your own designer working for you, fashioning outfits that are meant to fit and flatter your shape. What you DON’T want is to have someone raise their eyebrows at your outfit and ask, “Did you make that yourself?”
Homemade to Handmade
Here are a few tips to help you make sure your handmade garments don’t wind up looking “homemade,” in the worst of ways:

Fit: An ill-fitting garment is a sure sign that you didn’t make it with care. Here’s how to get the best fit for the clothes you make for yourself:

– When you sew a garment for yourself, make a muslin first to make sure the item is going to fit and flatter before you use up the “good” fabric you bought for the project. You can make adjustments to the muslin as needed and it won’t matter if it ends up a bit messy, because when you make the actual garment all that practicing and adjusting will mean the finished project looks as good as it can. See an example of using a muslin in our post on skirt pattern drafting here. *A dress form can come in handy for this step but is not necessary.
– When you read a pattern, use your actual body measurements and not just the standard pattern pieces in “your size.” The pattern may call for your bust measurement in one size and your waist in another, so you need to adjust and cut your pieces accordingly.
– Know your body shape and use techniques like making darts to adjust the pattern pieces to fit your body well. Don’t just sew a pattern because it looks good on a model; think about whether it’s the type of garment that will look good on YOU. (A good tip: Try to find a similarly styled commercial item and try it on in a store; then you’ll know if that style or shape is flattering before you take the time and expense to sew one for yourself.)

Tools: If you don’t have the right tools for the job, your finished project will show it.
– Keep the following items in your sewing arsenal at all times: good fabric shears, pinking shears, small snips or scissors for trimming threads, a good marking pen and a ruler for making straight lines. We’ve rounded up your must-have sewing essentials for you right here!
– Clean out your sewing machine regularly and remove the dust and fuzz; oil it regularly if your manual calls for that step. Cover your machine if you won’t be using it for more than a day, and take it to a mechanic for regular maintenance and repair. Of course, these tips include maintaining your serger, too!
– Always use the right needle for the job. In general, a bigger number for the needle size means the needle itself is larger so it is used for heavier fabrics. Use ball point needles for knits or other stretchy or delicate fabrics and use a heavy-duty needle for denim, leather, duck cloth and other heavier weight fabrics.

Fabric: All fabrics were not created equally; know your fabrics to get the best results in your sewing.
– Watch out for the fabrics you choose: quilter’s cotton is meant for quilting, not garment construction. Just because you have a lot of it in your stash doesn’t mean it’s the best fabric to grab the next time you want to make yourself a dress. Use the type of fabric recommended by the pattern, don’t just grab whatever you have in your stash and hope it will work.
– For clothing, I suggest Pre-wash EVERY fabric before you sew it into something, otherwise you may wind up with a nasty surprise when you wash the finished item and it shrinks.
– Position your pattern pieces on the grainline of the fabric in the direction indicated by the pattern. Take care to keep your pattern pieces straight every time (measure with a ruler against a known straight edge) or you will wind up cutting off-grain and your fabric pieces may stretch and distort in unpleasant ways when you sew the garment.

Finishing: The last steps you take in a project may be the ones that really step it up from homemade to handmade.
– Always press your fabrics as you sew, and do it properly. Want some tips on pressing vs. ironing? We’ve got ‘em here!
– Finish your seams, every time. Pinking shears are the easiest method, but it looks more professional to do French seams, serged seams, a 3-step zigzag stitch, or bias tape.
– Reduce bulky seams with proper trimming.
– Sew by hand when it is called for to make the neatest stitches; you’ll often find this is the case for the last few stitches of a garment, such as the hemming.
– Use proper hemming techniques to polish off your finished garments. When sewing with knits, use a double needle to mimic commercial hems. For other garments, use the type of hem that would typically be found on that type of garment in the store (link back to post on improving your hemming).
credit: thesewingloftblog.com
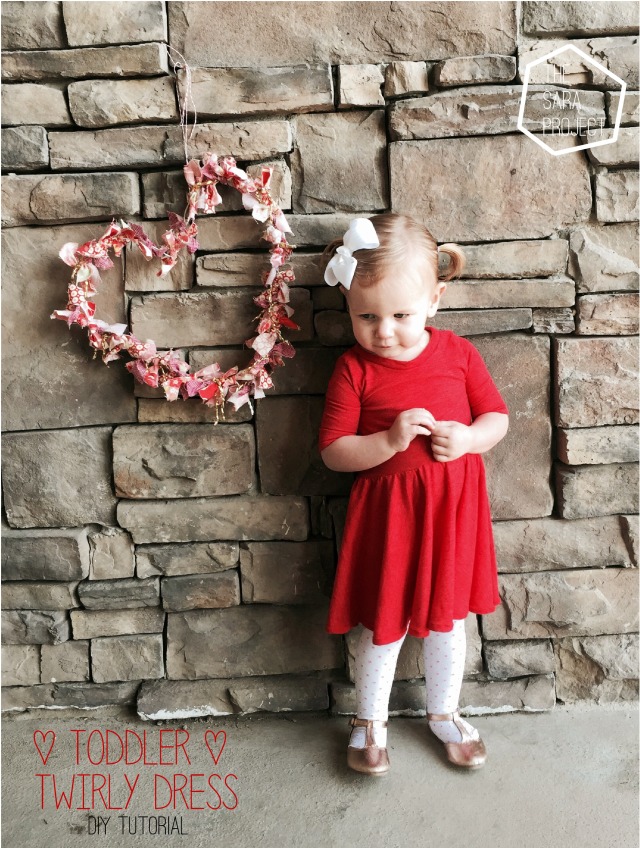

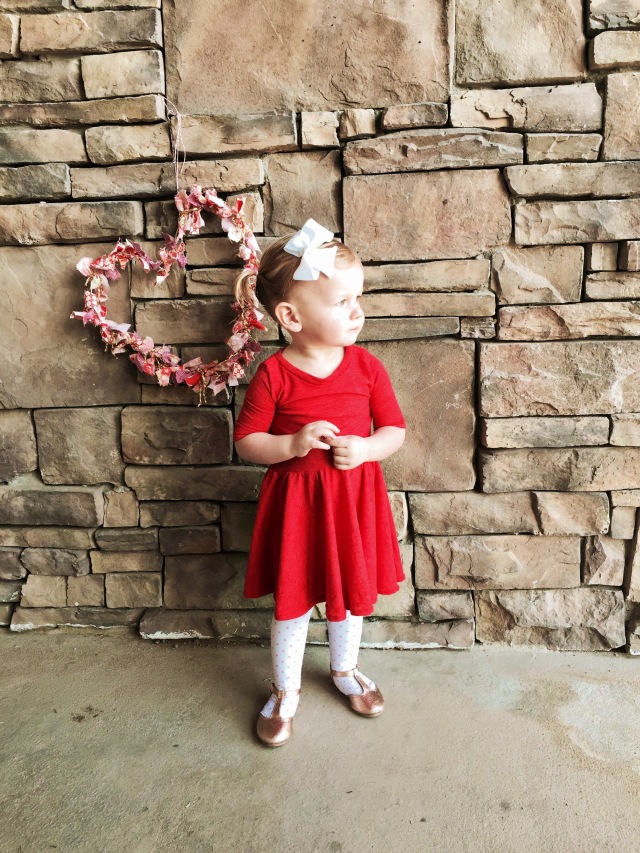
With Valentines Day approaching (one of my all time favorite holidays), I was inspired to make a cute little dress for my 18 month old little girl. I’ve seen some similar dresses in etsy shops and I thought I’d try to make one for myself. I put the whole dress together in an afternoon, it’s very simple. I made it using solid red Cotton Jersey Knit fabric that I found on sale at a local fabric shop, but this dress would also be so cute using a fun printed knit fabric. Check out Girl Charlee online for some great knit fabric options. Best of all, my daughter loves to wear it and twirl all around. It’s so comfortable for her to wear, and it’s so easy to slip on. I’m definitely planning on making some more!
What you need:
-I used about 3/4 of a yard of fabric, but this depends on the size you need. (Mine was for an 18 month old).
-matching thread
Let’s get started.
First of all, you need to create your pattern. For the top part of the dress, I used one of my daughters fitted t-shirts as template for the dress front and back pieces. I traced from about the waist area to the neckline with the shirt folded in half. Make sure to add a 1/2″ for your seam allowance.
Next you need to draw out your sleeve. See my image below for a good visual. Use your t-shirt as a guideline again for the top of the sleeve, and then add desired length.
Now we need a neckline facing. This is easy. Measure the length of neckline on your t-shirt. Mine measured about 8″ in the front and 7″ in the back. Add them together -1 1/2″ and draw a line on your pattern paper. So I drew a line that was 13 1/2″ long. Next draw the width of the neckling facing, depending on how thick you would like it to be. I wanted mine to be 1/2″ thick to I added 1 1/2″ width. It will look like a rectangle when your finished- see image below for my pattern piece.
For the skirt part of the dress, we will need to create a circle skirt pattern. This is so easy. I used this tutorial, it’s very clear and my skirt turned out perfectly. Just follow her directions for drawing the pattern and cutting the skirt.
My pattern pieces look like this:
Neckline Facing, Sleeve, Dress Bodice Back. Dress Bodice Front:
Circle Skirt Pattern: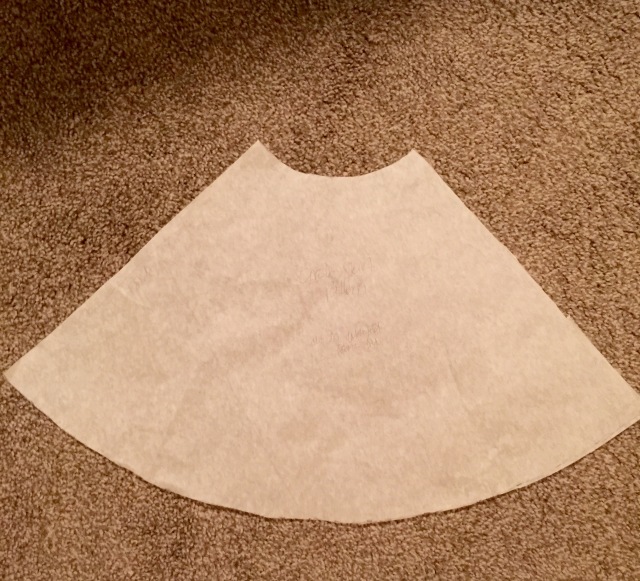
Let’s start putting this all together.
1. Cut out pattern pieces using desired fabric
2. Line up Front and Back Dress bodice pieces RST and pin at shoulder seams, sew at 1/2″ using zig zag stitch if you don’t own a serger like me.
3. Hem your sleeves. I just folded the edge up about a 1/2″ and sewed right on the raw edge using a zig zag stitch.
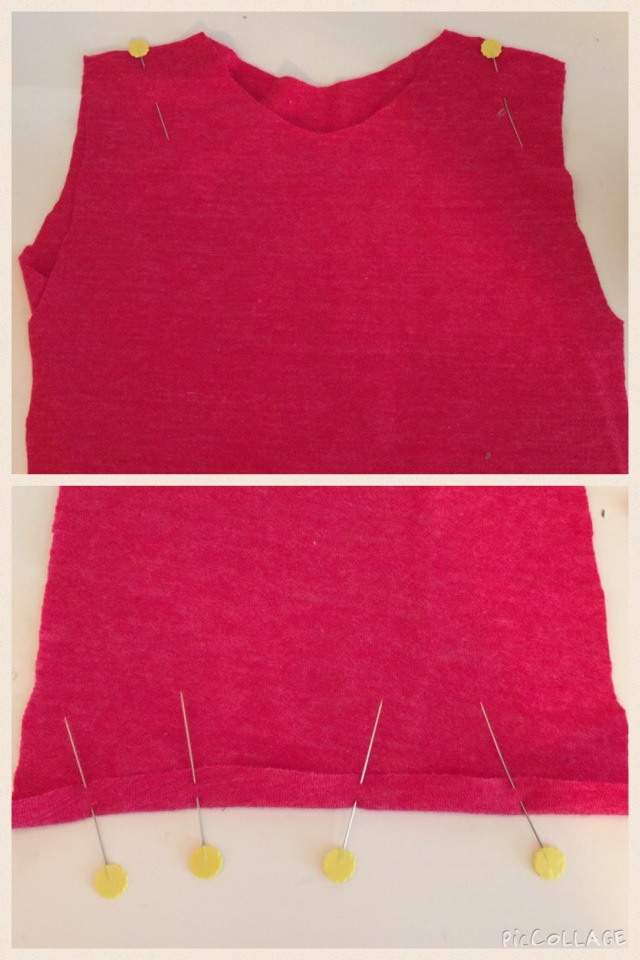
4. Open up your bodice pieces and find to edges on the sleeve, see where my pins point this out below. Pin sleeve to Bodice Front & Back pieces RST, matching end points and centers. Sew.
5. Pin Bodice Front & Bodice Back RST from sleeve end to waistline. Sew at 1/2″ with zig zag stitch. 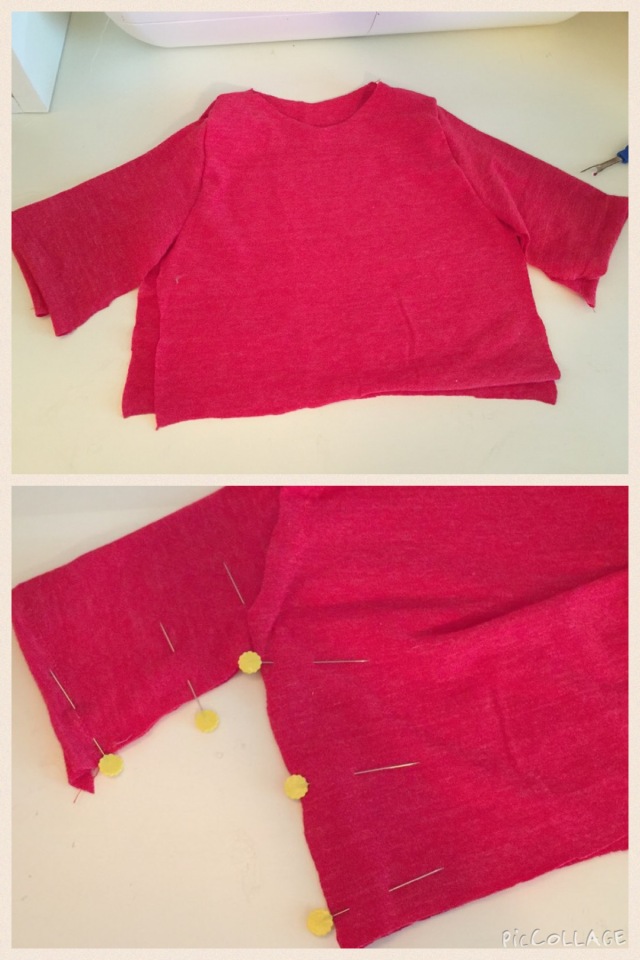
6. Now we need to sew the skirt to the bodice. First we need to prep our skirt to be gathered by ease stitching (using a wider stitch) sewing with a straight stitch at 1/2″ & 5/8″ around the waistline edge of the skirt. Make sure to leave your threads long enough for pulling.
7. Evenly pin your skirt to your bodice RST in about 4 places. Lightly tug on thread ends of ease stitching to gather the skirt, make sure to distribute gathers evenly until the bodice and skirt pieces match up. Pin and sew at 5/8″.
8. I recommend trying the dress on at this point. I had to adjust the neckline a little (make it wider) to properly fit my daughter. Make any needed adjustments at this point. Trim seam allowances.
9. Next, we need to sew in our neckline facing. Sew facing ends RST. Trim Seam allowance. Fold neckline facing piece in half WST. Iron flat. Pin RST to bodice neckline. (Make sure to line up neckline seam with the bodice center back). Sew at 1/2″ using a straight stitch. Trim Seam allowance, and iron flat.
10. Hem the bottom of your dress to desired length!
I know your little one will love wearing this dress as much as mine. This would be great for an adult dress too!! Hmm…
 credit: thesaraproject.com
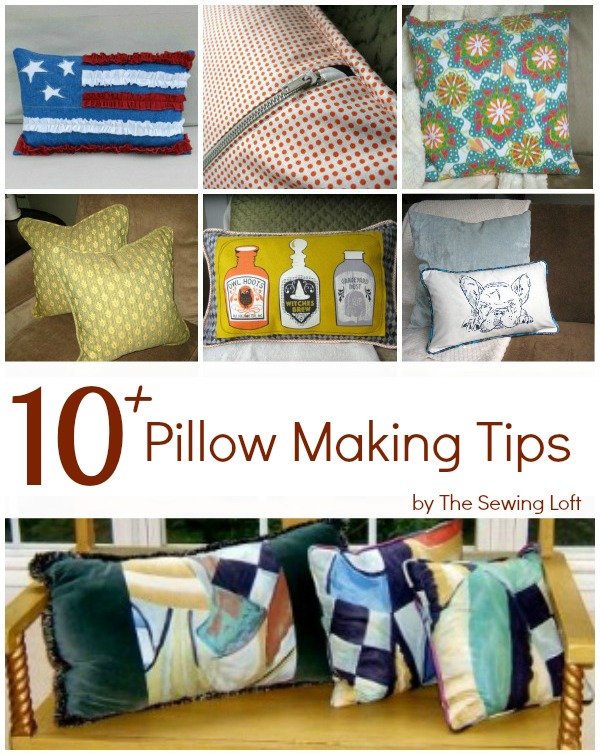
Let’s have some pillow talk! Hand made pillows are easy to create and can really liven up any space within your home. Not only are they easy to make but they can change the outlook of any space in a flash. So, I thought it would be fun to share some of my top tips for making pillows.

Think of pillows like the silent power player for your home decor. They are inexpensive, require minimal fabric and can be made in under an hour. To help you amazing pillows, I wanted to share a few tips and tricks to make sure your end results are nothing short of statement.
Tips for making pillows
- Clip corners before turning to reduce bulk.
- Use a blunt object to help turn out the corners of your pillow.
- Reinforce the corners of your pillow by sewing a double row of stitches around each corner.
- Make your pillow up to 1″ smaller than your pillow form. This will give your pillow a plump appearance and help maintain its shape.
- To ensure a smooth pillow surface consider adding a layer of batting to your main pillow fabric. This tip also comes in handy when creating odd-shaped pillows that will be hand stuffed.
- Decide your pillow closure before you start your pillow project. Zipper closure, envelope or all stitched up with a basic ladder stitch.
- Reduce your stitch length slightly to prevent stitches from showing at seams.
- Consider adding coordinating trims, fringe, pining or a flange to the edge of your pillow cover for an added layer of detail.
- Turn your zipper closure into a featured detail.
- Want to achieve a slightly curved corner? When sewing the corners of your pillow; mark a point 1/2″ from each corner. Then draw a line from each side, point to point to slight reduce your square shape. This is your new pattern shape.
- Think outside of the box with your pillow cover ideas. Pillows can be an easy conversation starter to a new guest in your home.
Now that you know my secret tips for making pillows are you ready to get started? Check out these easy patterns.
credit: thesewingloftblog.com


How To Sew Sock Monkey
Sewing Pattern: Download pattern here. It contains the eyes, ears and pattern for drawing the sock.
Materials:
Make: 1 (adult size)
1. Sock (crew length), 1 pair (I used striped sock so that it is easy to get the alignment right.)
2. White felt
3. Button eye 7/16″ [11.5mm], black, 2 (for toddler monkey, use 3/8″ button)
4. Embroidery Floss, yellow
5. Poly-fill stuffing material
6. Batting, or thick aquarium filter pad (you can get it from pet shop)
7. Letter size paper, 1
Tools:
1. Sewing machine
2. Sewing needle (prefer long) and pins
3. Scissors
4. Erasable fabric marker
5. Iron
6. Printer
Seam Allowance: approx. 1/8 – 1/4″
Note: for different sizes of sock monkeys, use different sizes of socks.
Since the sock is stretched after stuffed, thick sock yields better quality than thin sock.
**************************
Update May 2015:
In conjunction with the grand opening of Craft Passion Shop, we are giving 20% off the total sales. Great chance to get some beautiful socks to make the sock animal. Apply coupon code at check out.

Preparation
 Prepare all the materials needed as described above.
Cut the eye from white felt by following the download pattern above. Mark the button eye position.
If your socks have folded cuff, remove the stitches carefully and don’t accidentally cut the sock. Flatten the fold to have a longer length.
 Turn the sock to wrong side, align sock as per photo below. Press with warm iron.
 Draw pattern on the sock with erasable fabric marker. Since not all socks are the same, I can’t make a standard pattern for you to trace.
If you haven’t had the pattern, download it here and print it out.
 1. Align the stripes on both layers, pin.
2. Sew the socks (black lines) with sewing machine, best if you have walking foot so both layers walk together. You can use hand sewn too.
3. Cut as per pattern.
4. Cut all pieces out.
Body
 There will be an opening created between the legs. Use this opening to turn the sock right side out.
 1. Insert the thumb into the leg till the feet end. “Pinch” the feet end with your thumb and index finger.
2. Push the index finger into the sock while thumb withdrawing from the sock to turn the sock right side out.
3. When the feet surface to the opening, pull the whole leg right side out.
4. Repeat the same to the other leg.
 Finally, turn the body out. Smooth out all the seam line.
Turn the rest of the body parts, except the tail.
 Stuff the legs with poly-fill stuffing material.
 Fill the body round and to the firmness you like.
 1. Sew slip / ladder stitch on the opening about 1/8″ from the raw edge. Let the thread loose and don’t pull it yet.
2. After finish slip stitch the opening, pull the thread to close the opening.
3. With the needle still on the sock, wrap 2 to 3 rounds of thread on it, pull the needle through while pressing the wrapping thread with your finger.
4. Insert the needle some where near by and come out from the other side. Pull the thread and cut it close to the sock. The thread will be hidden in the sock neatly. Always do this when you sew.
Arms
 Stuff the arm with poly stuffing material until about 1/2″ from the opening.
Roll the monkey arm with you hands to make the stuffing even and nice. You can do this now and/or after sewing up the opening.
 1. Stuffed monkey arms waiting to be sewn.
2. Run stitches about 1/4″ from the raw edge.
3. Pull the thread to gather a bit, push the raw edge into the arm.
4. Tighten up the opening by pulling the thread fully, make a few stitch across, knot and cut thread.
 Both arms waiting to be assembled to the sock monkey.
Ears
 1. Stuff the ear with small amount of poly-fill. Fold the raw edges in and slip stitch.
2. Pull the thread to close the opening. Knot.
3. Fold the ear vertically and slip stitch the opening seam line.
4. The finished ear looks like this.
Tail
 Cut a piece of batting or thick aquarium filter pad, 3 times the width of the tail and the length when it is stretched or partially stretched.
 Fold the batting three times and sew the end to the seam line of the tail end (wrong side).
Whip stitch the folded batting in place until the other end.
Sew the batting again to tail seam allowance about 1/4″ below the raw edge.
(Note: I used this method since stuffing with poly-fill to a long narrow tail is difficult and uneven.)
 1. The batting and the tail before turning.
2. Insert finger into the sock and pull the tail right side out, portion by portion. Only turn the sock not the batting.
3. Repeat (2) until you reach to the end. Continue with the turning by inserting the batting into the tail until it fully gets into it.
4. Adjust the batting so that it looks neat. Fold the raw edge in and stitch it up just like the arms method.
Assembly
 Body, arms, ears, tail, mouth, felt eye and button eyes are all set to be assembled into a sock monkey.
Divide the body into half, with top half being the face of the monkey where eyes and mouth are sewed to.
 Position the felt eye with the center point align to the middle of the face portion. Pin it and sew with blanket stitch.
You may want to decorate the felt eye with a line of running stitch with 6 strands of embroidery floss before sewing it on the face.
 Sew the button eyes to the marked positions of the felt.
To make the eyes attach to the face closely, insert your needle as deep as possible into the face, turn and come out to another point of the same eye. Pull thread tightly so that the eye attach closely to the face.
 1. Mark the mouth on the face with erasable fabric marker. The shape is rounded corner rectangular, with bottom align to the face’s border and top covers a little on the felt eye.
2. Fold and baste the raw edge of the mouth, then pin it in place. Slip stitch around until you are about 1″ away from the starting point.
3. Stuff the mouth fully. Continue to slip stitch to the starting point to complete the mouth.
4. Embroidery branch stitches across the middle of the mouth. Tips: look out for the toe seam line of the sock, this is where the middle is.
 1. Sew ears on the side of the face with slip stitch around (front and back of the ear).
2. The front of the ear is aligned to the side line of the monkey.
3. Position of tail.
4. Sew it with slip stitch around too.
 Sew the arm on the marked position with slip stitch around. Knot the thread and insert the needle to the other side of the arm position. Pull the thread so that arm “squeezes” into the body, knot to secure the shape.
Sew another arm with slip stitch.
If you think that the arms are not “sunken” enough, pass the needle to the other side, pull the thread to get the result you want, knot the thread securely.
 Provided you stuff you monkey very dense, sometime, you may find the monkey head is a little tall and pointy, this is normal due the shape of the adult sock. I found that kid’s and toddler’s sock do’t have this problem.
If you are happy with it, then it is OK. But, if you want to make the monkey head round like the one I made, the following step will be helpful.
 1. The original pointy head due the toe compartment of the sock.
2. Pinch the top of the head to judge how much you want to sew to make it rounder. Mark the space with erasable marker. Gradually decrease the width from center towards the front and the back.
3. Join both lines with slip stitch.
4. Here is it, a rounder head for the monkey.

[Update: August 15, 2014] I have just published an amigurumi pattern to crochet the twin brother of sock monkey, crochet amigurumi monkey, aren’t they look identical? credit: craftpassion.com