
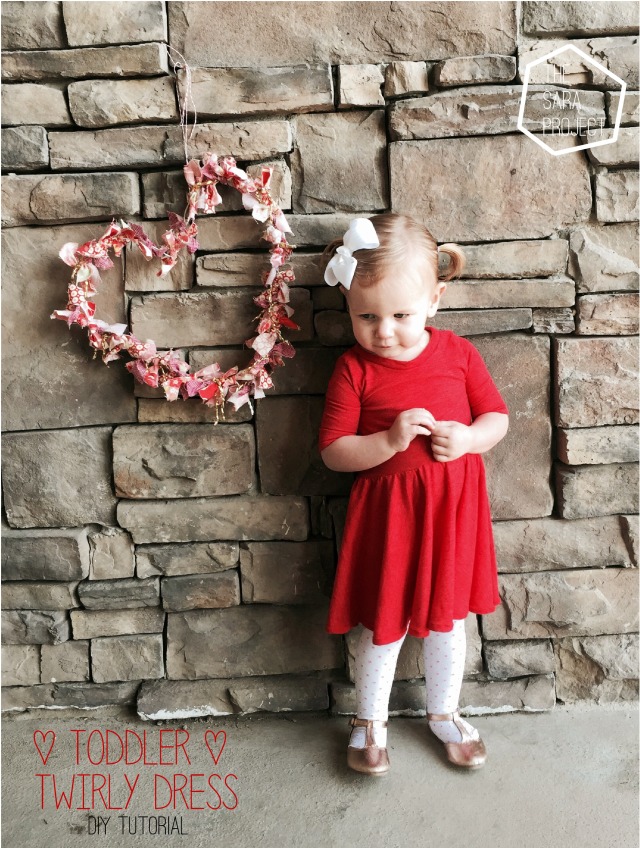

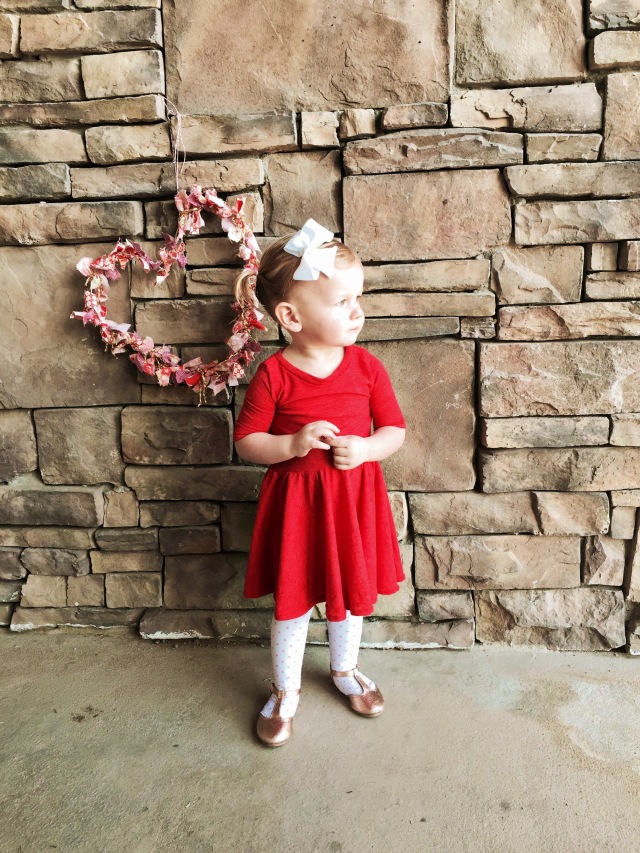
With Valentines Day approaching (one of my all time favorite holidays), I was inspired to make a cute little dress for my 18 month old little girl. I’ve seen some similar dresses in etsy shops and I thought I’d try to make one for myself. I put the whole dress together in an afternoon, it’s very simple. I made it using solid red Cotton Jersey Knit fabric that I found on sale at a local fabric shop, but this dress would also be so cute using a fun printed knit fabric. Check out Girl Charlee online for some great knit fabric options. Best of all, my daughter loves to wear it and twirl all around. It’s so comfortable for her to wear, and it’s so easy to slip on. I’m definitely planning on making some more!
What you need:
-I used about 3/4 of a yard of fabric, but this depends on the size you need. (Mine was for an 18 month old).
-matching thread
Let’s get started.
First of all, you need to create your pattern. For the top part of the dress, I used one of my daughters fitted t-shirts as template for the dress front and back pieces. I traced from about the waist area to the neckline with the shirt folded in half. Make sure to add a 1/2″ for your seam allowance.
Next you need to draw out your sleeve. See my image below for a good visual. Use your t-shirt as a guideline again for the top of the sleeve, and then add desired length.
Now we need a neckline facing. This is easy. Measure the length of neckline on your t-shirt. Mine measured about 8″ in the front and 7″ in the back. Add them together -1 1/2″ and draw a line on your pattern paper. So I drew a line that was 13 1/2″ long. Next draw the width of the neckling facing, depending on how thick you would like it to be. I wanted mine to be 1/2″ thick to I added 1 1/2″ width. It will look like a rectangle when your finished- see image below for my pattern piece.
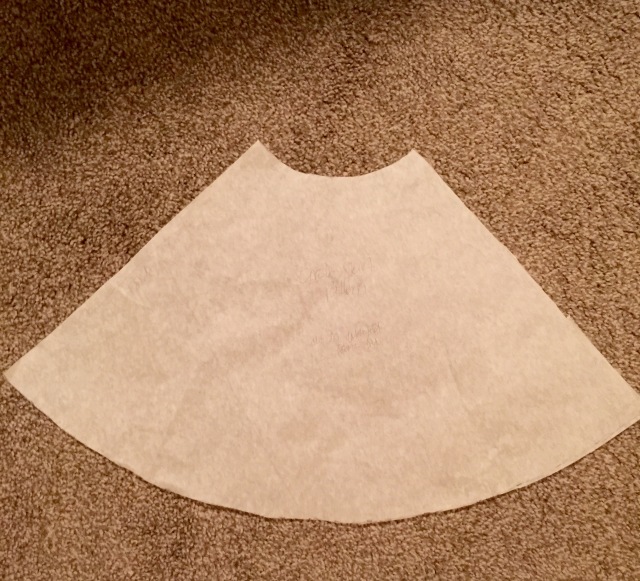
For the skirt part of the dress, we will need to create a circle skirt pattern. This is so easy. I used this tutorial, it’s very clear and my skirt turned out perfectly. Just follow her directions for drawing the pattern and cutting the skirt.
My pattern pieces look like this:
Neckline Facing, Sleeve, Dress Bodice Back. Dress Bodice Front:

Circle Skirt Pattern:
Let’s start putting this all together.
1. Cut out pattern pieces using desired fabric
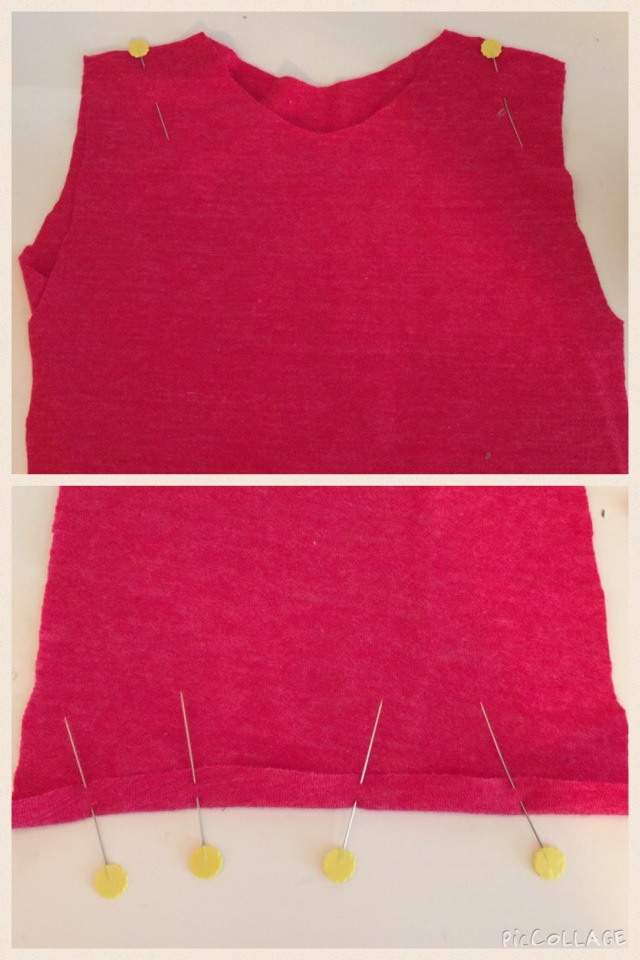
2. Line up Front and Back Dress bodice pieces RST and pin at shoulder seams, sew at 1/2″ using zig zag stitch if you don’t own a serger like me.
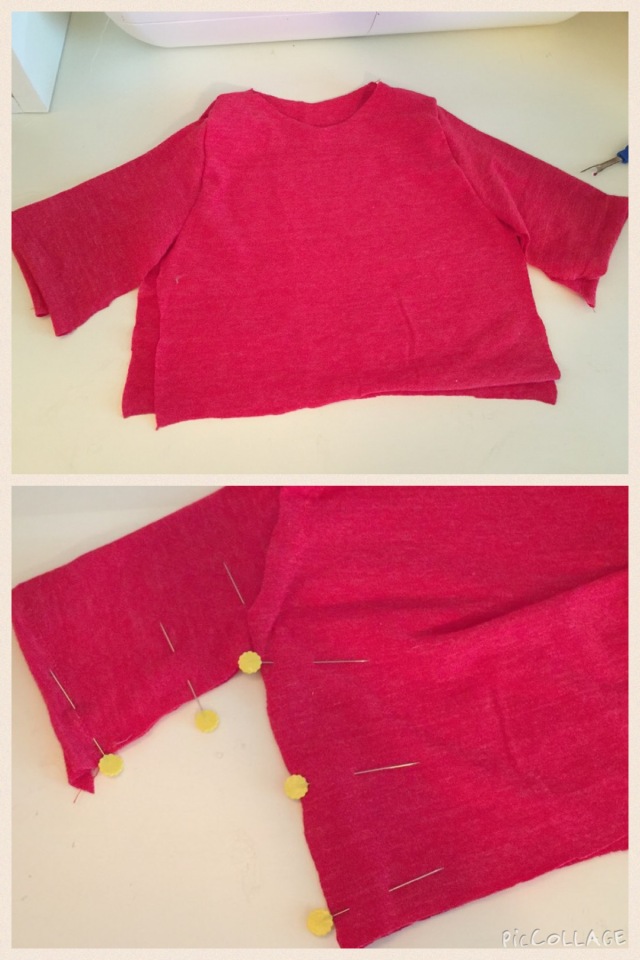
3. Hem your sleeves. I just folded the edge up about a 1/2″ and sewed right on the raw edge using a zig zag stitch.
4. Open up your bodice pieces and find to edges on the sleeve, see where my pins point this out below. Pin sleeve to Bodice Front & Back pieces RST, matching end points and centers. Sew.

5. Pin Bodice Front & Bodice Back RST from sleeve end to waistline. Sew at 1/2″ with zig zag stitch.
6. Now we need to sew the skirt to the bodice. First we need to prep our skirt to be gathered by ease stitching (using a wider stitch) sewing with a straight stitch at 1/2″ & 5/8″ around the waistline edge of the skirt. Make sure to leave your threads long enough for pulling.
7. Evenly pin your skirt to your bodice RST in about 4 places. Lightly tug on thread ends of ease stitching to gather the skirt, make sure to distribute gathers evenly until the bodice and skirt pieces match up. Pin and sew at 5/8″.
8. I recommend trying the dress on at this point. I had to adjust the neckline a little (make it wider) to properly fit my daughter. Make any needed adjustments at this point. Trim seam allowances.
9. Next, we need to sew in our neckline facing. Sew facing ends RST. Trim Seam allowance. Fold neckline facing piece in half WST. Iron flat. Pin RST to bodice neckline. (Make sure to line up neckline seam with the bodice center back). Sew at 1/2″ using a straight stitch. Trim Seam allowance, and iron flat.
10. Hem the bottom of your dress to desired length!
I know your little one will love wearing this dress as much as mine. This would be great for an adult dress too!! Hmm…
credit: thesaraproject.com
No comments:
Post a Comment