Monday, May 29, 2017

DIY Easy Kaftan Dress / Cover Up

DIY Easy Kaftan Dress


Shop Now: https://shop.al-borj.com
by: Mao
Copy rights: www.sparklybelly.com

DIY Kaftan Dress / Cover Up

Kaftan dresses are comfortable and  very feminine. They are perfect as summer dresses, and keeping one in your dance bag is a great idea because it can be used as a cover up before and after dance performance.

To make this simple kaftan dress / cover up, you need:

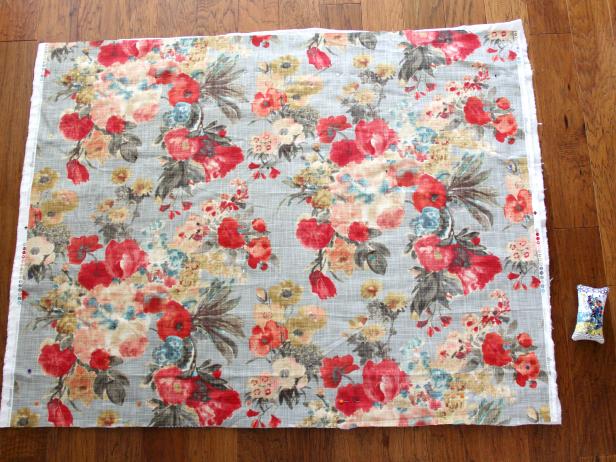
Lightweight, flowy fabric – It can be light knit, chiffon or anything that drapes nicely. You need about 3m (3.3yd) of this.
Sewing tools.

How to Make a Kaftan Dress / Cover Up:

First, stand in front of a mirror with your fabric. Fold the fabric wrong sides together, hold it up against your body and see how long you want your dress to be. Hold the fold, and lay the fabric on the floor, and cut the excess fabric.

Next, fold the fabric in half lengthwise, and mark the corner, which is the centre point on the fold. From there, measure and mark 15cm or 6in on either side of the centre point with pins.
Mark neck line for Kaftan dress
Unfold the fabric and cut along the fold to connect the 2 points.
Cut neckline for Caftan dress
At this point, try it on to make sure the head hole is large enough, and take it to your sewing machine and finish all raw edges by however way you like. I’m practicing using a hemmer foot, so that’s what I used. If you are patient, you can do a rolled hem all the way around, or you can do a zigzag stitch or if you have a serger, use your serger.

Back on the floor, fold it wrong sides together again, and measure about 40cm or 16in from the fold and from the side edge and mark the point with a pin. From there, measure 40cm or 16in down to the bottom, and make a line. Do the same for the other side.
Stitch Lines and Button Holes for DIY Kaftan Dress
Now all you need to do is sew down along the lines using a straight stitch.  ðŸ˜€

This is optional, but if you want to wear a belt or a tie around your waist area, mark the width of your belt at the top of the lines you just sewed, and we’ll make button holes there.

For the buttonholes, you can make them without a special foot. Simply decide how big you want the hole to be, and draw a line. Then, go around it with a narrow zigzag stitch with the stitch length very close to 0. Try not to sew over the line, just go around it. And simply cut along the line without ripping the stitches.
Button Hole for Caftan Dress DIY
If you want to make a matching tie, cut a long strip out of the leftover fabric. I used the whole width of the fabric, and made it about 5cm or 2in wide, and sewed a tube right sides together with a 5mm or 1/4in seam allowance. Turn the tube inside out, and stitch the ends shut.

Monday, May 22, 2017

How to Make Easy Roman Shades

Instead of reaching for pricey shades and curtains when updating a room, combine the two and create some sophisticated, easy-to-make Roman shades.


Shop Online Now: https:shop.al-borj.com
Article Courtesy: www.diynetwork.com


Step 1:


Cut Pattern and Fabric

Measure your window's height and width. Add 12" to the length and 4" to the width. This is the size you'll use to cut your fabric. Make sure that any design detail on the fabric is centered.

Step 2:

Hem the Sides

Hem the edges for a nice finished look. Start with the long sides, make a double-turn hem. Place the fabric pretty-side down, and make a 2" fold on one of the long sides. Measure and pin it so you know it's nice and straight, then iron the crease. Remove the pins and fold that fold in half so it’s only an inch wide. Pin and iron again, then sew over the hem with the sewing machine, about 1/8" in from the inner edge of the hem. Use the edge of your presser foot as a guide and remember to back stitch. Repeat the process on the other side.
Step 3:

Create Bottom Hem

The bottom hem is going to be super wide so that it gives the whole shade enough weight to hang straight. Fold it just like you did for the long sides, but this fold is going to be 4". Measure, pin and iron it flat, then fold the hem again using the 4" hem as a guide so you've got a 4" double hem. Pin and iron again.
Step 4:

Top Rod Pocket Hem

For the top hem, make a hollow pocket to slide the curtain rod through. With the pretty-side down, fold over fabric 2", pin and press, then fold it again another 2", press with the iron. Sew across the hemline. Again, use the presser foot as a guide. Backstitch at both ends of the seam to make it nice and sturdy.
Step 5:

Cut and Place Ribbon Ties

Choose ribbon that is at least 1" wide, in a color that complements the fabric. You need two pieces of ribbon, double the height of the window plus two feet. Fold the ribbon pieces in half and position them over the top of the rod pocket, with half the ribbon behind the panel and half in front, pretty-side out. Then space them evenly, about a quarter of the way in from each side, and make sure the ends are even.
Step 6:

Pin Ribbon Ties

Pin the ribbon in place, make sure the pins go all the way through to the ribbon on the other side. Sew them in place along the top seam.
Step 7:

Create Bows

Tie the ribbons at whatever length you want the shade to hang. We used double bows, but the ends can also be folded and tucked out of sight.


Tuesday, May 16, 2017

Our Story | Celebrating 30 years of Success | Al Borj Machinery LLC

Welcome To Al Borj

Al Borj was established back in 1987 being the pioneer and market leader in supplying machinery, equipment, spare parts, consumable and services to the apparel manufacturing industry in the GCC, Middle East and MENA region. Through continuous effort, hard work and motivation of Al-Borj team members and appreciation from our valued clients it has successfully completed its 30 years of excellence and still look forward to further new ventures and product lines.


Al Borj Machinery LLC
Copyright Al Borj Machinery LLC. 
All Rights Reserved

To BUY Our Machines Contact:
hassan@alborj.com
www.alborj.com
https://shop.al-borj.com

Buy Now: https://shop.al-borj.com | e: info@al-borj.com | t: +971 6 5333413

Shop Online Now | Organ Needles

#OrganNeedles The types of sewing machine needles have increased due to the diversification of sewing. We propose a wide variety of needle part shapes in order to meet the wide demand with the most suitable needle.

Buy Online Now: 
https://shop.al-borj.com/needles.html


#alborjmachineryllc #Needles #SewingMachine#Juki #Organ #GarmentFactory #Tailors #Fashion#Dubai #Sharjah #UAE #Nairobi #Jeddah#AddisAbaba #Amman

Sunday, May 14, 2017

How to Make a Rug From Upholstery Fabric


Looking for the perfect rug to match your couch or curtains? Learn how to turn home decor fabric into a fabulous area rug.


Shop Online Now: https:shop.al-borj.com
Article Courtesy: www.diynetwork.com


Step 1:


Position Layers of Fabric

Lay the no-slip rug pad on the floor. Press it flat to remove all creases. Lay the cotton batting on top of the rug pad, also pressing out any creases or folds. Then lay the fabric right-side up on top of those two layers, making sure it is nice and flat as well (Image 1). Cut off any excess around all four sides so that all three layers are the exact same size (Image 2).
Step 2:


Pin Layers Together

Pin the three layers in place in various spots around the rug (Image 1). Make sure the three layers stick together and do not shift. You should now have a nice large three-layer rectangle or square, pinned all around the edges and center (Image 2).

Step 3:

Cut Border Fabric

From the outer edge fabric, cut four 4" strips of fabric from selvage to selvage (width of fabric). You may need to cut more strips if your rug is larger than the width of your fabric and sew the strips together.
Step 4:


Fold Borders

Iron the strips as if you were making your own homemade bias tape. Fold each strip in half wrong-sides together, straight down the middle and iron to create a crease. Open up the fold and then fold in the outer edges 1/4" towards the wrong side and press flat (Image 1). Repeat for all four strips. Fold the strip in half again, enclosing the 1/4" edge folds in the center, and press (Image 2). Repeat for all four strips. Now you're ready to bind your rug.
Step 5:

Pin Border to Rug

Unfold one strip and place it right-side down (with the folds facing up) along the edge of one side of your rug. Keep the edge of your binding about 1-1/2" away from the edge of your rug, and pin along the 1/4" folded line. Do this for only ONE side of the rug.
Step 6:


Stitch Border to Rug

Sew the binding in place using a heavy-duty needle. Sew directly on the 1/4" fold line so you won't see the stitches when the binding is folded back over. Remove the pins as you sew (Image 1). Fold the binding over the raw edge of the rug, enclosing the side of the fabric. The center fold of the binding should be the outer edge of the rug. Pin in place. Sew directly on top of the binding to secure in place (Image 2). You can also hand sew the bottom binding in place with a whipstitch if you do not want to see a stitched line along the top.

Step 7:


Sew Adjacent Border

To work on the adjacent edge, place the binding along the edge as you did the first time, but allow a few inches to hang off of each end (Image 1). Fold the excess fabric over the corner towards the back of the rug and pin in place (Image 2). It should look something like this. Sew the binding onto the rug as you did for the previous sides (Image 3).

Step 8:

Finishing Steps

If your rug has some wrinkles in it, use an iron on a low-setting to carefully get them out. Just make sure to press gently, and not let the iron linger because you do not want to melt the no-slip rug pad underneath.