

Serger Stitches 101 Cheat Sheet: Never Ever Without It – Your New Must Have!
As you may know, one of the blogs where I actually usually guest post it’s SewMcCool, owned by the super Deanna: such an explosive etrepreneur, you maybe know her from Birdsong Design… consider that she wrote a book too! She is certainly someone to look at

Two months ago I wrote for her a pic-heavy tutorial about serger tensions that went really well… this is something you definitely would pin for later, believe me!
Today I’m taking back home my latest one. a cheat sheat about how to better use your serger, because it can do a lot more than only finishing seam allowances… so many stitches are available with any basic serger, like mine!
Today I’m taking back home my latest one. a cheat sheat about how to better use your serger, because it can do a lot more than only finishing seam allowances… so many stitches are available with any basic serger, like mine!
Just to complete the serger scenery, today I’d like to describe you all the other fun stitches I have on my serger (and chances are that you have the same stitches on your), just because you can use your serger for finishing seams (and it’s ok) but: a serger can do a lot of other fun things, other than a 4-threads or a 3-threads overlock.
When I was approaching my serger, I’ve searched the web for an infographic collecting all those fancy stitches in one place, but I wasn’t able to find it! What could I do? Create one all by myself!
I hope you’ll enjoy my Cheat Sheet you can (and should) pin it and bookmark it for future reference!
I’m giving you some guidelines for using your serger’s stitches; for each one I’m listing:
- needles and loopers tension numbers;
- if a stitch finger is required, and which one;
- if a two-thread convertor is needed;
- if you have to engage/disengage your knife;
- your overedge cutting width and stitch length.
Consider that numbers I give are the settings I use, maybe you need to adjust them, keep themjust for reference.
Like last time, I’ve threaded my serger using the same color code I have on my machine:
green (left needle)
yellow (right needle)
blue (upper looper)
violet (lower looper)
I hope this will help you identify which thread goes where, in every stitch!
I use a Necchi Lock 181, you are probably using a different brand/model: refer to your serger’s manual to see if your knobs/tools are different from mine and mark down any eventual difference.
Take your manual now, and search for:
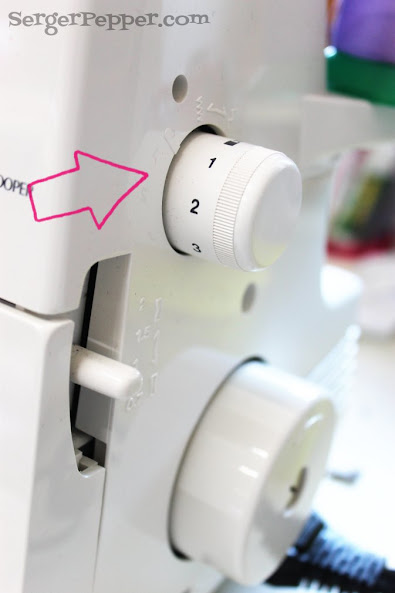
1. Overedge cutting width dial
In my serger it’s placed on the left side of the machine and goes from 4 to 7 mm.
Tip: if fabric’s edge curls while sewing, you need to make it smaller; if you see loops hanging off the edge, make it wider!
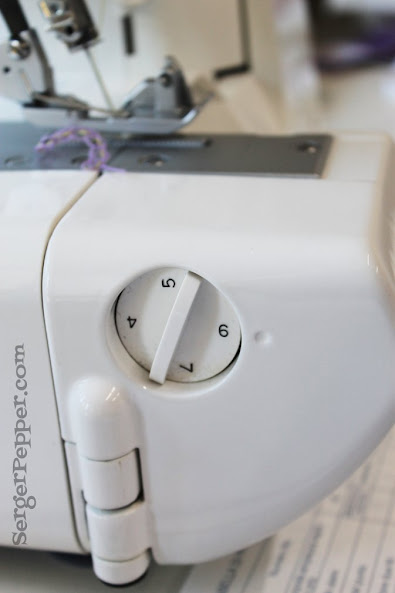
2. Stitch length knob
In my serger is placed on the opposite side of the machine, on the right, and goes from 1 to 5 (plus 2 special positions: P and R: we’ll see later when we can use them).
The higher the number (normally) the longer the stitch!
My thread tension dials goes from 0 (no tension) to 9 (stronger tension).
3. Stitch finger
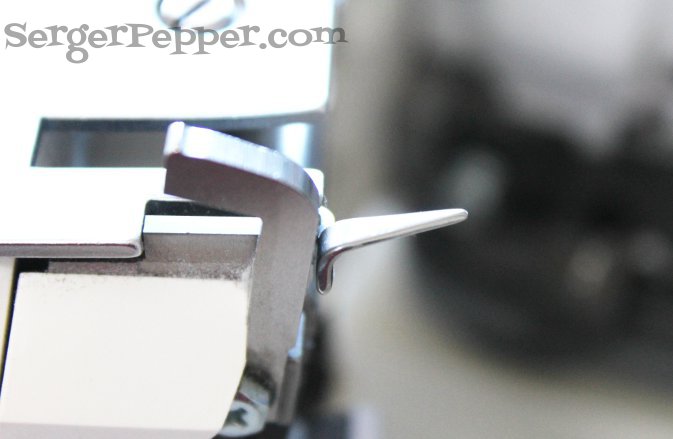
Your serger should have a thicker stitch finger on (A) but in most models you can change it to a smaller one (or none at all), depending on the stitch you’re planning to use and the material thickness.
As a rule of thumb, for georgette, chiffon and lightweight fabrics in general you could experience loops hanging off the edge while using a 2-thread or 3-thread (right needle) and using a medium-low cutting width. Change to the narrower stitch finger and your stitch will certainly be better (mine is B).

For a narrow hem, a rolled hem (2 or 3 threads) or a picot hem you can sew without any stitch finger on (or use the narrower – B).
Put away the stitch finger you’re not using in its case (mine goes side by side with the 2-thread converter), so you won’t lose it!

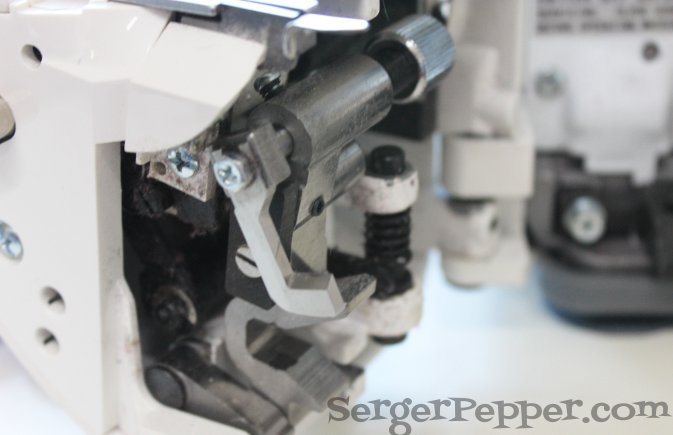
4. How-to convert to the 2-thread
In my serger I have a little gadget to add if I want to by-pass the upper looper.
This is useful for 2-threads overlock, 2-threads narrow hem and also for 3-thread super stretch stitch, because it is the only stitch that requires 2 needles plus 1 looper (the lower one).
Here’s where I have to place the gadget:

Here’s the gadget in place:

And this is the label, reminding how to place it, right inside the serger.
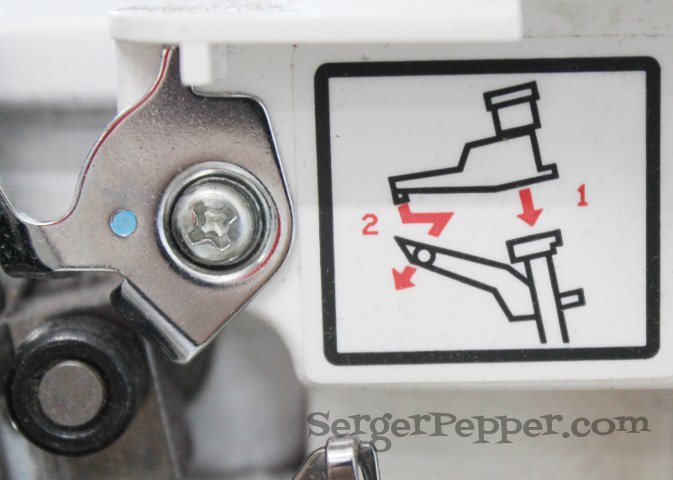
Check on your manual if you have something like this and how to convert your serger for sewing with only the lower looper.
5. Engage/disengage the blade

blade engaged
In some situations you’ll need to disengage the blade (i.e. when you need to sew a flatlock decorative stitch right in the middle of a garment): check your manual because I was pretty sure mine was hard to do and tricky, but I discovered that I only need to push the stud toward the bladeand turn it to put it out of the way and sew without cutting edges.
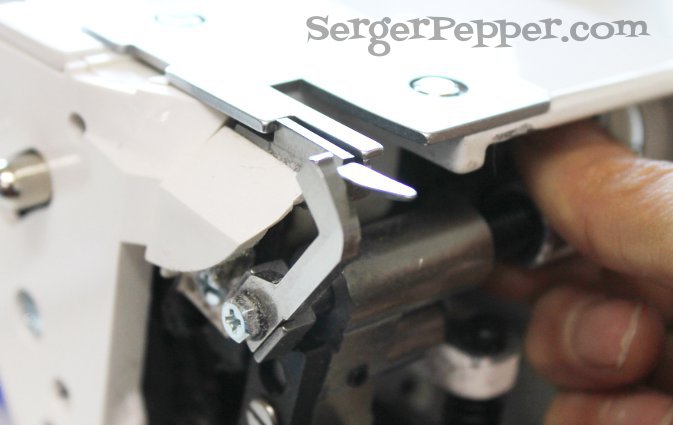
push & turn…
… blade disengaged!
Tip: When your blade is disengaged, pay attention to your seam allowances not to be wider than the overedge width you’ve selected (see point 1), or you can damage your needle and/or the upper looper!
Some general notes about settings:
– Different fabrics and threads can need tension adjustments.
– When you need to adjust tensions/overedge cutting dial and stitch length, usually a little fine tuning will give huge improvement to your stitch.
– Thicker thread needs less tension.
– If you experience skipping stitches, adjust tensions first.
– Always make sure your needle is inserted through and through.
– Always reposition everything as if you’re going to sew a 4-thread stitch at the end of the day, before closing your serger (needle, tensions, width and length), it’s easy to forget something!
I’ve sewn without my finger stitch for a while, before I noticed it!
– On serger stitches with one only needle, choose which one you’re going to use considering yourthread’s and fabric’s thickness: use the left one with thicker and the right one for lighter ones.
Three more little tips:
- when you are sewing without using one of the needles, remove it and completely close the screw, to be sure it’s not falling down inside the serger;
- in the same way, completely un-thread the unused thread and wind it on its spool;
- LAST, BUT NOT LEAST: tweezers are your best friends!
Now, let’s master all those funny stitches.
Please pin this infographic, share it if you like it
No comments:
Post a Comment