
TUTORIAL: a simple skirt | Al Borj
With spring and summer upon us, it’s time for skirts! And making cotton skirts for girls (or yourself) is so very simple.
 The concept is nothing new. We’re making a simple gathered skirt, with an elastic waistband.
And we have a fantastic MADE Everyday episode if you’d like to see the process in-action!
Just hit the Play button below [or continue reading after the video for the standard tutorial]:
 The concept is nothing new. We’re making a simple gathered skirt, with an elastic waistband.
And we have a fantastic MADE Everyday episode if you’d like to see the process in-action!
Just hit the Play button below [or continue reading after the video for the standard tutorial]:
If you’ve made a gathered skirt before then you know how easy it is. And if you’ve never made one before but have always wanted to….this one’s for you!
It’s…….


 It’s lightweight and bouncy.
Perfect for playtime,
 for sharing ice cream,
 and sharing secrets.
 It’s a skirt that’s just, you.

 Make it a single or double layer. Bind it with bias tape or leave it plain.

 Make it as detailed or as simple as you’d like.

 Ready to sew?
Let’s get started!
It’s…….


 It’s lightweight and bouncy.
Perfect for playtime,
 for sharing ice cream,
 and sharing secrets.
 It’s a skirt that’s just, you.
 Make it a single or double layer. Bind it with bias tape or leave it plain.
 Make it as detailed or as simple as you’d like.
 Ready to sew?
Let’s get started!
FABRIC:
* Fabrics to use
- lightweight cottons (such as broadcloth, batiste, chambray, seersucker, voile)
- lightweight knits (such as jersey. Interlock is a bit heavy for a double-layered skirt)
- lightweight cotton/poly blends (the mint green fabric below is a blend)
* Fabric amount – about 1/2 yard to 1 yard of fabric (depending on size and whether you’re making a single or double layer)
* Fabric care - always wash and dry your fabric ahead of time to pre-shrink it. You may also consider washing and drying your elastic as well. I notice that it tends to shrink a bit the first time I wash a finished skirt or pair of Kid Pants.
 Fabrics in the photo above:
Party Dot Fabric – 100% Cotton from Hobby Lobby (not sure what the official name is)
Mint Green Flower Fabric – Cotton Poly from Walmart, $2/yard (very lightweight but doesn’t feel as nice as 100% cotton)
Golden Rod Floral Fabric – Cotton Poly from Walmart, $2/yard (very lightweight but doesn’t feel as nice as 100% cotton)
Dark Chambray - 100% Cotton, lightweight from Hobby Lobby
———————————————————
The diagram below shows what your pattern piece looks like.
Simple right?
One big rectangle. That’s it!
 Let’s define it a bit more.
And please NOTE: The skirt does not need to be cut as one entire piece. If you have smaller bits of fabric, you can cut the skirt into two rectangles and sew two side-seams instead of one. Easy!
Okay….
Simple right?
One big rectangle. That’s it!
 Let’s define it a bit more.
And please NOTE: The skirt does not need to be cut as one entire piece. If you have smaller bits of fabric, you can cut the skirt into two rectangles and sew two side-seams instead of one. Easy!
Okay….
* Skirt Width: Measure around the entire waist and then double it. This is your skirt width. You can also multiply by 1.5 (instead of 2) for a less-full skirt, but I find that a 1:2 ratio is good for gathered skirts–it makes them full and bouncy.
* Skirt Length: Measure from the waist down to where you’d like the skirt to end (usually right above the knee for little girls). Then add 1 1/2 inches to the length, to compensate for the folded over waistband and a very small hem.
NOTE: If you plan to use 2-inch wide elastic in the waistband or prefer a wider hem at the bottom of the skirt, you’ll need to add more length.
NOTE: If you plan to use 2-inch wide elastic in the waistband or prefer a wider hem at the bottom of the skirt, you’ll need to add more length.
* Skirt Length for the Double Layer: Take the original skirt length and subtract approximately 3 inches. For older girls or adults, you may want to subtract 4 inches or more so the pieces are more proportionate with each other. For babies, subtract only 2 inches.
For a 3T-4T size, use the following measurements:
* Skirt Width – 42 inches
* Skirt Length – 15 inches
* Skirt Length for Double Layer – 12 inches
* Elastic Length – 22 inches
NOTE: these measurements were used for my skinny 5-year-old daughter, who has a 21-inch waist size.
* Skirt Width – 42 inches
* Skirt Length – 15 inches
* Skirt Length for Double Layer – 12 inches
* Elastic Length – 22 inches
NOTE: these measurements were used for my skinny 5-year-old daughter, who has a 21-inch waist size.
If your fabric allows, you may want to incorporate the selvage as part of your hem. Often the selvage (the finished edge of the fabric) is printed with the fabric designer’s name and color codes and thus not usable. But when you find a beautiful, plain selvage like this one you can use it as the bottom of your skirt and it makes the process even easier!
 Okay, let’s start with a single-layer skirt….the simplest skirt you’ll ever sew.
My cut fabric measures 42×15 inches:
 With right sides together, fold the rectangle in half to create a side seam. If you have a small side tag, place it in there, a few inches from the bottom (info about my woven labels HERE).
 (note: the bottom of my fabric above is serged. Sometimes I do that as my first step–I serge the top and bottom of my fabric, prepping it for the waistband and hem–but in the tutorial we’ll do this later on. Just didn’t want you to think you missed a step.)
Okay, pin it all the way down the side and it looks like this:
 Sew down the side seam, using a 1/4 inch seam allowance (or whatever width you’d like! It really doesn’t matter).
 Serge off your seam, do a zigzag stitch to keep the edges from fraying, or just leave the seam edges raw. NOTE: If you sew with a serger, you can serge the seam instead of sewing with your machine and then serging. For tutorial purposes and to allow more room for correcting my errors, I always sew first and then serge.
Then iron out your seam. Always iron your seams. This is key to making your creations look professional, rather than homemade.
 Now serge around the top of your skirt and serge around the bottom to finish off the raw edges. If you don’t have a serger, iron each raw edge under 1/4 of an inch.
 Select and cut your elastic. For these skirts (and elastic waistband Kid Pants) I prefer 1-inch-wide elastic (braid or knit).
The length of the elastic should be the length all the way around the waist plus one inch for overlaying the ends as you sew them together. For my daughter’s 21 inch size waist, I cut the elastic 22 inches long.
 Create a waistband at the top of the skirt by folding the fabric over and ironing it down. Use your elastic to gauge how wide it should be. I give myself about 1/4 inch of space on each side of the elastic
 Pin the waistband in place. Use pins to mark a 2-inch wide opening for the elastic to come in and out.
 Sew the waistband in place! Begin sewing at the starting point and sew all the way around to the stopping point.
 For fun, I like to sew a top-stitch at the top of my waistband, about 1/8 inch in from the edge. It’s subtle but makes the waistband stand up a bit more. Sew all the way around (you don’t need to leave an opening on this)
 String your elastic through the waistband. Attach a safety pin or bodkin to the front end of the elastic and pin the other end of the elastic to the skirt opening, to keep the elastic from disappearing inside the casing.
 Push the elastic all the way through the casing till it comes out the other side. Look how cute and gathered the waistband is! Yay!…you’re almost done.
 Overlap the elastic ends by an inch and sew them together. I sew two zigzag lines to make sure it’s nice and secure. Make sure the elastic isn’t twisted anywhere inside the casing before sewing!
 If your elastic ends up being too short or too long, no worries! We can easily fix it…..
* If the skirt is too big, cut the elastic, cut out a small bit of the elastic–about 1 inch– and resew the ends together.
* If the skirt is too small, cut the elastic, and sew in another small piece of elastic, adding more length to your waist.
Sew the waistband closed. Pull the fabric with your left hand, so it’s taut and then sew it closed.
 Hem the skirt--final step! I prefer a very small hem on these skirts so they’re light and airy, perfect for summer. Iron the hem under about 1/2 inch around the bottom of the skirt.
 Sew the hem in place–about 1/4 inch from the edge.
 For added touch, sew a second line 1/8 inch over from the first one.
 Sew a label on the back of the waistband (info about my woven labels HERE).
 And……you’re done!
One very simple skirt with tons of personality.
 and a cute little hem.

 Ready for more?
Let’s make a Double-Layered skirt.
 Now serge around the top of your skirt and serge around the bottom to finish off the raw edges. If you don’t have a serger, iron each raw edge under 1/4 of an inch.
 Select and cut your elastic. For these skirts (and elastic waistband Kid Pants) I prefer 1-inch-wide elastic (braid or knit).
 The length of the elastic should be the length all the way around the waist plus one inch for overlaying the ends as you sew them together. For my daughter’s 21 inch size waist, I cut the elastic 22 inches long.
 Create a waistband at the top of the skirt by folding the fabric over and ironing it down. Use your elastic to gauge how wide it should be. I give myself about 1/4 inch of space on each side of the elastic
 Pin the waistband in place. Use pins to mark a 2-inch wide opening for the elastic to come in and out.
 Sew the waistband in place! Begin sewing at the starting point and sew all the way around to the stopping point.
 For fun, I like to sew a top-stitch at the top of my waistband, about 1/8 inch in from the edge. It’s subtle but makes the waistband stand up a bit more. Sew all the way around (you don’t need to leave an opening on this)
 String your elastic through the waistband. Attach a safety pin or bodkin to the front end of the elastic and pin the other end of the elastic to the skirt opening, to keep the elastic from disappearing inside the casing.
 Push the elastic all the way through the casing till it comes out the other side. Look how cute and gathered the waistband is! Yay!…you’re almost done.
 Overlap the elastic ends by an inch and sew them together. I sew two zigzag lines to make sure it’s nice and secure. Make sure the elastic isn’t twisted anywhere inside the casing before sewing!
 If your elastic ends up being too short or too long, no worries! We can easily fix it…..
* If the skirt is too big, cut the elastic, cut out a small bit of the elastic–about 1 inch– and resew the ends together.
* If the skirt is too small, cut the elastic, and sew in another small piece of elastic, adding more length to your waist.
Sew the waistband closed. Pull the fabric with your left hand, so it’s taut and then sew it closed.
 Hem the skirt--final step! I prefer a very small hem on these skirts so they’re light and airy, perfect for summer. Iron the hem under about 1/2 inch around the bottom of the skirt.
 Sew the hem in place–about 1/4 inch from the edge.
 For added touch, sew a second line 1/8 inch over from the first one.
 Sew a label on the back of the waistband (info about my woven labels HERE).
 And……you’re done!
One very simple skirt with tons of personality.
 and a cute little hem.
 Ready for more?
Let’s make a Double-Layered skirt.
There are fancier ways to make multi-layered skirts–with a separate sewn-on waistband–which is outlined in the Market Skirt Tutorial. But the key here is to keep it simple! So that’s what we’re doing.
I’ll show you two methods for making a double-layered skirt:
Method #1 is the easiest when using lightweight fabrics.
Method #2 is also easy and reduces some bulk around the waistband.
———————————————————–
METHOD #1:
Method #1 is the easiest when using lightweight fabrics.
Method #2 is also easy and reduces some bulk around the waistband.
———————————————————–
METHOD #1:
Using the measurements from the diagram at the top of the tutorial, cut out the two fabric layers. The only difference between the layers is that one is three inches shorter than the other.

Each layer is going to be sewn separately and then joined at the top waistband.
So, following the steps above for the single layer skirt, sew down the side seam of each skirt (add a side label in the seam of the longer layer).
 If you’re going to use a standard hem on each layer, it’s best to hem the top layer now–it’s much easier to do when the layers are separated than when sewn together. Serge the raw edge, iron it under and sew the hem in place. However, I don’t hem the bottom layer until the end to make sure it’s the exact length I want.
If you’re going to add bias tape to the hems, skip this part and continue on!
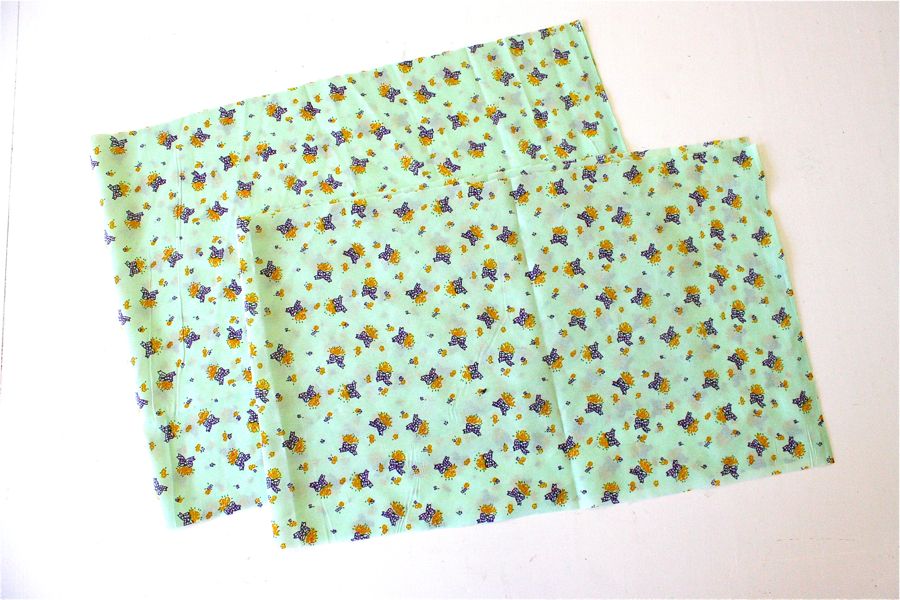
 You should have two sewn layers that look like this:
 Stuff the longer layer inside the shorter layer and match them up at the top of the skirt.
 Pin the two layers together around the top of the skirt.
 Serge or baste the two layers together, all the way around the top of the skirt. Basting is a loose, temporary stitch to hold the layers in place until the official waistband is sewn.
 Cut your elastic and use it to gauge how wide your waistband will be. Fold over, iron, and sewn your waistband in place, leaving an opening for the elastic to go in and out. String the elastic through, sew the ends together, and sew the casing closed.
 You’re almost done!
For a splash of color, let’s add bias tape to the hem of each layer.
You can use store-bought bias tape or make your own using my simple tutorial HERE (the tutorial also provides detail info about Bias Tape in general)
 Just sandwich the tape on there, sew the ends together, and sew it onto the skirt.
 Voila! A bouncy double-layered skirt!

 ———————————————————–
METHOD #2:
If your waistband feels bulky from all those folded layers of fabric, here’s a little trick for you…..
Create the waistband casing between the two layers of fabric!
Each layer is going to be sewn separately and then joined at the top waistband.
So, following the steps above for the single layer skirt, sew down the side seam of each skirt (add a side label in the seam of the longer layer).
 If you’re going to use a standard hem on each layer, it’s best to hem the top layer now–it’s much easier to do when the layers are separated than when sewn together. Serge the raw edge, iron it under and sew the hem in place. However, I don’t hem the bottom layer until the end to make sure it’s the exact length I want.
If you’re going to add bias tape to the hems, skip this part and continue on!
 You should have two sewn layers that look like this:
 Stuff the longer layer inside the shorter layer and match them up at the top of the skirt.
 Pin the two layers together around the top of the skirt.
 Serge or baste the two layers together, all the way around the top of the skirt. Basting is a loose, temporary stitch to hold the layers in place until the official waistband is sewn.
 Cut your elastic and use it to gauge how wide your waistband will be. Fold over, iron, and sewn your waistband in place, leaving an opening for the elastic to go in and out. String the elastic through, sew the ends together, and sew the casing closed.
 You’re almost done!
For a splash of color, let’s add bias tape to the hem of each layer.
You can use store-bought bias tape or make your own using my simple tutorial HERE (the tutorial also provides detail info about Bias Tape in general)
 Just sandwich the tape on there, sew the ends together, and sew it onto the skirt.
 Voila! A bouncy double-layered skirt!
 ———————————————————–
METHOD #2:
If your waistband feels bulky from all those folded layers of fabric, here’s a little trick for you…..
Create the waistband casing between the two layers of fabric!
First, cut both fabric layers about an inch shorter than in Method #1 (since you’re not folding over a wide waistband).
Now I know your thought might be to sew the two layers with right sides together and then flip them over to create a nice seam at the top of the skirt. I thought so too, but it doesn’t work. One of the layers ends up on the “wrong” side of the fabric…..and if you try sewing them with right sides together, the side seam shows up on top of the skirt. I know that sounds confusing. But try it out and it’ll make sense.
So…..just as you did in Method #1, sew the layers as separate skirts and then attach them together at the top with a serger or by basting.
Next, you’re going to fold the top under about 1/4 inch, iron, and sew it in place. This is just to finish off the top of the skirt. Another idea–instead of folding over–is to bind the top of the skirt with bias tape. Then we’ll sew a casing inside the skirt. Use your elastic to gauge how wide the casing needs to be. Make sure you leave an opening for the elastic to come in and out.
 Then sew a casing line right on the outside of the skirt–sewing the two skirt layers together. I use the edge of my throat plate (the silver/metal plate under your presser foot) to guide me in a straight line. In the photo below, the edge of the skirt is lined up with the plate, which puts the presser foot about 1 1/4 inches over from the edge.
 When you’re done, it looks like this:
 Now, insert the elastic between the two skirt layers and into the opening hole.
 String the elastic all the way through, sew the ends together, and the sew the opening closed.
 And you’re done!
It looks slightly different on the inside and reduces the bulky layers.
 But it’s the same old skirt on the outside!
 ————————————————-
More variations on the double-layer….
* 2-inch wide elastic to make a wide waistband:
 (NOTE: make sure you add extra inches when cutting out your fabric to accommodate a wider waistband).
 Then we’ll sew a casing inside the skirt. Use your elastic to gauge how wide the casing needs to be. Make sure you leave an opening for the elastic to come in and out.
 Then sew a casing line right on the outside of the skirt–sewing the two skirt layers together. I use the edge of my throat plate (the silver/metal plate under your presser foot) to guide me in a straight line. In the photo below, the edge of the skirt is lined up with the plate, which puts the presser foot about 1 1/4 inches over from the edge.
 When you’re done, it looks like this:
 Now, insert the elastic between the two skirt layers and into the opening hole.
 String the elastic all the way through, sew the ends together, and the sew the opening closed.
 And you’re done!
It looks slightly different on the inside and reduces the bulky layers.
 But it’s the same old skirt on the outside!
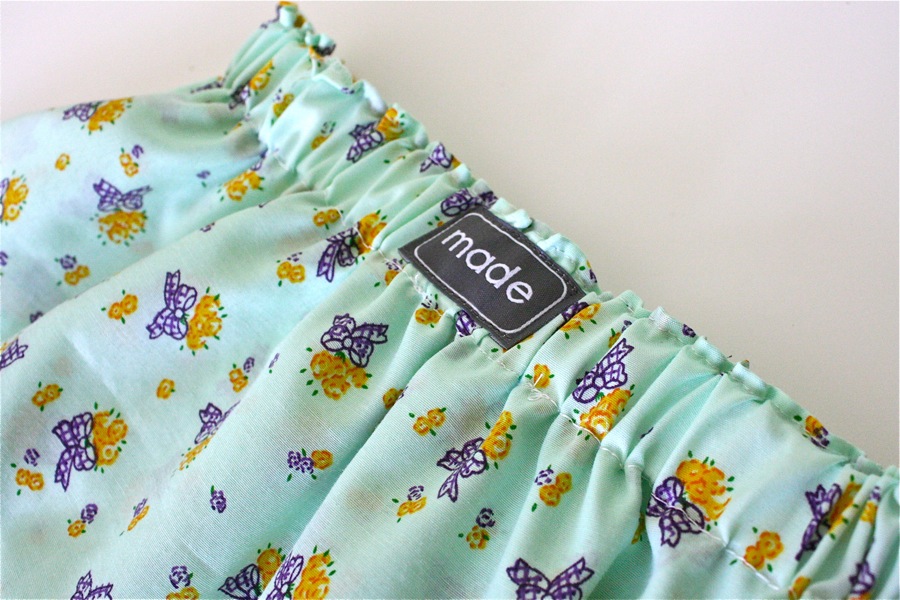 ————————————————-
More variations on the double-layer….
* 2-inch wide elastic to make a wide waistband:
 (NOTE: make sure you add extra inches when cutting out your fabric to accommodate a wider waistband).
Purple skirt blogged about HERE:

 * Two different fabrics for the layers:

 * Hems sewn inside out, with the serged edge ironed to the oustide of the skirt. Gives a subtle pop to the bottom of the skirt:

 Hooray for summer!


 * Two different fabrics for the layers:
 * Hems sewn inside out, with the serged edge ironed to the oustide of the skirt. Gives a subtle pop to the bottom of the skirt:
 Hooray for summer!

No comments:
Post a Comment