Showing posts with label #alboj #sewingmachine #stitching #fashion #industrial #irons #samjin #soloplate #lightweight #tailors #fashion #boutique #gaments #uniforms. Show all posts

Tuesday, April 11, 2017

Make your own abaya

One big advantage of making your own clothes is that you can use better and more healthy materials as the synthetic ones so often used for abayas nowadays. If your surroundings are not very hot, you can get away with a good cotton, or even better, a nice linen. Linen is ideal, it can retain far more moisture as cotton, therefore it will be feeling cool. In a really hot environment a light silk would be the best choice. Silk is usually very expensive, but that is a market mechanism. To buy in bulk, a decent silk doesn’t cost much more as a good cotton. So do shop around! Because of it’s luxury reputation, the shops put a much larger margin on it, making it more expensive. It might also be a good idea to buy a cheaper undyed material, and dye it in the color of your choice. With delicate materials it is best to try a small piece first. Dupioni silk is usually fairly cheap, but it looks a bit stiff. I do like the rough texture though, and you can get it in all sorts of colors, and in pretty changeant weaves too.


Article & Copy Rights: 
by thuriayaa
http://sewing4rlife.blogspot.ae
BUY Sewing/Embroidery machines / Software's from http://shop.al-borj.com
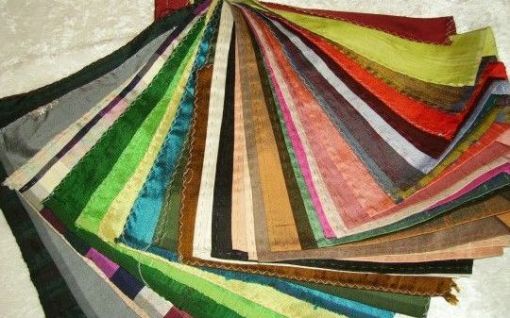
dupion-silk1

Fastenings:
You can use snaps, hooks, zippers, buttons or velcro, it is your own choice. Velcro may sound easy, but has spelled doom for many a pretty delicate shayla. I think the easiest option is buttons, and, instead of making the quite complicated buttonholes, make a loop, use a bit of nice ribbon, or cord. If you use a different color it will be a decorative feature.

Measurements of the patterns:
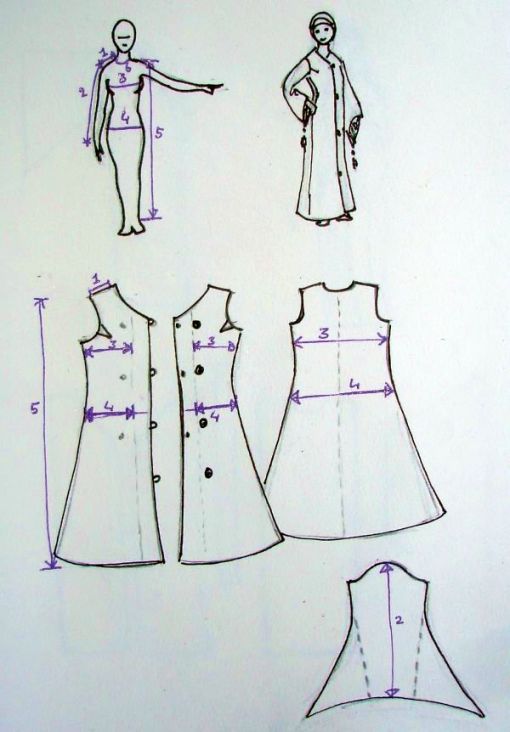
I can’t give exact measurements on these designs, you have to find out your own measurements. The measurements you need are in the drawing underneath. Instead of experimenting on some beautiful material, I suggest you buy some very cheap cloth, like an unbleached cotton, and stitch it loosely, or even just pin it together, try it on and make changes as you like. Once your try-out is to your liking, you unpin or pick out the stitching, and you can then use the pieces of material for your own perfectly fitting pattern.
If your pattern is precisely cut on your finished dress/abaya, make sure you allow an extra 1,5 cm for stitching and edging the material. I would not line an abaya, because you use it over your clothes in mostly hot countries, so to add even extra material would be even more suffocating. If you add a lining for effect you could choose to only line the bottom of your abaya or sleeves.
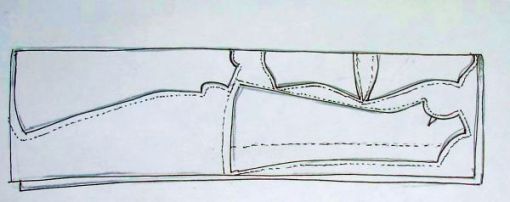
abayamaking

Above you see an example on how you could lay out the pattern on your material. lay out your pieces, and move them around until you have them placed as economically as possible. Note down how much material you need, handy to know, especially if you plan on buying an expensive material next time. Most cloth comes at a width of 1.50 meter. Some more exclusive materials are only 1,20 wide. In that case you can’t slip in the sleeves at the sides, and you need 2× your length, #5. And 1× your sleeve length, #2.
abayamaking1

These are the measurements you need, work them out for yourself, and make a trial-abaya which you can unpick, or cut up, and use as your personal pattern. Draw the pattern on your real material with special tailor chalk. The sleeve on pattern #1 is a wide sleeve, but if you draw the line to the seam you get a fitted sleeve. This also shows how you can make variations, once you have a good pattern. I only use basic patterns myself, and chance them when drawing them with chalk on the material for the design of a specific garment I’m making.
Pattern #1 and #2 have an overlapping front. You can easily adapt #1 so it won’t overlap. If you use an overlapping front, you nee to put in at least two extra buttons or snaps on the inside, to keep the bottom layer of cloth from sagging down. On pattern #1 you can see three light doth which are sugestions for the inside buttons or snaps.

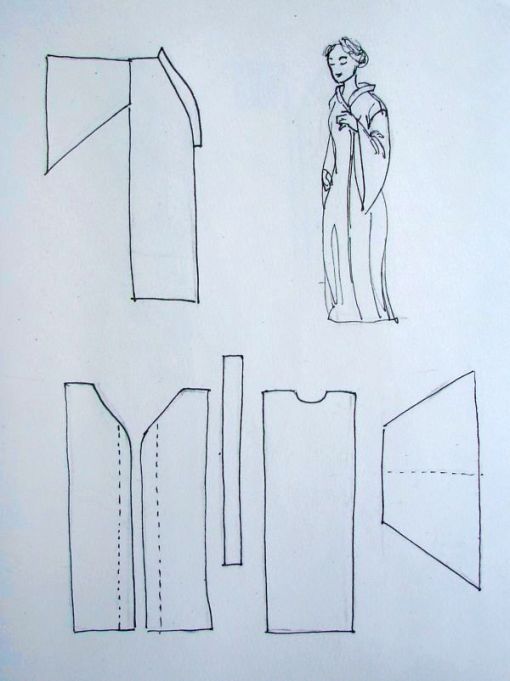
This second pattern is really a Japanese kimono. This is a véry simple pattern and should be well in reach of everybody who would like to try and make something. Simple forms are also a nice canvas for your own decorations.
abayamaking2

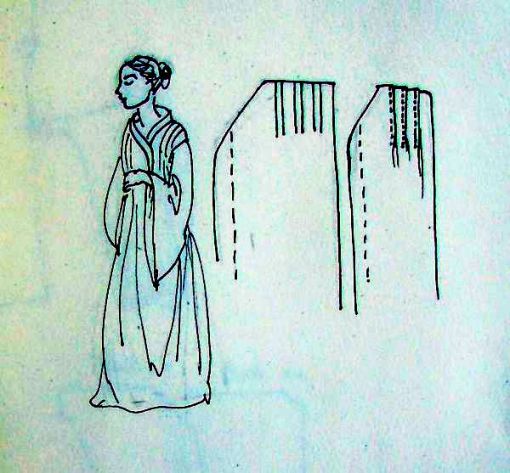
With the kimono pattern, you don’t have to be careful with the shoulder seam, it’s supposed to slip from the shoulder a bit. You can make a much wider kimono, by cutting the front and back-panels for a much wider shoulder, and then create three folds which you stitch for about 25cm.
abayamaking3

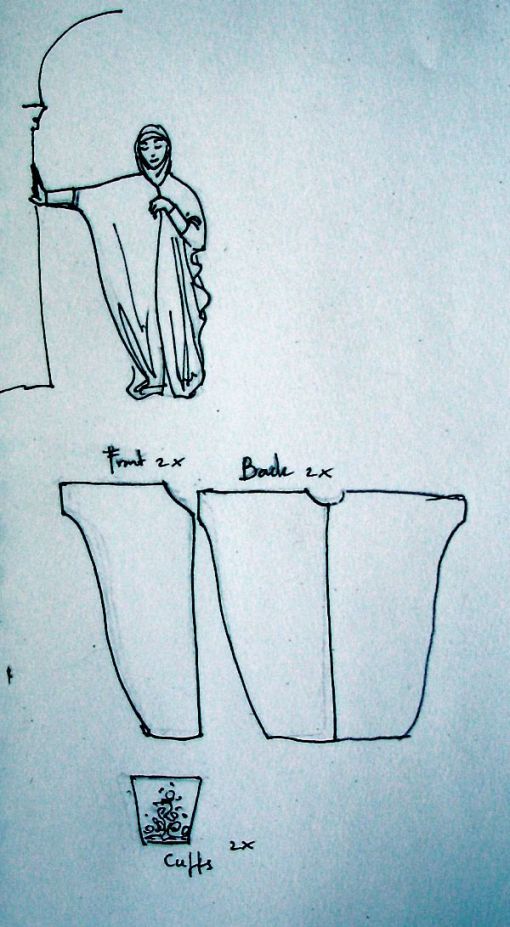
Pattern #3 is a very simple basic traditional butterfly design. Not handy in daily life, but very pretty. You can decorate the sleeve cuffs, or even make them of a different material. Like a Chinese brocade.
Once you have tried making one of these, experiment with different cuts, or try your hand at adding some nice decorations. In part 2 I will give some ideas for decorating your abaya. (or anything else)
abayamaking4

Monday, April 10, 2017

How to Make Headbands Out of Shirts

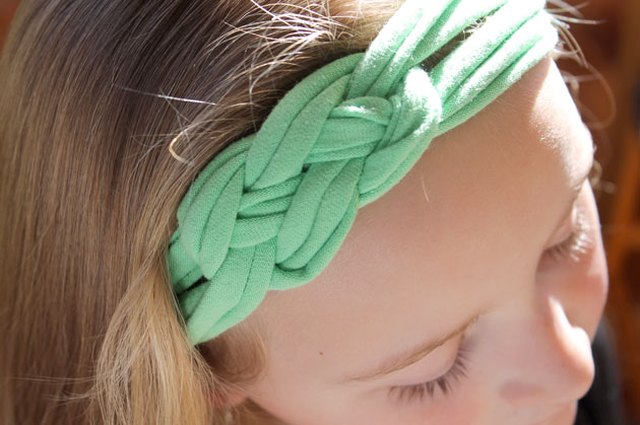
Celtic knots represent infinity and eternity because they don't contain beginnings or ends. In ancient times, if a gift was adorned with a Celtic knot, it was thought to give the recipient longevity or good luck in new adventures. This no-sew headband is made with a Shannon knot, which symbolizes balanced creativity, a fitting emblem because it makes creative use of old T-shirts. You have to see how easy this is! Watch the video below.

To Buy Sewing Machines follow the link: https://shop.al-borj.com Source & Copy Rights: By Beth Huntington (eHow)
Celtic knot headband (Images: Beth Huntington)


Celtic knot headband


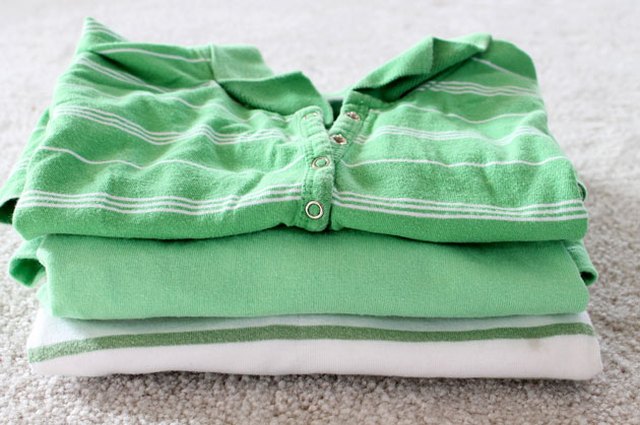
Choose a large T-shirt in your desired color.
Choose a large T-shirt in your desired color. (Image: Beth Huntington)


Step 1

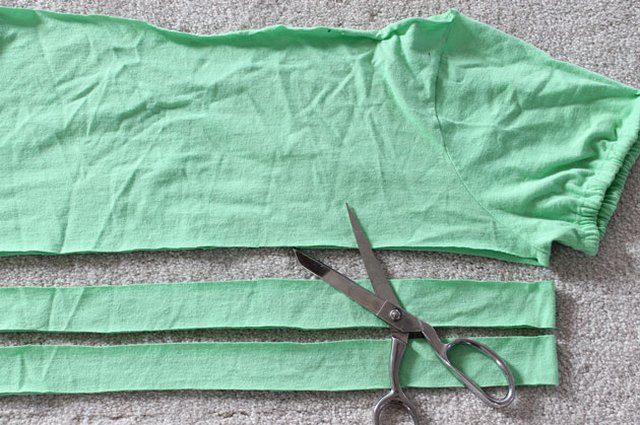
Use sharp scissors to cut two 1 1/2-inch wide strips across both layers of the T-shirt. Do not use the hemmed bottom edge of the shirt. Each strip will have two layers.
Cut two strips from the T-shirt.
Cut two strips from the T-shirt. (Image: Beth Huntington)

Step 2

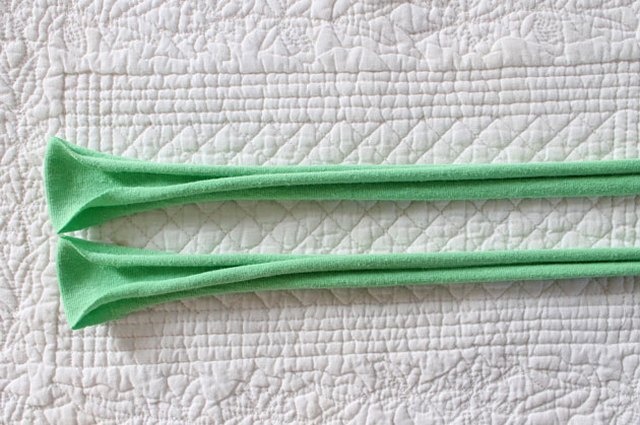
Stretch the strips. Do not unfold the two layers. Grab each end and pull tightly until the strip rolls into itself.
Pull the strips tightly.
Pull the strips tightly. (Image: Beth Huntington)

Step 3

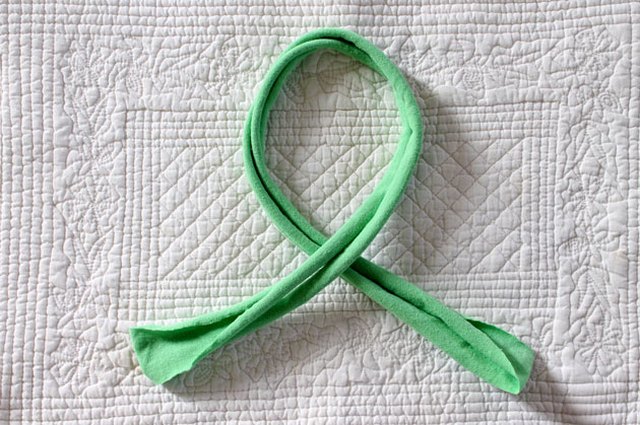
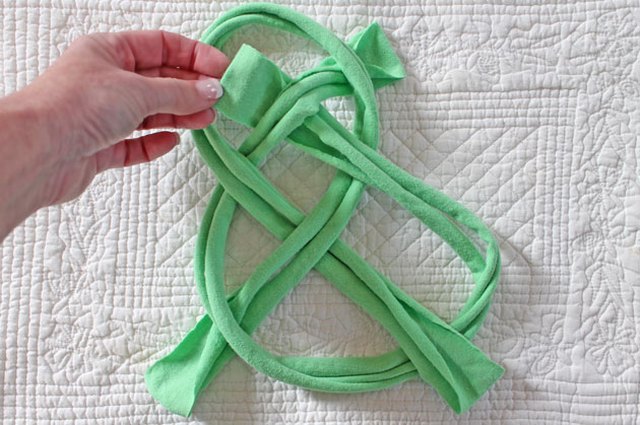
Create a loop with one of the strips by crossing the right side over the left side. Keep the loop at the top.
Create a loop.
Create a loop. (Image: Beth Huntington)

Step 4

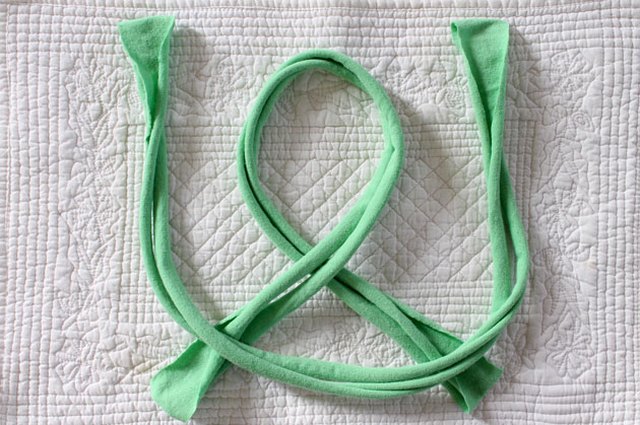
Lay the second strip in a U-shape on top of the first strip. Place the ends at the top.
Add the second strip.
Add the second strip. (Image: Beth Huntington)

Step 5

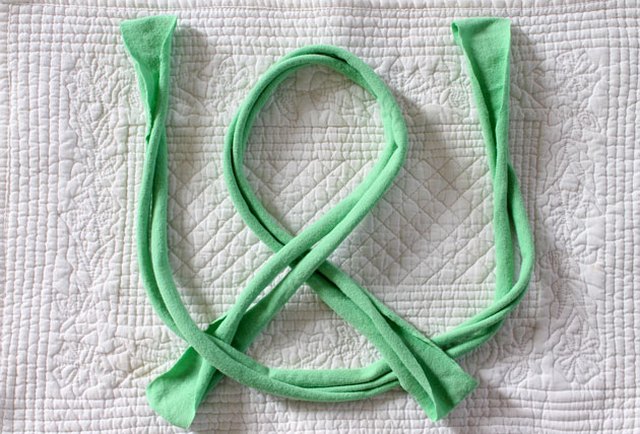
Place the right side of the top piece under the right side of the bottom piece.
Weave the right side of the top piece under the bottom piece.
Weave the right side of the top piece under the bottom piece. (Image: Beth Huntington)

Step 6

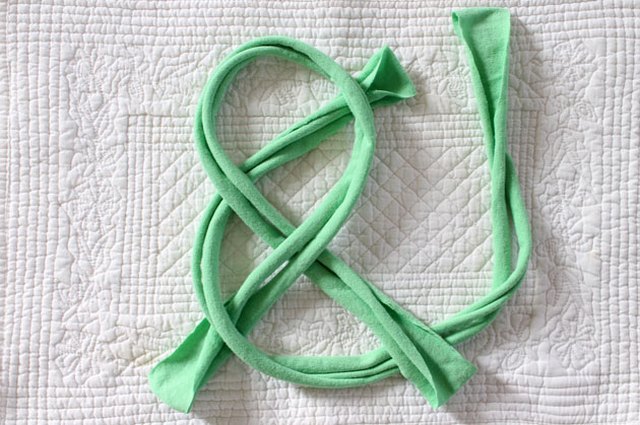
Place the left side of the top piece under the loop of the bottom piece.
Weave the left side of the top piece under the bottom loop.
Weave the left side of the top piece under the bottom loop. (Image: Beth Huntington)

Step 7

Place the right side of the top piece over the loop of the bottom piece, passing under the left side of the top piece and then over the other side of the loop.
Pull the right side of the top piece through.
Pull the right side of the top piece through. (Image: Beth Huntington)

Step 8


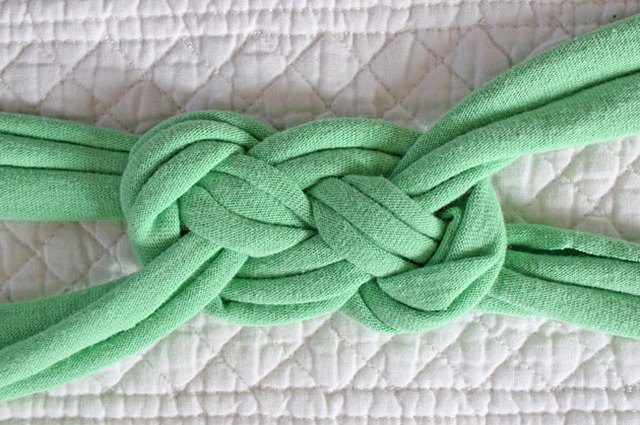
Pull on each end gently and slowly until a neat knot is created and you have loose strips of fabric on each side of the knot.
Pull the ends to create the knot.
Pull the ends to create the knot. (Image: Beth Huntington)

Step 9


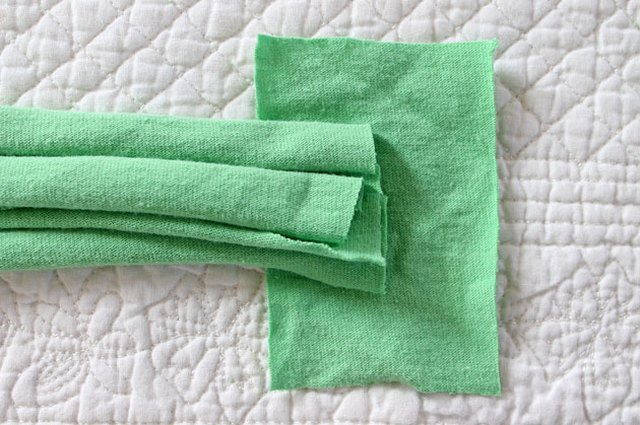
Wrap the strips around the head of the person who will be wearing the headband to mark where to cut the ends. Or measure the person's head circumference and cut the ends to that length. Cut a 2 1/2-by-3 1/2-inch piece of T-shirt and place both ends of the headband on top.
Place the ends on top of the 2 1/2-by-3 1/2-inch piece.
Place the ends on top of the 2 1/2-by-3 1/2-inch piece. (Image: Beth Huntington)

Step 10


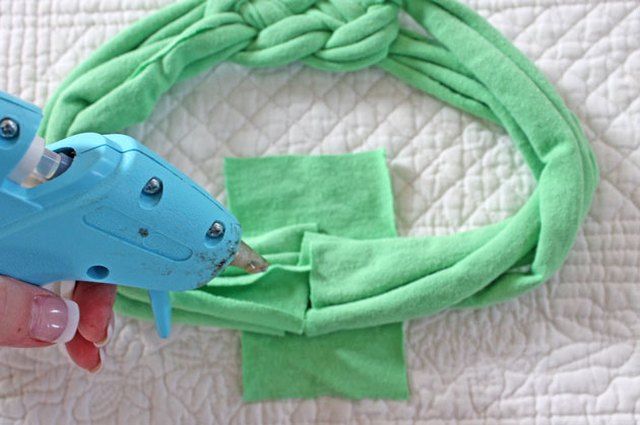
Spread some hot glue onto the tops of the headband ends.

Tip
  • You could use fabric glue instead of hot glue, but it will take longer for the glue to dry.
Use hot glue on the headband ends.
Use hot glue on the headband ends. (Image: Beth Huntington)

Step 11


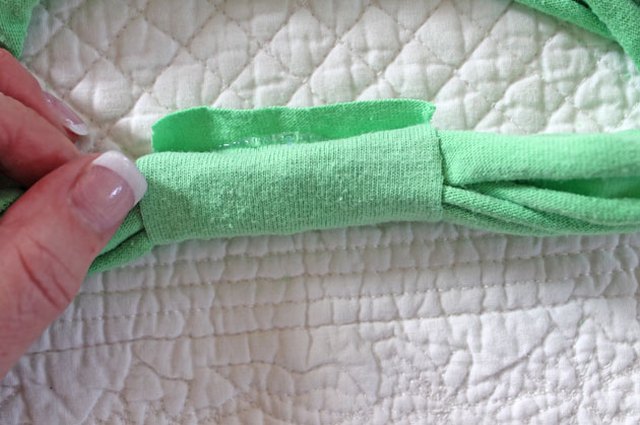
Roll the 2 1/2-by-3 1/2-inch piece of T-shirt tightly around the glued ends of the headband. Use caution when rolling the fabric to avoiding burning your fingers.
Roll the small piece of fabric around the glued ends.
Roll the small piece of fabric around the glued ends. (Image: Beth Huntington)

Step 12

Let the glue dry for a few minutes, slip the headband on and enjoy some balanced creativity of your own.


Saturday, April 8, 2017

How to make your own jeans

How to make your own jeans

Article Copy Rights By Karen Ball.

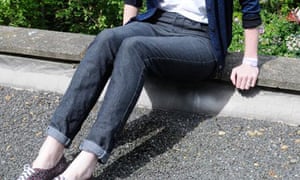
Most people are familiar with horror of shopping for a new pair of jeans. One sewing blogger decided to take matters into her own hands, and make her own. Did she discover the modern woman's holy grail – a perfectly fitting pair of jeans?

Karen Ball's make your own jeans blog
Photograph: Karen Ball

Jeans. Denim. Strides. They’re the ubiquitous fashion statement that transcends gender, class, style and generation. From gold-rush frontierland to the modern high street, we’re all meant to want them, wear them and spend a lot of money on them. So why are they so difficult to look good in? My fellow blogger, Grey Fox, recently touched on a similar topic in his post about jeans and the middle-aged man. Jeans are hard to wear!
In my experience, a good fit doesn’t equate with the money you spend. I’ve forked out anything from a tenner to the best part of eighty quid on a pair of jeans, and it’s rare that I’ve ever been satisfied with my indigo-dyed, rugged cotton twill.
Jeans collage
Is there hope out there in denimland? Blogger Yes I Like That thinks so. She turned to Burda, a German sewing pattern company, and used their pattern as an experiment to see if she could make a pair of jeans to suit her body.
I asked Kathryn to tell us – had sewing jeans changed her life, or just her wardrobe?
Why did you decide to sew your own pair of jeans?
Kathryn: It felt like the ultimate sewing challenge. I wanted to see if I could make a pair of jeans that fits me. I’m pear-shaped with a really long torso, so jeans shopping is always a bit of an ordeal. I’m also trying to move towards a 90% handmade wardrobe. I love the idea of being able to make my whole outfit myself!
How did you start the process of choosing a pattern and fabric?
K: The only ready to wear (RTW) jeans that fit me are straight-legged and made of stretch denim, so I knew I wanted a similar pattern. I was very inspired by the Australian blogger Handmade by Carolyn, who’s made several excellent versions of the Burda 7863 pattern, so it was an easy choice to give it a try. Burda patterns have notoriously bad instructions, though, so I relied on web tutorials to get the fly zipper right.
Fabric is a bit of a problem; it’s tricky to find the right stuff. I’d love to see more coloured stretch denim and twill in fabric shops. The fabric for my first pair was not ideal – really you want something very stretchy and light – but I had to work with what I could find.
Jeans
What were the challenges of sewing with denim?
K: I’ve only used stretch denim and twill, which is not as heavy as your classic Levi’s-style denim fabric, but it can still be challenging to work with. The absolute worst bit is the topstitching. Each pair of jeans uses three spools of topstitching thread, and you’re often trying to force the needle through more than six layers of fabric. It’s incredibly frustrating when your needle starts skipping and the thread tangles in a big knot, but I think topstitching adds the finishing touch, so I probably wouldn’t skip it.
What are your tips for making a pair of jeans that actually fit?
K: Well, I’m definitely not an expert. My first two pairs of jeans have some severe fit problems but they’re comfortable and I wear them a lot anyway. My top tips would be:
 Expect to make a few pairs to perfect the fit, unless you are shaped like a coathanger.
 Compare your pattern to an existing pair of jeans you already own that fit well; just lay the pattern on top and you’ll be able to see if it’s going to be radically different.
 Choose a pattern that has an adjustable back waistband seam (such as the Burda one). This helps a lot if RTW jeans normally gape at your back waist.
 Fit as you sew! Baste them together and try them on before you topstitch. Unpicking that stuff is not fun. Ask me how I know …
 Get a willing assistant to take photos from the back to diagnose the fit. You’ll never be able to see what they look like by twisting round in front of the mirror.
Even though none of my homemade jeans fit perfectly, I still wear them. I think as sewers we can get obsessed with diagnosing fitting wrinkles, but at the end of the day, stretch jeans are never going to fit like a pair of tailored wool trousers.
What advice would you give readers about sewing their own jeans?

K:
 Give it a try! You’ll learn a lot and, if it works out, your smugness levels will go through the roof. I recommend making your first pair in a dark-wash denim fabric; it hides a multitude of sins. Also, practise making a fly zipper first. It can seem like strange fabric origami the first time you try it.
What is your take on the jeans industry now that you’ve made your own?
K: The production of jeans is very hard on the environment and on workers, so it feels good to take control over at least part of the process. My jeans are not made from fair trade or organic cotton, so I’m still supporting the commercial textiles industry, but at least I know exactly who sewed them (me) and in what conditions (messy sewing room, teabreak every half hour).
Thanks, Kathryn. I agree that quality denim fabric is hard to find, though I’ve seen some lovely denims at Stone Fabrics and Our Patterned Hand (now closed). If you’re buying denim for the first time, it’s a good idea to keep an eye on how stiff the fabric is. I’d recommend using a lighter denim with at least some softness and drape. You may also need to use a denim needle on your machine and heavy-duty topstitching thread. You could even go to town with rivets and decorative stitching!
Jeans
What do you think, readers? Would you make your own pair of jeans? Do you have tips of your own?

Saturday, March 25, 2017

How to Salvage Damaged Clothing: Tips and Tricks

 
Getting rid of clothing may be hard to do when the garment is fairly new or it's an article of clothing you really like. Sometimes it takes time and luck to find clothing that looks fantastic on you and fits well so you may really want to avoid throwing it away. With a little creativity and some basic sewing knowledge, you can salvage damaged clothing and even enhance the way your clothes look. Use these sewing tips to get you started and back into the clothes you’d rather not throw away.
 

Small Holes

Sometimes a small hole in an article of clothing can suddenly appear without you ever knowing how, or why, it got there. Often, a tiny hole in a garment is barely visible, but a hole barely there is still a hole that can detract from the appearance of a blouse, or a pair of slacks. To cover the open area and add some glitz to the garment at the same time, apply a spot of fabric glue to the back of a rhinestone and glue the shiny stone over the hole. Rhinestones look fabulous on satin and on denim jeans. After gluing the rhinestone in place, add additional rhinestones to the garment to create a design, if you like.

Large Holes

Cutting pants at or above the knee with a pair of scissors can easily eliminate large holes that appear in the bottom area of the pants. After removing the damaged area, you can then hem the pants. Consider trimming the pants with a piece of decorative trim while you’re at it. Although the pants will be shorter, you will still be able to wear them.


Frayed Sleeves

If the edges of the sleeves on a long-sleeved shirt are no longer fit to be worn, make the sleeves shorter to eliminate the unsightly frayed edges. Hem the edge of the altered sleeves to create a clean finish. Wear the shirt under a sweater if you prefer long sleeves.


Stains and Worn Out Areas

Depending on where the stain or worn out area is located, sewing an appliqué over the damaged area can be an excellent way to make a garment wearable again. Position your appliqué directly over the stain or worn out area and sew the appliqué on with a needle and thread that matches the edges of the appliqué. Note that some appliqués can be sewn on while others can be applied using a warm iron. Shop for the appliqué that best suites your needs and desires.

Thursday, April 28, 2016

DIY - HOW TO SEW AN ADORABLE PILLOWCASE WITH PRETTY TRIMS


For This Tutorial:
For Sewing Machine & Accessories Click below website link to BUY Online:

https://mysewingmall.com/

Courtesy: Tutorial by Kate from the homemakery for homemade happy mag.

If you’ve been here before then you have probably noticed the Hello Bar at the top of the blog directing you to the free magazines, well today I have a special treat for you! Kate from The Homemakery created this excellent tutorial, showing you how to sew a pillowcase or two. Or three.
You Will Need:
2 pieces of cotton fabric measuring 108cm by 50cm.
1m Crochet lace trim
1m Ribbon
Cotton thread
Pearl headed pins
Scissors
Iron
How to:
Cut your main piece of fabric (we used stripes) measuring 108cm x 50cm, iron in half.
Using a contrasting fabric cut one piece measuring 25cm x 50cm and sew it to the left hand side of the large piece of fabric.
Cut another piece of contrastic fabric measuring 40cm x 50cm and sew to the right hand side of the fabric. Finish your seams using a zig zag stitch.
From each seam, measure 22cm and pin. On the shorter piece, turn over 1/2cm and iron, turn over again to create a seam.
On the opposite piece, iron a line at 22cm (this will be the pillowcase flap.) At the end of the fabric turn over 1/2cm and then turn over again to create a seam. Sew the seam.
If you are adding trims, pin them in place on the fabric join and stitch them down using a straight topstitch.
To sew the pillowcase together, fold the sewn piece of fabric in half, right sides together (excluding the flap). Line up the seams and trims. Fold the flap back over the end of the pillowcase so it covers the end of the pillowcase and the pattern is right side down.
Pin around the pillowcase then sew from the fold to the pillowcase opening using a straight stitch.
Repeat on the other side then finish the seams using a zig zag stitch.
Turn your pillowcase right side out and you are done!

Thursday, April 21, 2016

LEARNING TO SEW – TISSUE COZY SEWING TUTORIAL FOR BEGINNERS

Tutorial Courtesy: by  
For This Tutorial:
For Sewing Machine & Accessories Click below website link to BUY Online:

https://mysewingmall.com/

Tissue Cozy sewing tutorial for beginners like me! Let's learn how to sew together! This is a great sewing project for beginners!

DOUBLE-SIDED TISSUE COZY

Supplies:
– Two pieces of fabric
– Matching Thread
– Scissors
– Fabric Ruler
– Pins
– Iron
– Sewing Machine
– Chopstick or long pointy object
Instructions:
Step 1: I started off by cutting the two pieces of fabric to 6 ½″ x 7″.
How to cut fabric for sewing project
Step 2: I took both pieces and placed the right sides facing each other and pinned them together.
Place fabrics right sides facing each other.
Step 3: Next I moved the fabric over to the sewing machine. I placed the long side under the sewing foot about 3″ from the top and ¼″ from the edge. I didn’t start sewing directly from the top because I wanted to leave about 1″ gap on the long side in order to leave an opening to be able to flip the fabric right side out. 
How to sew tissue cozies.
Step 4: I started sewing by doing a few stitches forward, back stitched a few stitches and then proceeded to sew around the entire piece until I got about 1″ away from where I started. Once I was about 1″ away, I did a few back stitches and then stopped sewing. I made sure to cut the loose threads.
Step 5: Before turning the fabric right side out, I cut the corners of the fabric (making sure not to cut the stitches). Using the opening that I left, I pulled out the fabric. With the help of a chopstick, I poked the corners out. I used my iron to press the fabric making sure to fold in the fabric from the opening.
How to turn fabric inside out.
Step 6: I determined that I wanted the flowered fabric to be the outside of the tissue pouch so I pinned the short side with the green fabric over the flowered fabric. I folded the bottom short side and overlapped it over the top by ¼″. I could have folded the top and bottom evenly but I prefer the overlap look. 
How to pin fabric together.
Step 7: I moved the project back over to the sewing machine. I placed the top of the folded fabric under the sewing foot ¼″ from the edge. I sewed a few stitches, then back stitched a couple, then I proceeded to sew to the bottom, and finished with a couple of back stitches.The back and forth of stitches at the beginning and at the end is to help prevent the stitches from unraveling. Once the first side was done, I moved over to the second side and sewed it the same way.
Learning to sew tissue pouches
Step 8: I turned the pouch right side out and used a chopstick to poke out the corners.
Use a chopstick for perfect corners
And voilà! I had the double-sided tissue pouch completed!
Tissue Cozy Simple Sewing Tutorial. Great sewing project for beginners.
Want to learn how to sew? This is a great little tutorial to help you get started. Oh so cute and oh so easy to sew! Tissue Cozy sewing tutorial for beginners!