
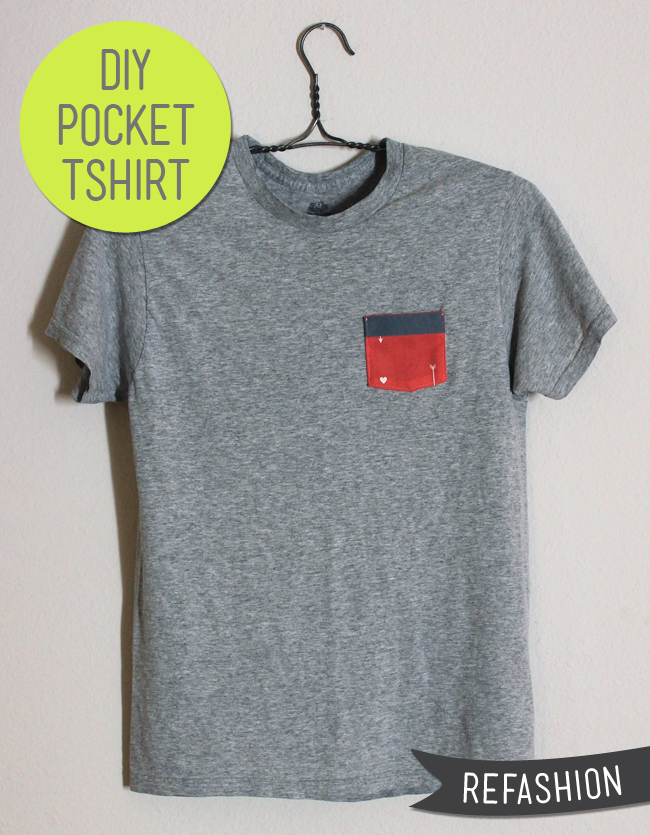
Adding a pocket to a t-shirt is a great way to bring new life to plain old boring shirt. It's really fast and easy and you can use pretty much any fabric. I used a piece of this self-designed fabric that I had printed with Spoonflower. If you get tired of the pocket (I mean, it happens right?) or want to change it to a different fabric, just use a seam ripper to remove the stitching.
How to Add a Patch Pocket to a T-shirt

Supplies:
Tag board to make templates
Fabric
Sewing machine
Iron
Thread for topstitching
Step 1:
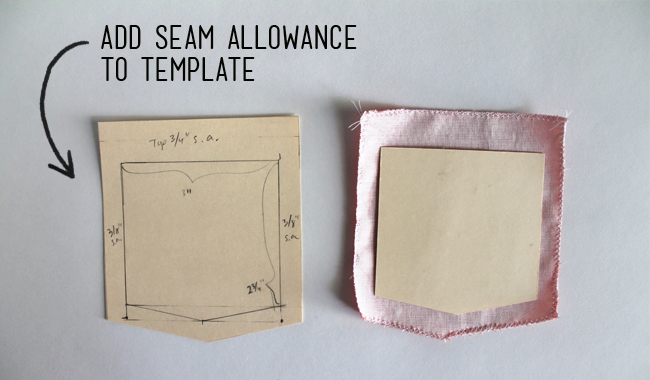
Play around with shapes and sizes until you find a pocket that you like. Make a template of the finished size using tag board. Then make a second template with the seam allowance included (on the left in the picture above).
For my pocket, I wanted a finished size of 3 inches wide by 2.75 inches high with a pointed bottom. I made extra seam allowance at the top so that the top edge would be a little sturdier.
Step 2:
Using the second template (the one with seam allowance) cut out your fabric pocket. Finish edges and add trim if desired.

Step 3:
Use your first template as a guide to fold in the seam allowance and press.
Step 4:
Determine placement of pocket on t-shirt and pin in place. Using the walking foot on sewing machine, stitch pocket in place by stitching around sides and bottom. (Using the walking foot will help move the knit fabric through the machine and prevent bunching. If you don't have a walking foot, try putting tracing paper between the fabric and the feed dogs to help it move through smoothly.)
Design Variations:
- Try different fabrics like stripes or sequins (see this post for inspiration)
- Add a trim, such as lace or a button, to the pocket
- Try different shapes like a rounded corners, a narrow rectangle or a semi-circle
- Add pockets to a skirt or dress
- Try placing the pocket in an unexpected area like the side or the hip
No comments:
Post a Comment