
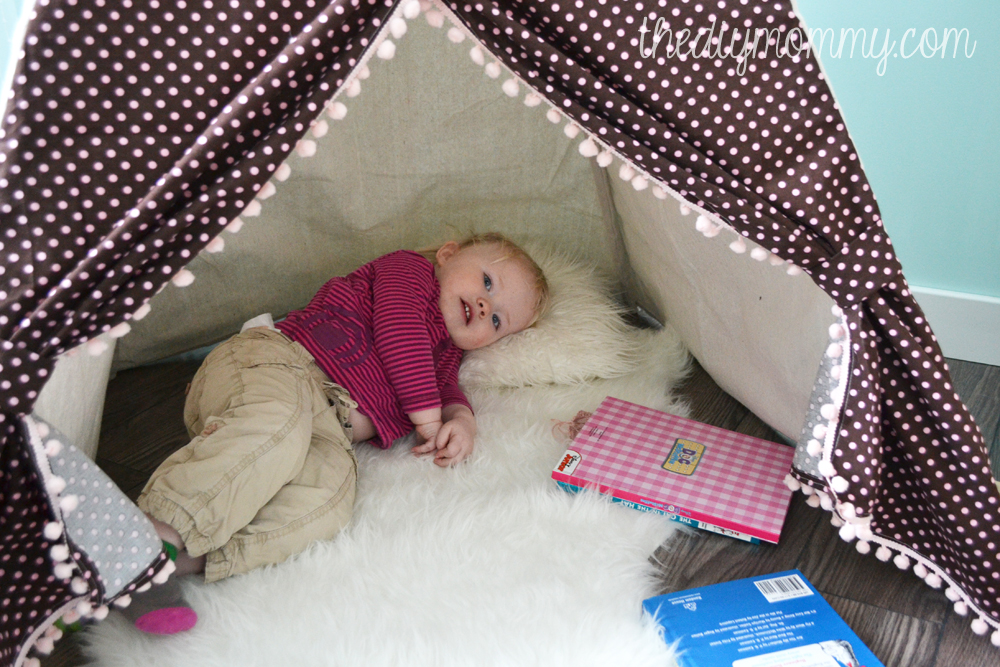
My Little A loves to read already and she’s only just turned two years old! Her reading, mind you, is staring at picture books lovingly but I’m thrilled that she’s showing such a love for books at this age. I’m trying to finish her little room before Baby Three comes, and I thought making a cute tent in her room for her to retreat with some books to would be fun. I’ve seen so many creative DIY play teepees and tents online, and I thought I’d create my own for my little girl. I did, and I’m so excited with how it turned out! She absolutely loves it, and it’s such an adorable addition to her room decor.
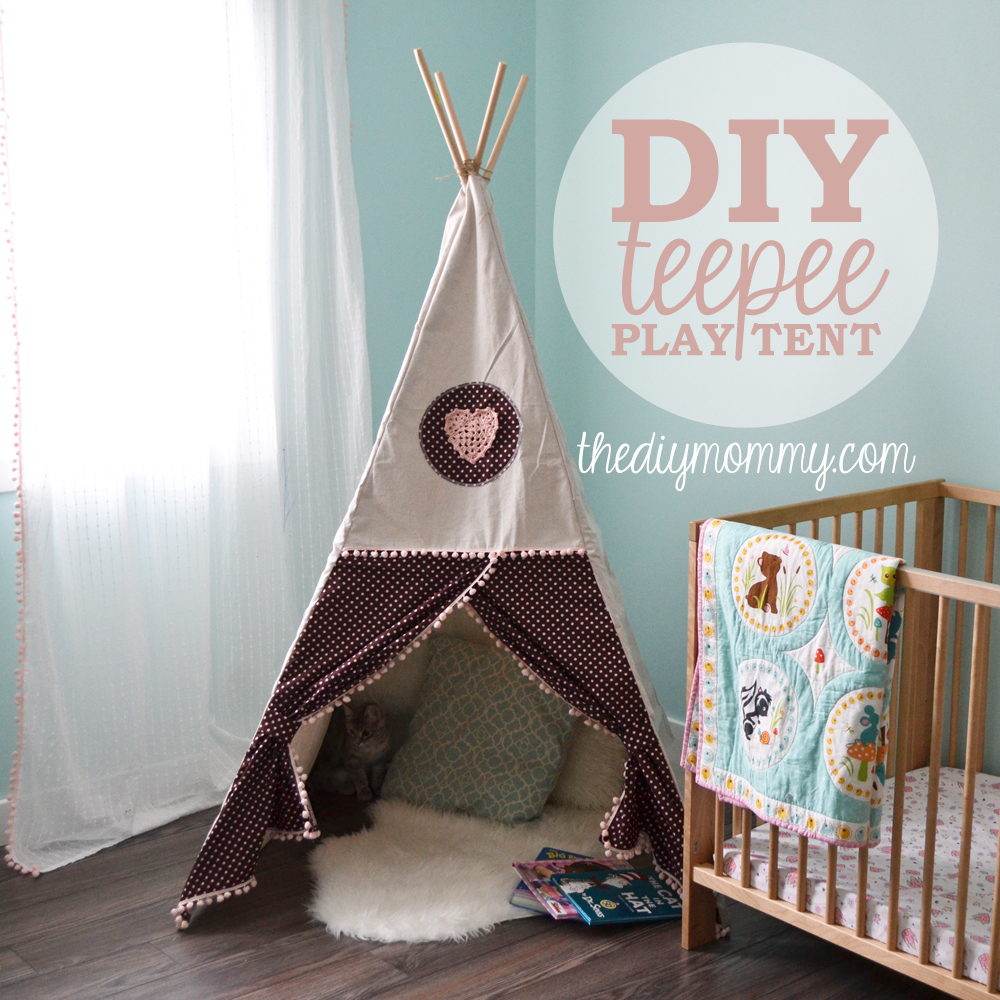
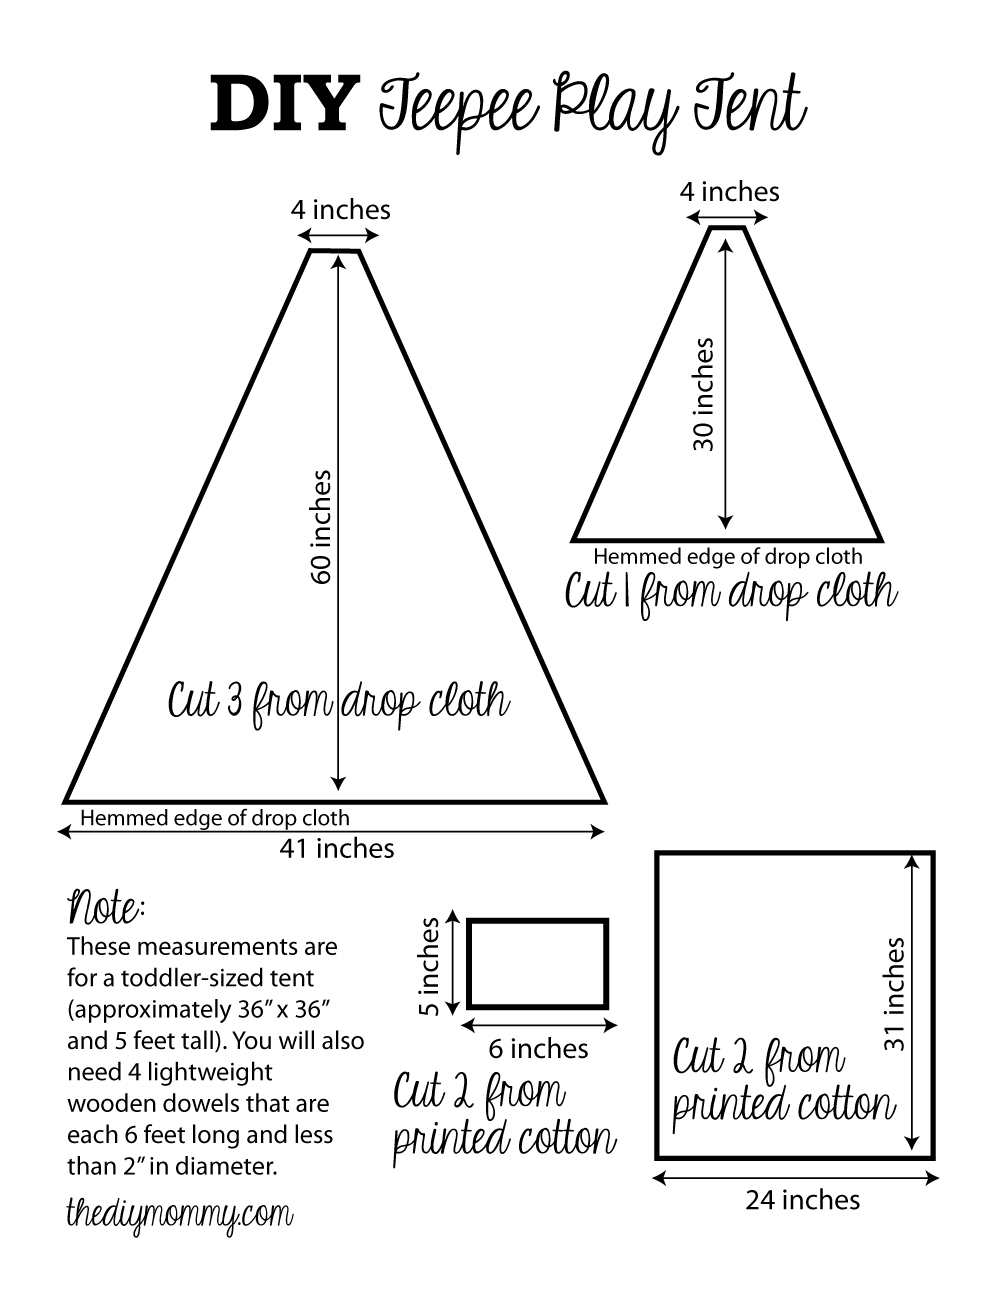
This is a toddler-sized teepee (about 36″ x 36″ and 5′ tall), so if you follow my instructions you should come out with something with about the same dimensions! If you want to make a larger teepee, buy longer dowels and calculate your own measurements for the fabric (I’ll explain how I found mine out).
This tutorial does require sewing, but it’ simply a lot of straight lines with a regular ol’ sewing machine and/or serger. If you don’t like to or cannot sew, I recommend checking out this no-sew teepee tutorial. The fabric is wrapped around the frame rather than sewed together.
I chose to make this tent with 4 dowels (for simplicity and budget sake), but I’ve also seen them made with 5 or more. If you’d like to use more, you’ll also have to calculate your own measurements for the narrowed side panels. I really like our simple, four-sided tent, however!
Here’s how to make your own:
Materials:
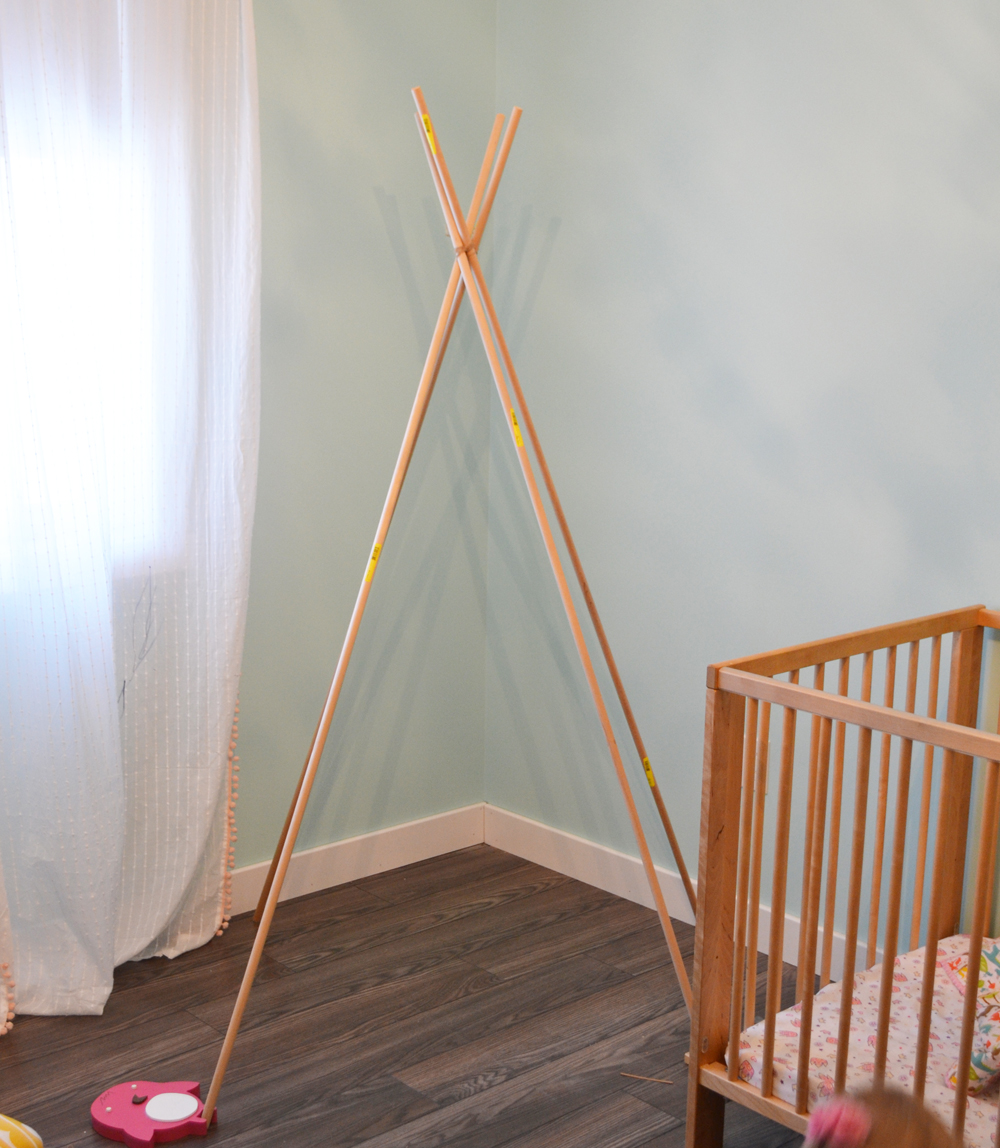
- 4 lightweight wooden dowels that measure 6′ tall and 3/4″ in diameter or less *For those that have asked, I found my dowels at Home Depot in the moulding section. They are 3/4″ full rounds made from Hemlock that were 12′ long that I cut down to size.*
- a painter’s cotton canvas drop cloth (I used a 9′ x 12′ drop cloth and have plenty left over for other projects)
- 1 1/2 yards of printed cotton fabric (for the curtain doors, tie backs and embellishments)
- 4 yards of decorative trim (optional) (I used pom-pom trim leftover from this project)
Directions:
If you’re making a tent that’s the same size as mine, follow the cutting guide below. If not, set up your 4 longer dowels by tying them together at the top (about 9-12″ from the top), spreading out the bases evenly to the height you want, and measuring the width and height of the triangles you’ll need.
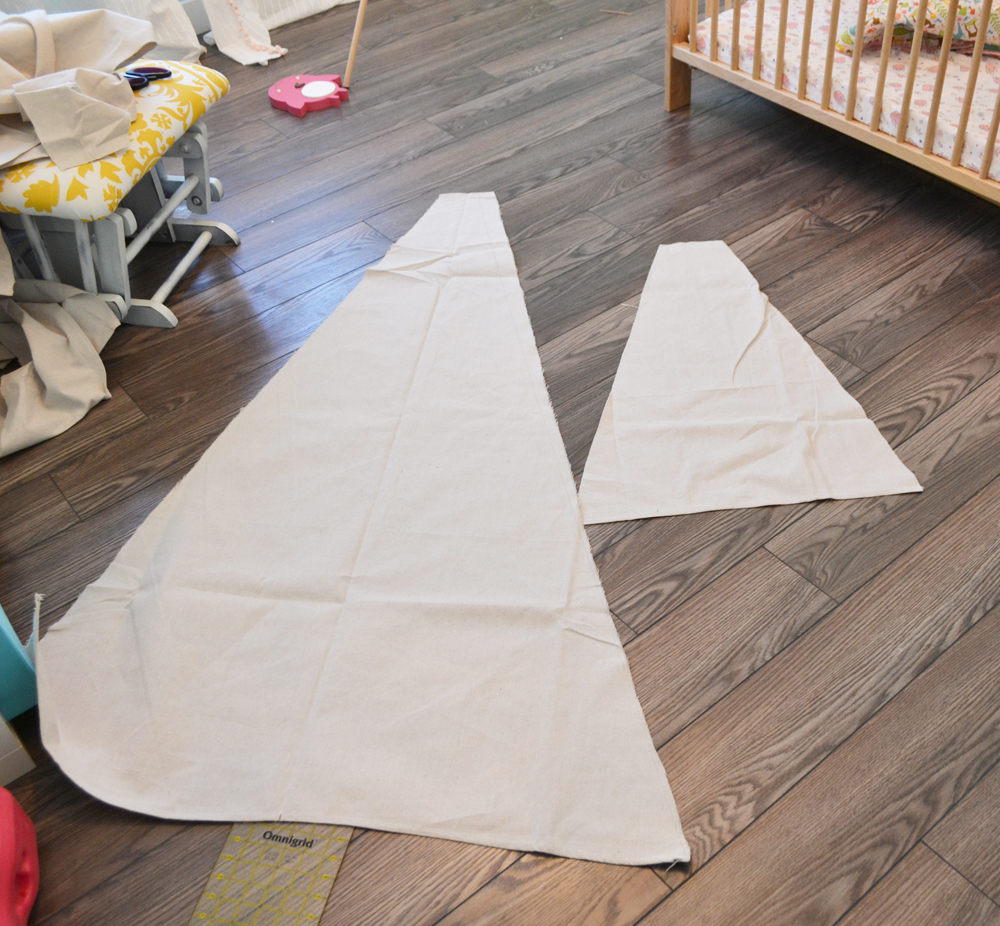
For a toddler teepee like mine, cut out three triangles from the drop cloth, one smaller triangle for the front panel from the drop cloth, and the two large and two small rectangles from the printed cotton fabric. Use the guide below for your measurements and make sure that the bottom of each piece is on a hemmed edge of the drop cloth. This saves you having to hem yourself!
The cutting is my least favourite part because of the bulk of the fabric and size of the pieces, so I cleared out a large space on the floor in Little A’s room to do it! I used a measuring tape, a hard edged ruler and a pencil to measure my pieces and ensure I had straight lines.
Once the pieces are all cut out, it’s time to get started on the front panel with the curtain doors.
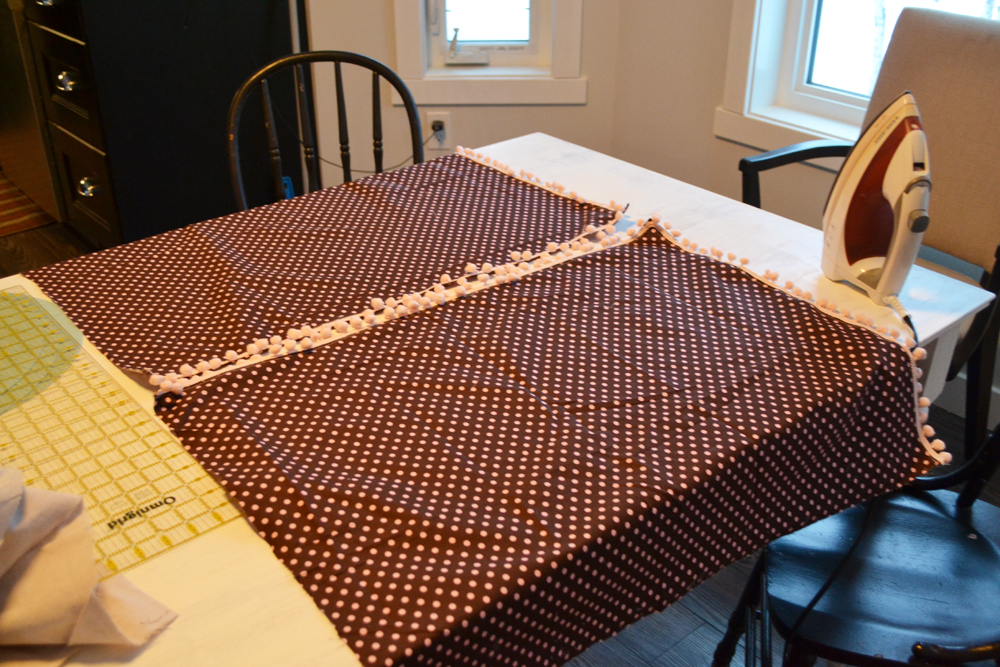
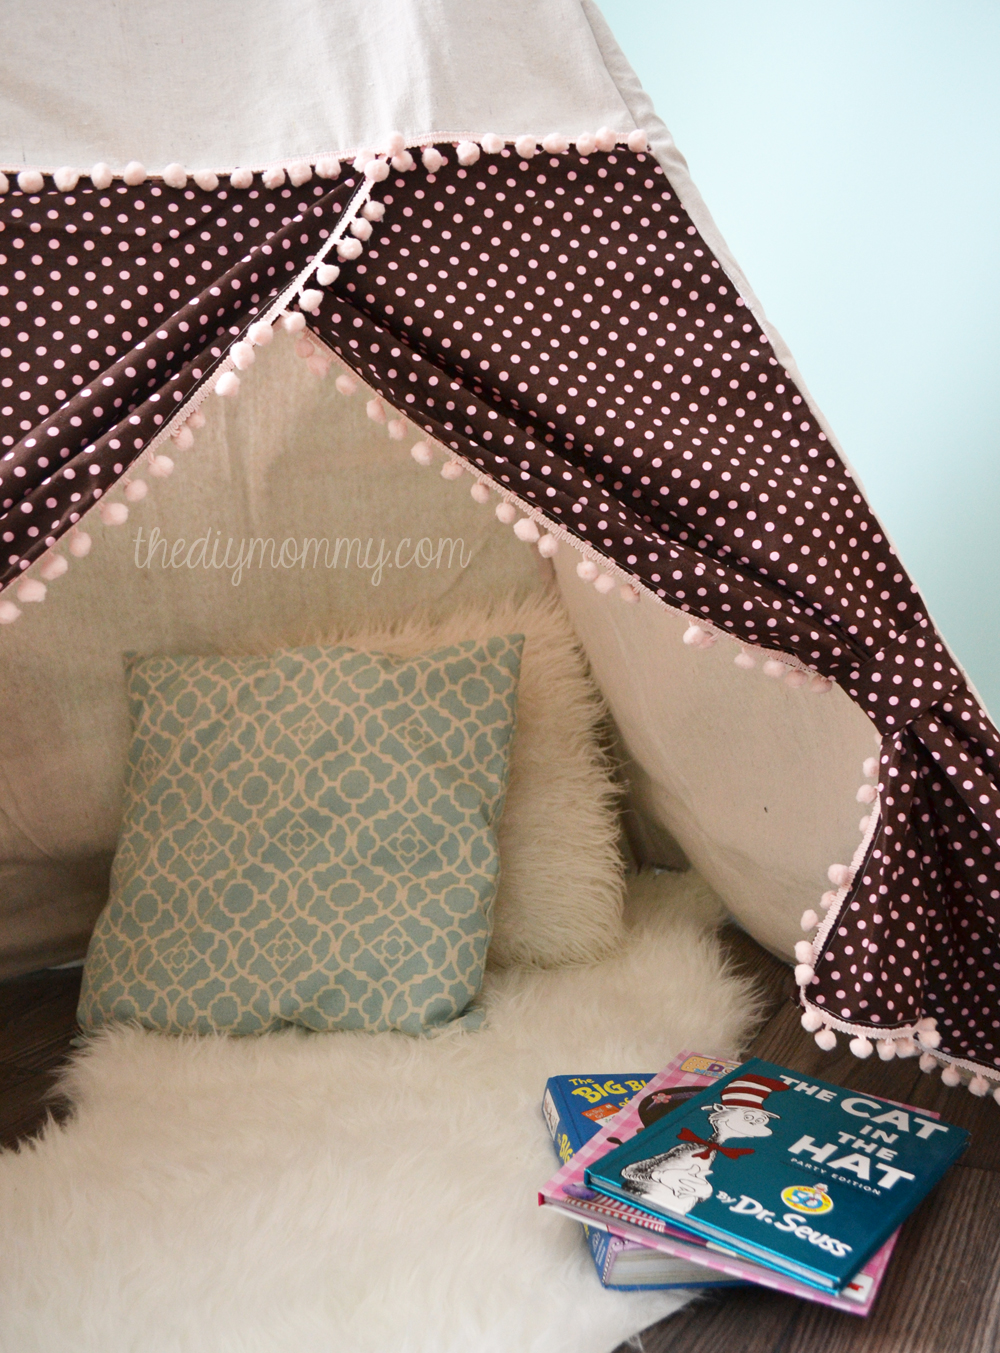
Hem the bottom and the two inside edges of the large rectangular curtain pieces (fold over 1/4″, then another 1/4″ and stitch). You can then embellish the inside and bottom edges with trim if you wish.
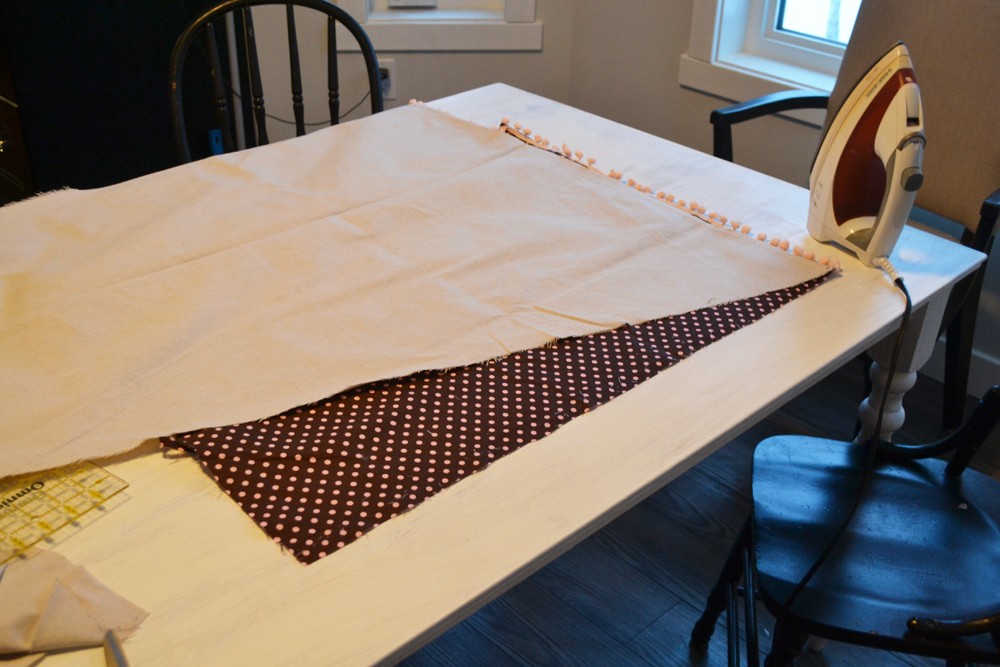
Lay the bottom diagonal edge of one of the drop cloth triangles over one of the curtains and cut the side of the curtain diagonally to match the side angle of the drop cloth triangle. Repeat with the other curtain piece.
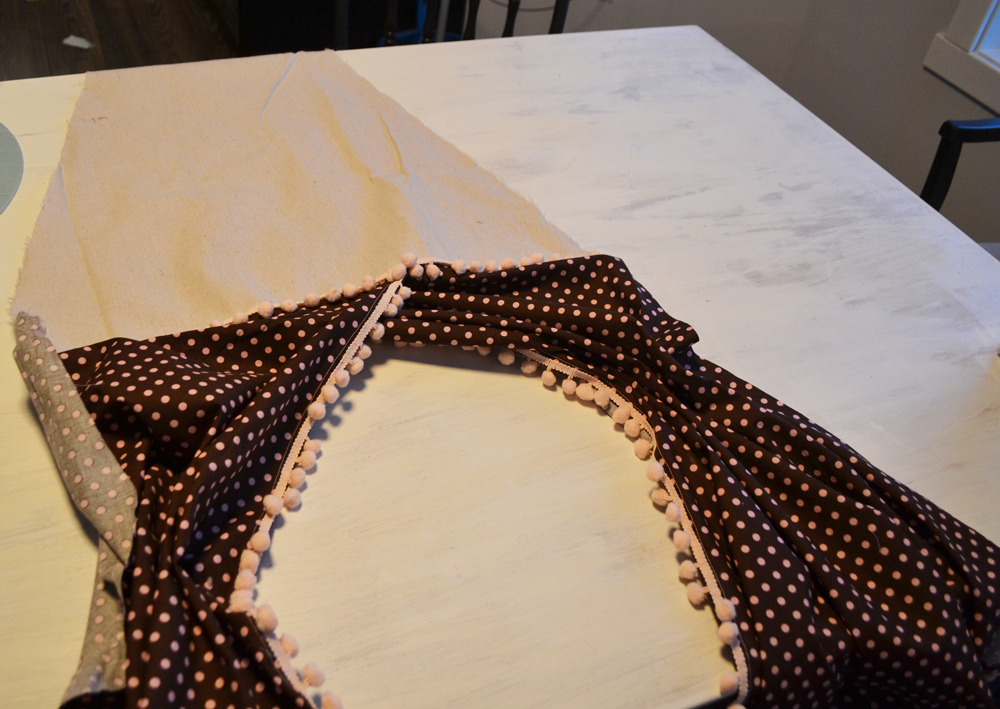
Next, find your small drop cloth triangle and pin your two curtain pieces to it so that their top edge is about 1/2″ above and behind the small drop cloth triangle. Adjust the curtains to overlap and match the sides of the drop cloth triangle. Pin and then stitch together.
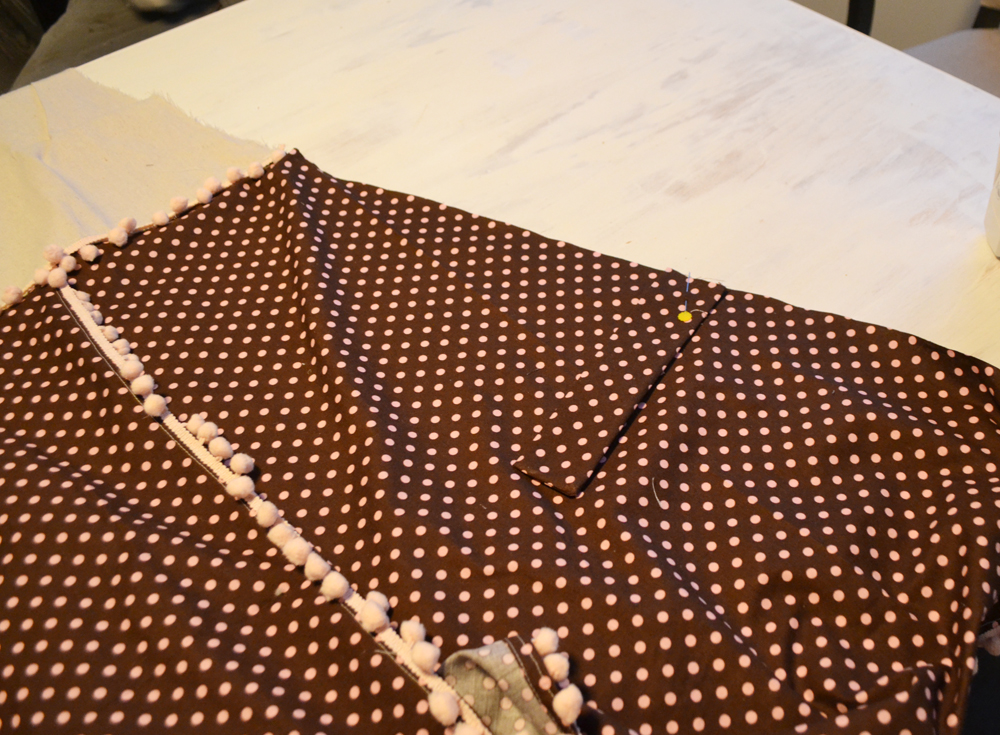
Fold each of the two tieback rectangular pieces in half horizontally (right sides together), and sew down one short side and the long side. Turn them right-side-out and press to form a strap piece. Pin one tie back to the raw edge of one side of the curtain. I pinned mine so it was about half way down the curtain piece. Repeat with the second tie back and curtain.
Sew a small piece of velcro (hook side) onto each tie back, and another small piece (loop side) onto the wrong side of the curtain that’s about 2″ from the seam and in the same spot vertically as the tie back.
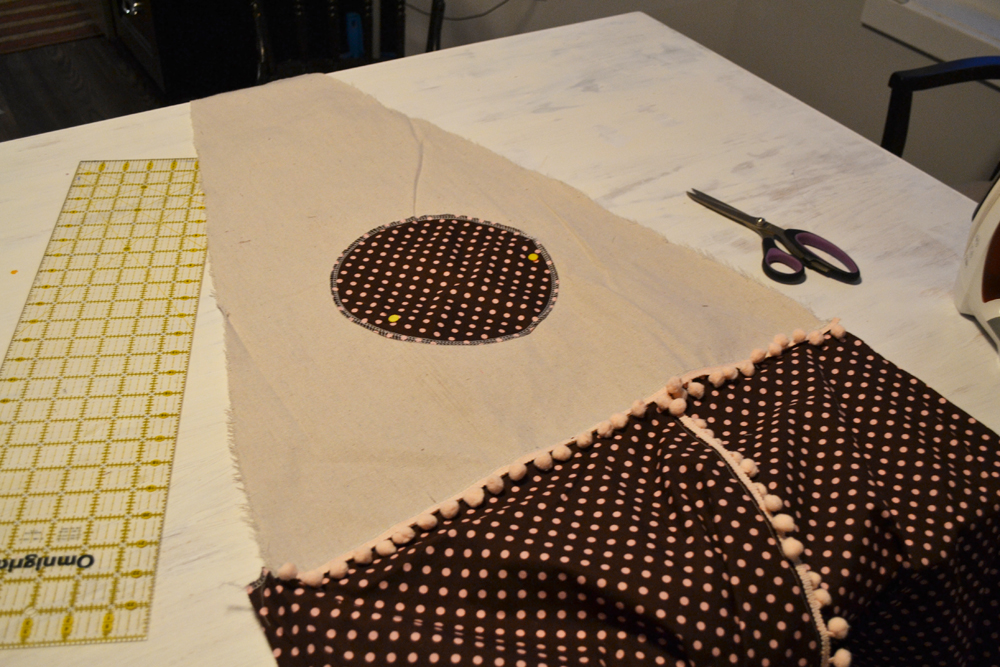
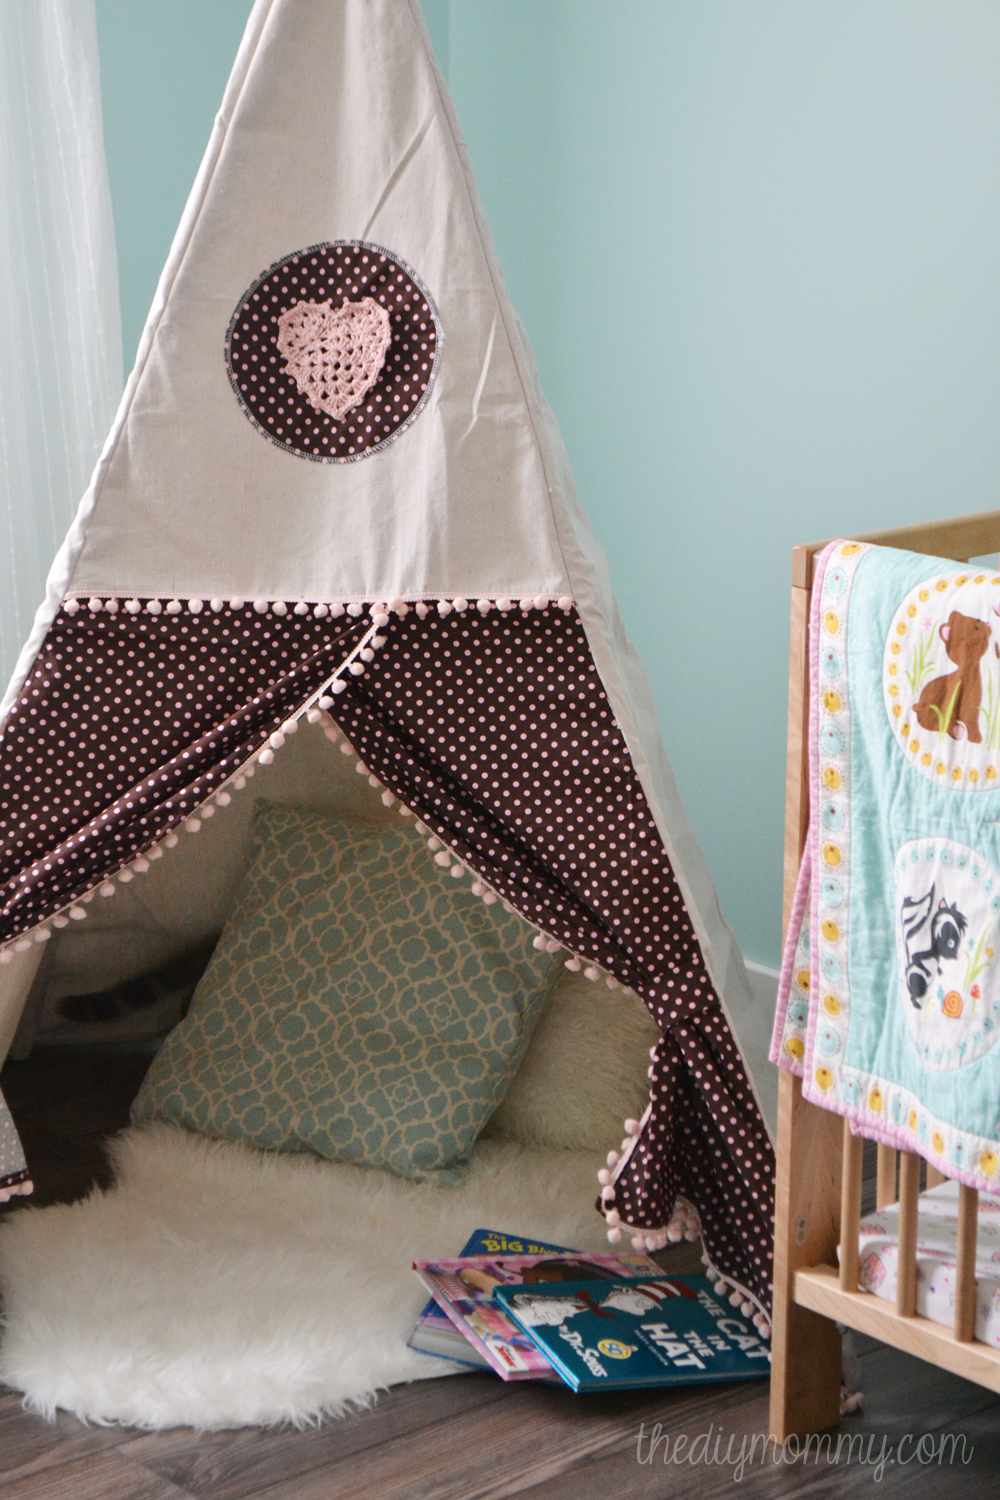
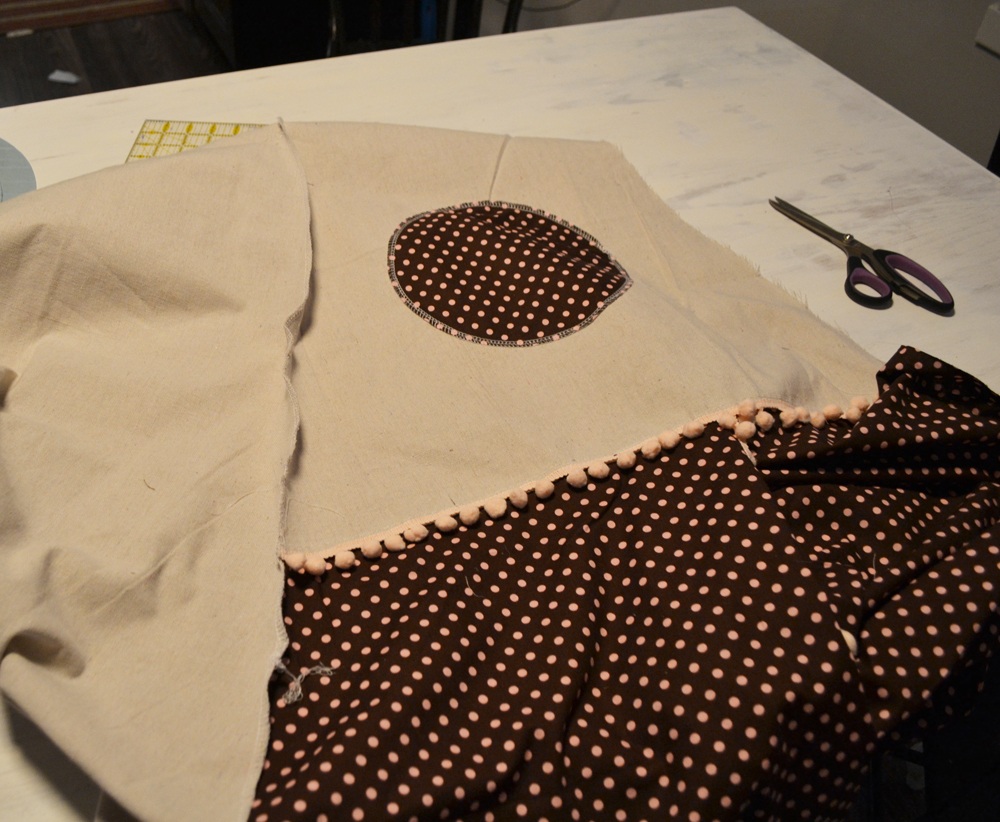
You can embellish the top half of the front with an applique if you like. I chose to cut a circle out of my printed cotton (using a dinner plate as my pattern), and then I later crocheted a sweet pink heart and hand stitched it to the center. I’ve also seen some adorable tents and teepees with children’s monograms on them! You could also sew a bunting banner and stitch it to the top of the front.
Now, you’ll simply be sewing all of the triangular panels together to make the pyramid shaped tent. Each seam will be a casing for the dowels.
Sew each panel together at the sides of the triangles, lining up the tops and bottoms (and pinning if you wish) on the RIGHT SIDE of the fabrics using a 1/2 seam allowance. You will have 4 panels sewn together and four seams. I found the drop cloth frayed a TON, so make sure you catch both sides of the drop cloth well when you sew them together.
At this point, you can serge, zig-zag or hem the very top of the teepee. I chose to leave mine with raw edges and so far it’s holding up!
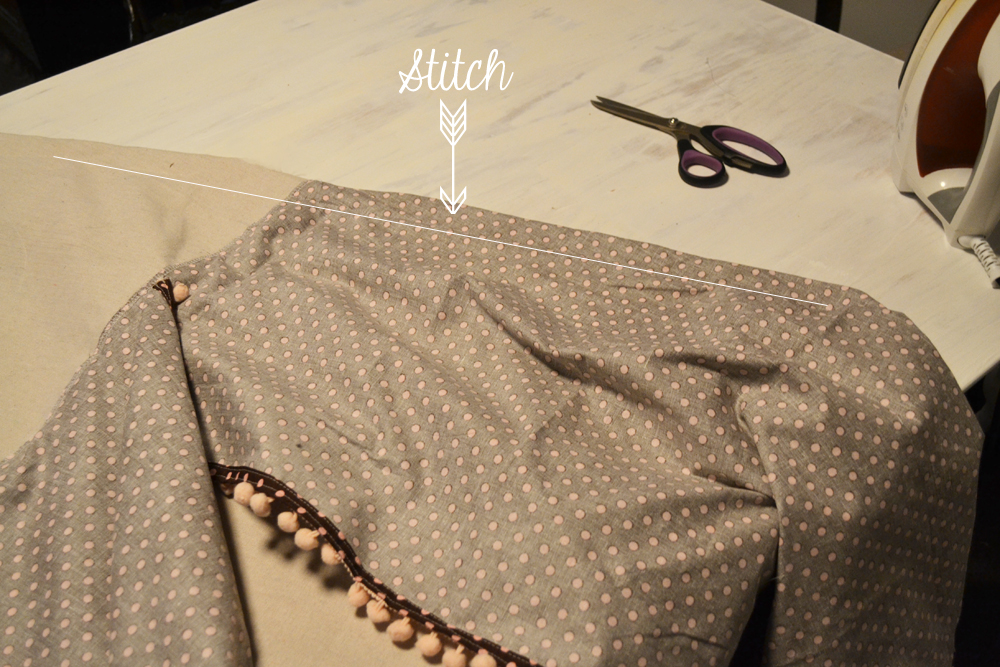
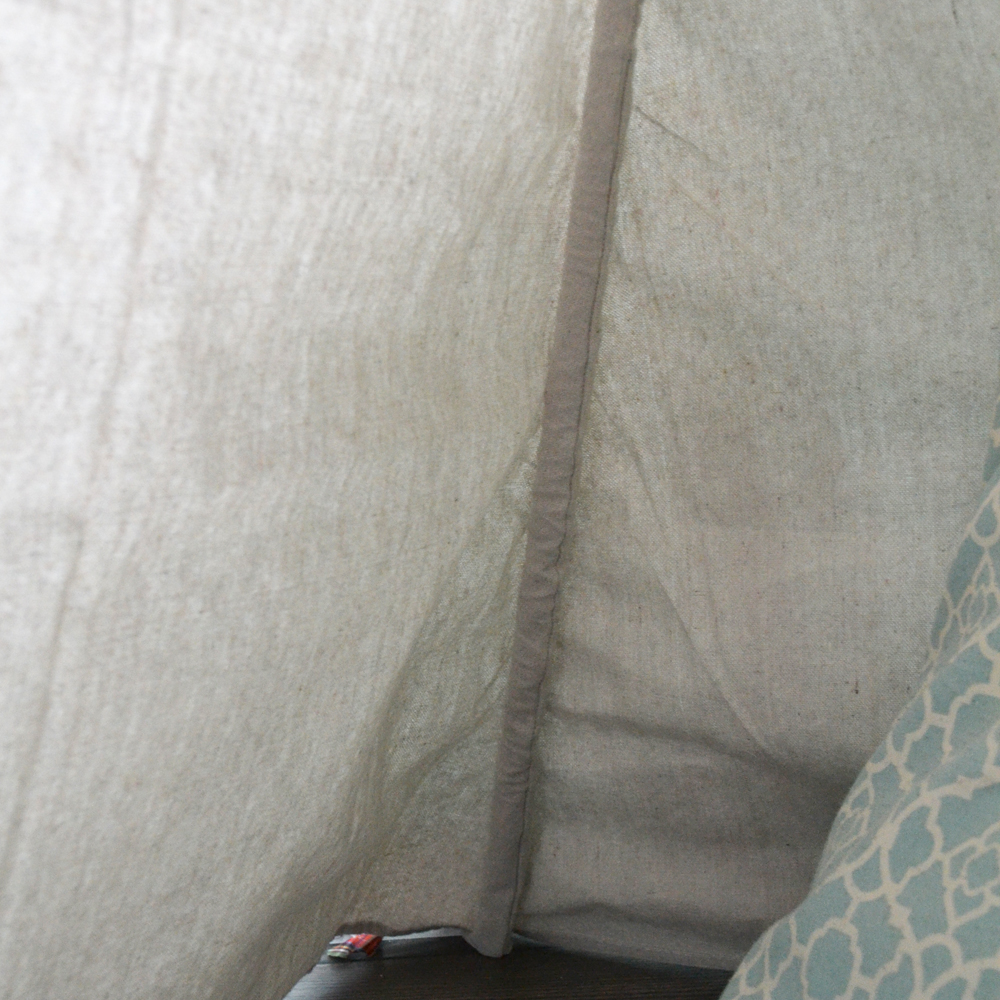
Then, turn the tent inside out and fold each corner right-sides together. Stitch a line that’s about 1 1/2″ from the seamed edge to create a casing for your dowels. Repeat from the top to the bottom of each of the 4 seams.
The inside of the tent and the casing will look nice and neat, like this:
Now, all you have to do is insert the dowels and tie the tops! Insert each dowel, one at a time, through each of the four casings. I found it easiest to go from the bottom of the teepee to the top. Once they’re all inserted, stand the teepee on it’s bottom, arrange the dowels at the top, and tie them with a piece of twine or rope. There will be about 9-12″ of dowel sticking out of the top of the teepee.
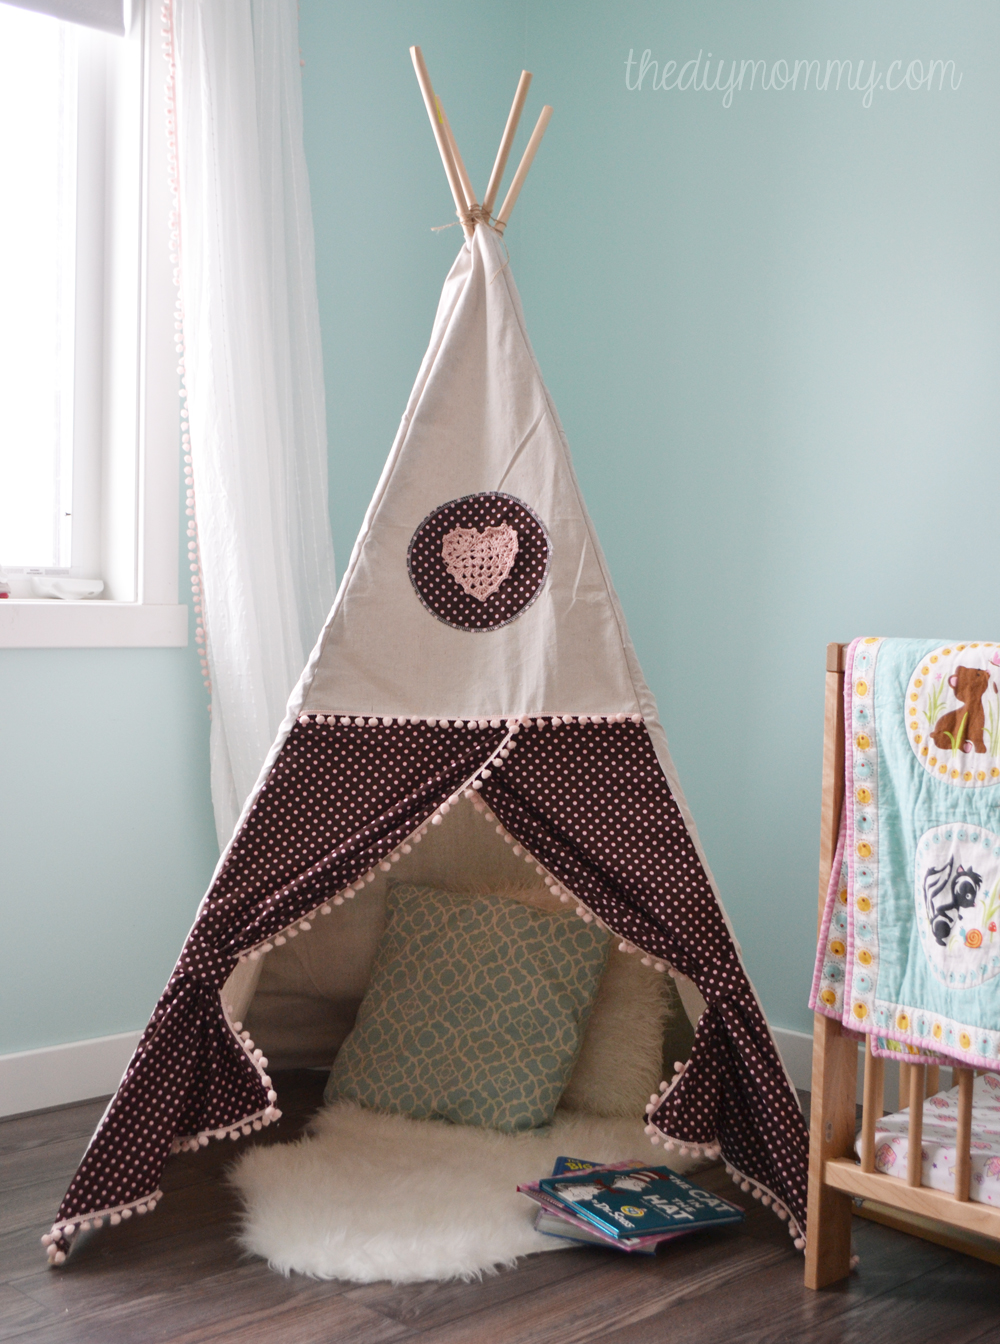
You’re all done. Wasn’t that fun? I absolutely love how this project turned out. It adds just the right amount of whimsy to Little A’s bedroom.
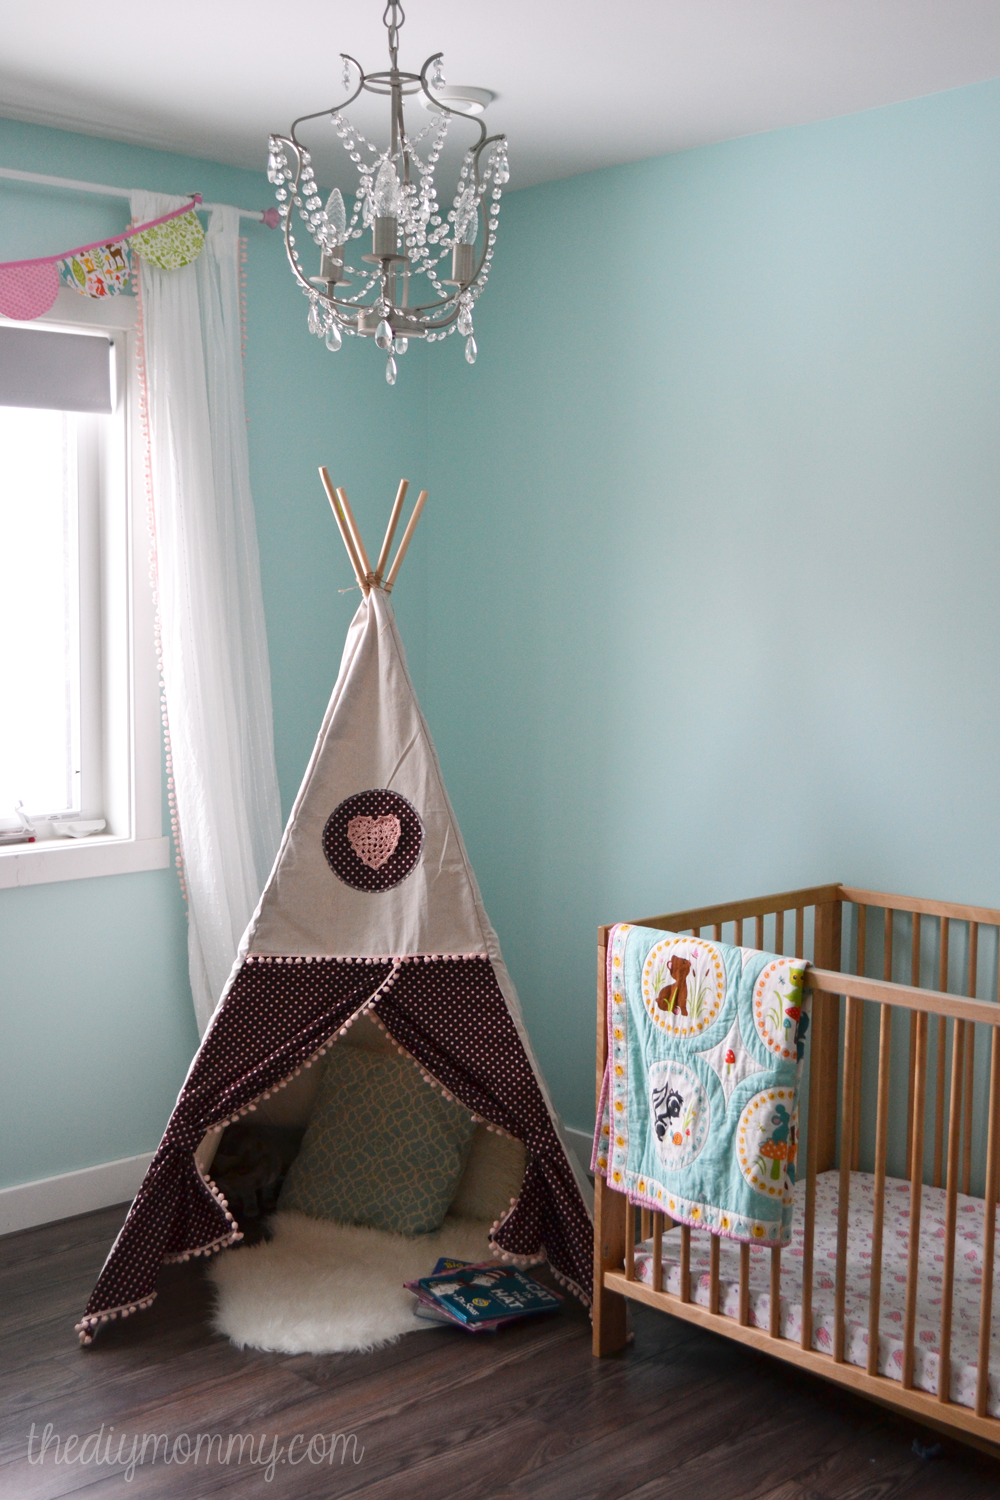
We’re SO CLOSE to finishing her room! There are just a few things left to do.
No comments:
Post a Comment