
I’m probably not the first to have thought of this way of making lined curtain panels but I’ve never seen it. I am familiar with the “usual way” of making them – you know, where you’re basically making two curtains panels. One of the curtain fabric and one of the lining fabric – lots of folding, lots of ironing and lots of straight stitching. Well with this way, you still have folding, ironing and straight stitching. Just not as much.
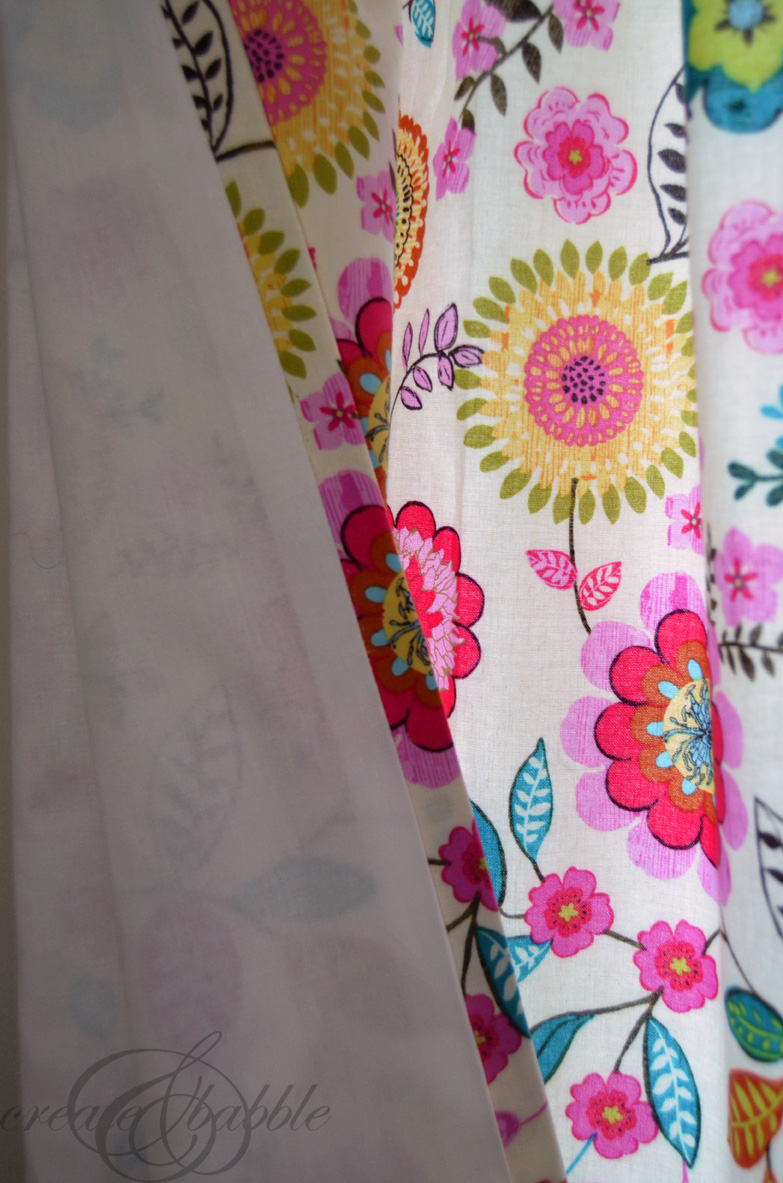
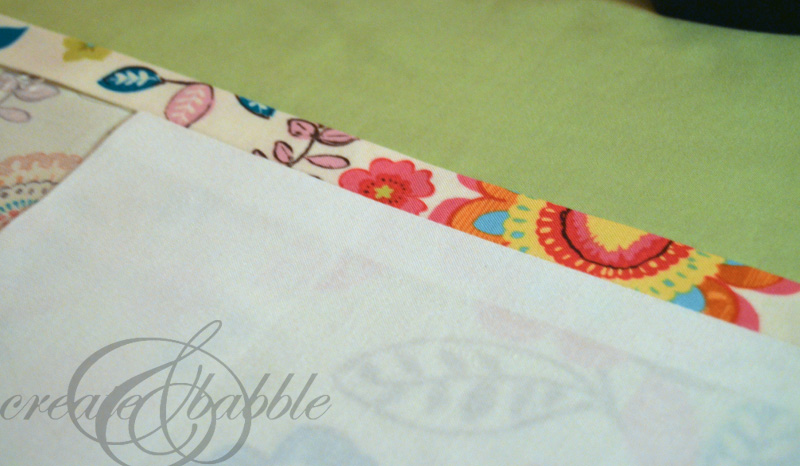
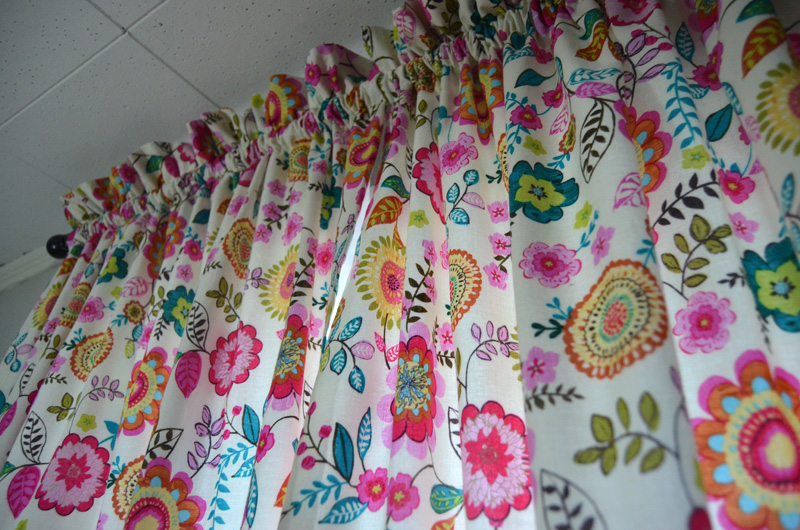
Basically, my method is sewing the fabric panel to the lining panel, right sides together, at the long edges and then turning it right side out. What makes this work is that I cut the lining fabric narrower than the curtain fabric. After the curtain is turned right side out and pressed, it looks just like a professionally-made curtain panel. See for yourself!
Here’s are step-by-step instructions for how I made my lined curtains:
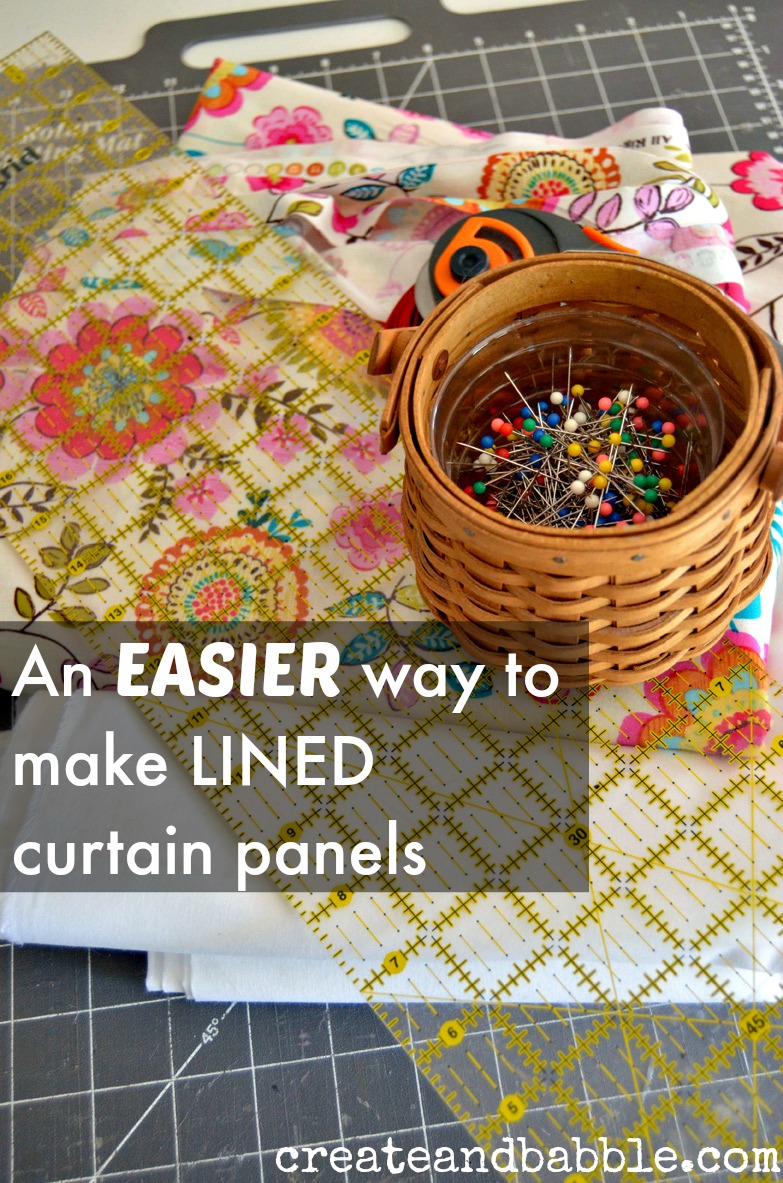
Supplies:
curtain fabric
lining fabric
pins
rotary cutter
cutting mat
straight edge
measuring tape
iron
ironing board
sewing machine
thread
Step One:
Cut two curtain panels. Determine the length of the curtain fabric by adding the desired finished curtain length with the length of the header and hem plus 2″. I am making 2 curtain panels for a narrow window in the baby’s nursery, so I cut two 84″ lengths of 44″ wide fabric to make curtains that measure 77″ long.
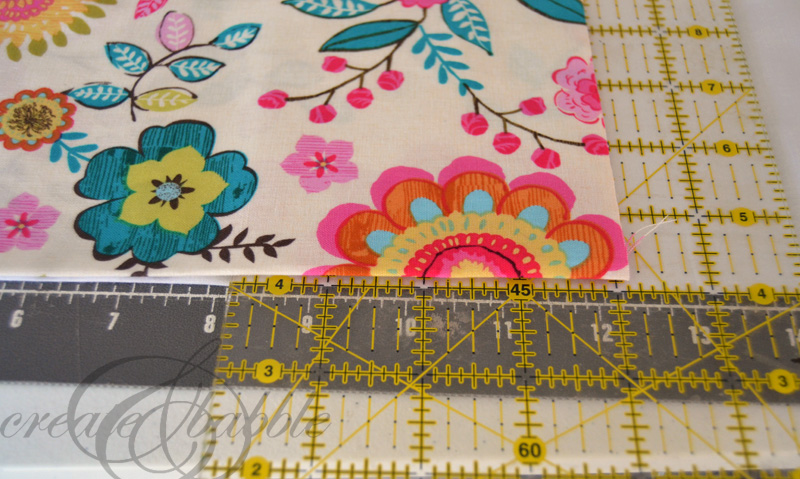
Cut two lining panels. Cut the lining panels 2″ narrower and 4″ shorter than the curtain panels.
Tip for cutting long lengths of fabric: keep the fabric folded lengthwise (just as it comes off the bold) fold in half twice, keeping fold edges aligned.
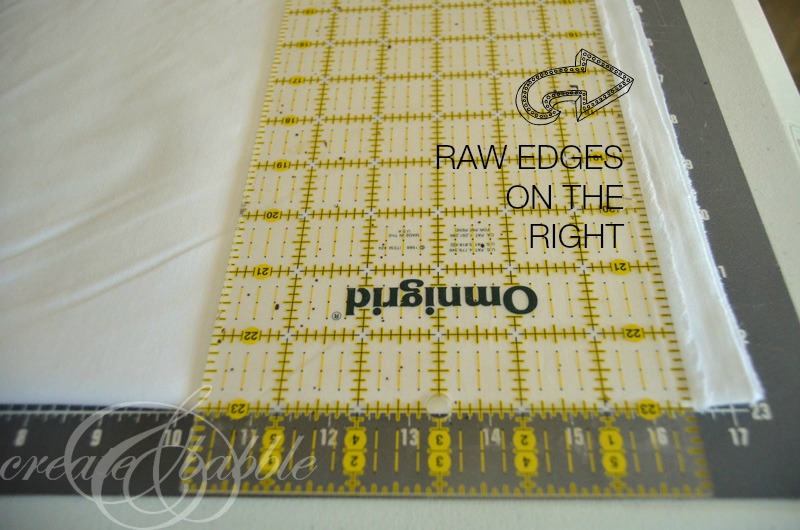
Line up the clear measuring grid (what is that thing called???) and use a rotary cutter with a sharp blade and cut to desired width. Well actually cut it to HALF of the desired width since it’s folded in half. I needed my lining to measure 42″ so I lined up the fabric on my cutting grid and cut at 21″.
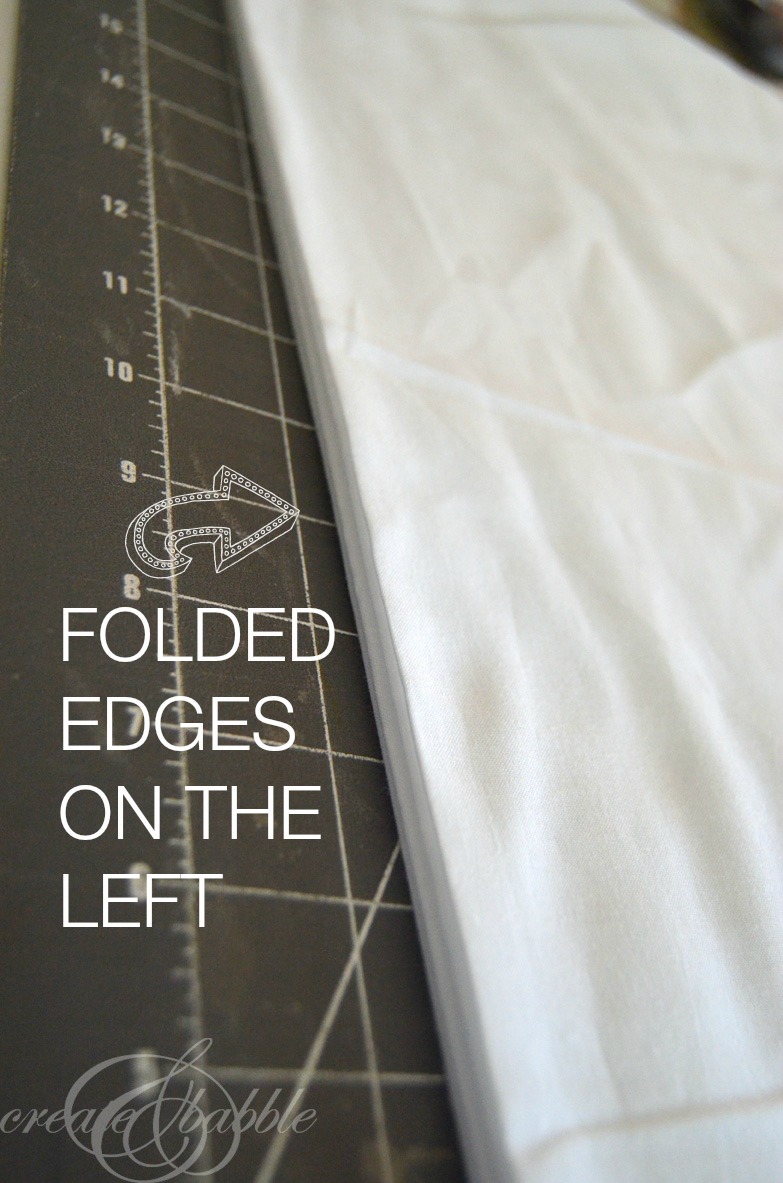
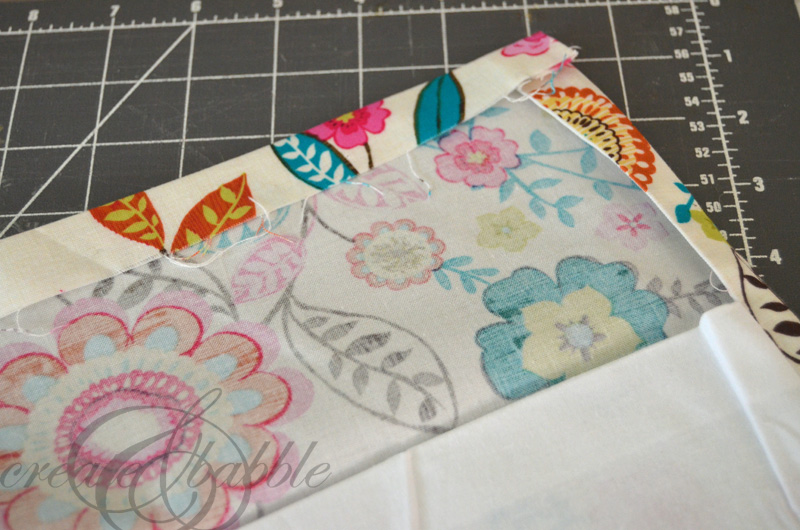
Open up your folded lining fabric and then fold down 1″ and press on both ends of the lining fabric. Fold and press again. Now line up and pin the long edges of the curtain fabric and the lining fabric right sides together and folds facing out. Stitch both sides.
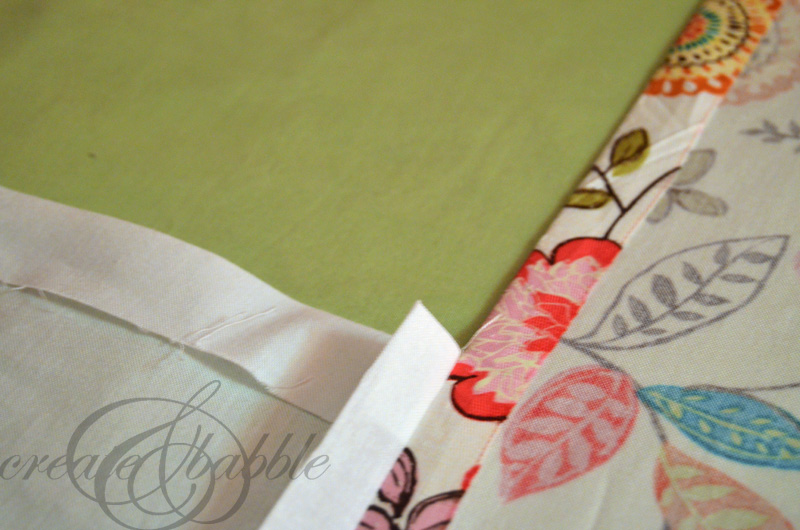
Before turning the panel right side out, press open both seam allowances.
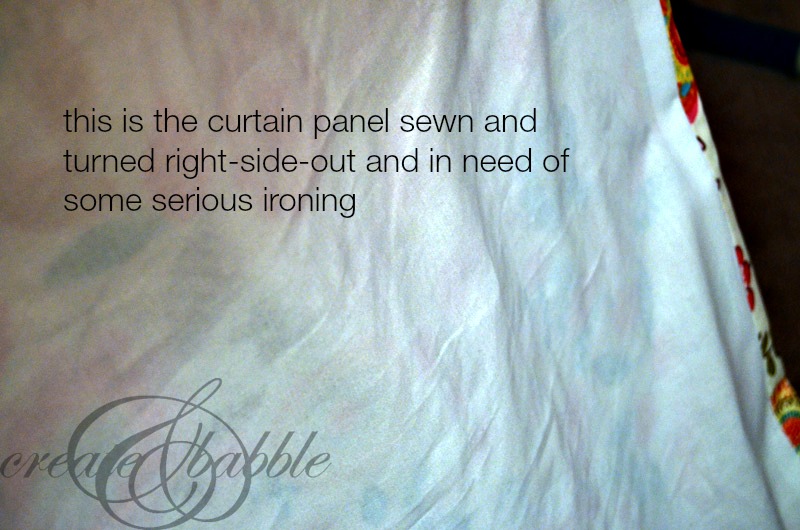
Turn sewn panel right sides out and press.
Now you have a nice, clean (and wrinkle-free ; ) lined curtain panel. Now, what about those ends??? I’m glad you asked!
Fold and press down about an inch from the end on the curtain fabric where the lining is shorter. This is going to be your bottom hemmed edge.
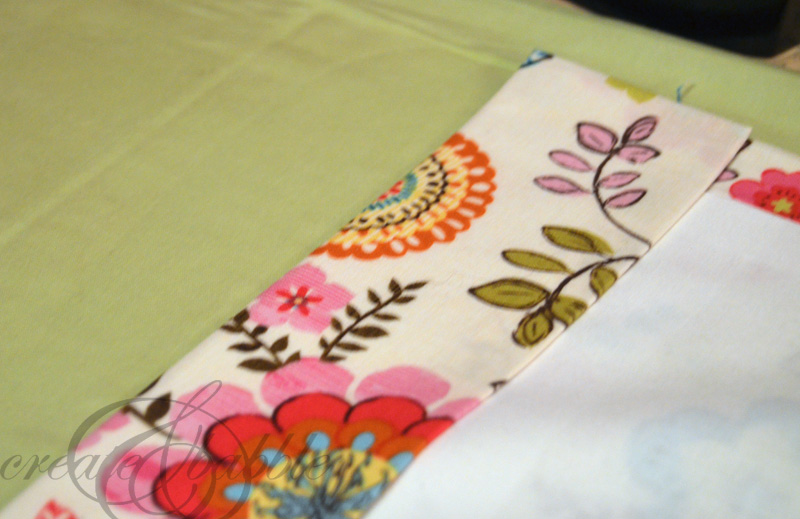
Fold up again and pin. Now you can sew in the hem by hand (what!?!?) or do what I do and use the blind hem stitch on your sewing machine. Or you could sew a straight stitch. But after going to all this trouble of making beautiful, lined curtains, you don’t really want to do that, right? Right!
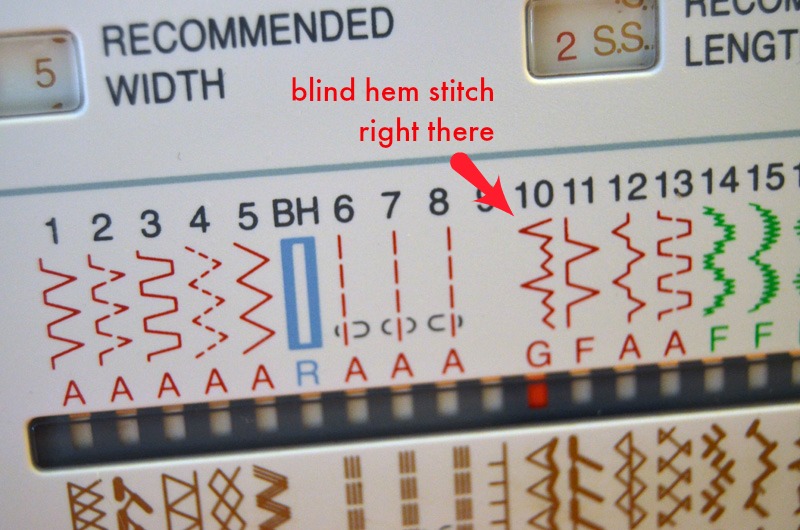
I could be wrong but don’t all sewing machines have a blind hem stitch? Ever use it? I do. Ever since I learned to sew many, many … a few decades years ago ; )
Well in case you haven’t used your blind hem stitch, here’s a little picture tutorial:
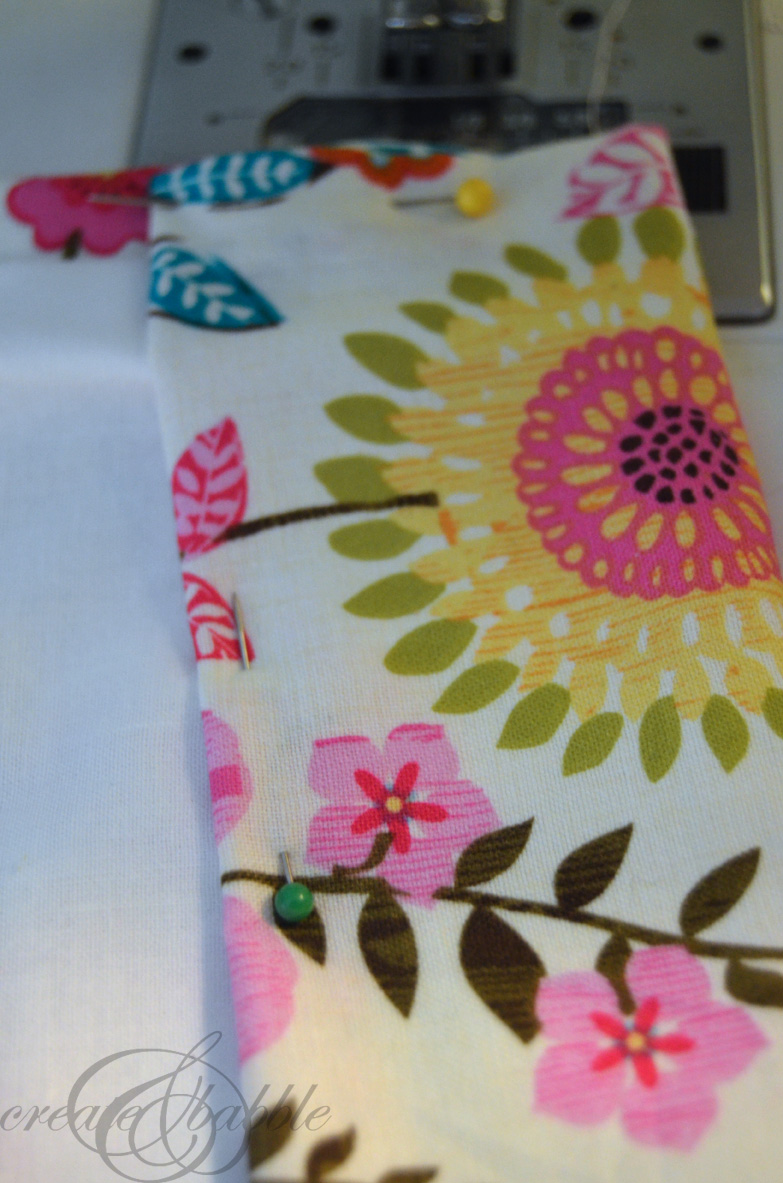
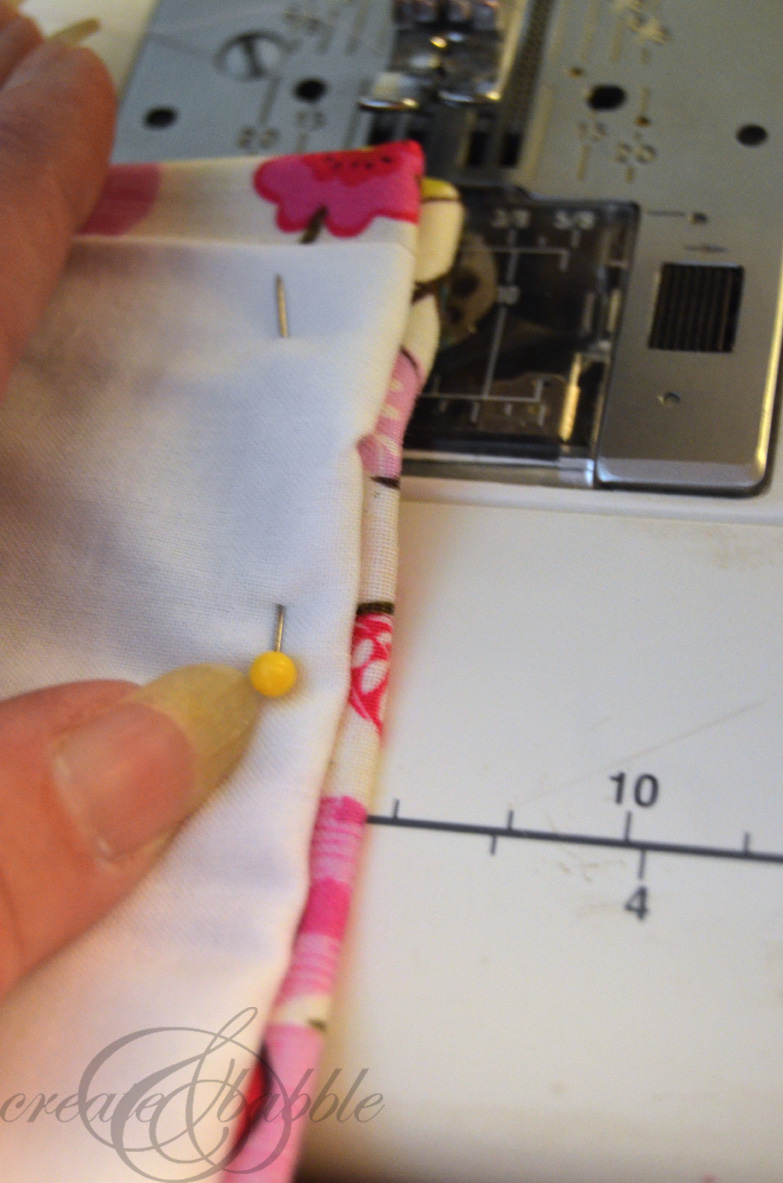
With the lining side up, fold the hem to the back leaving a small amount peeking out on the right.
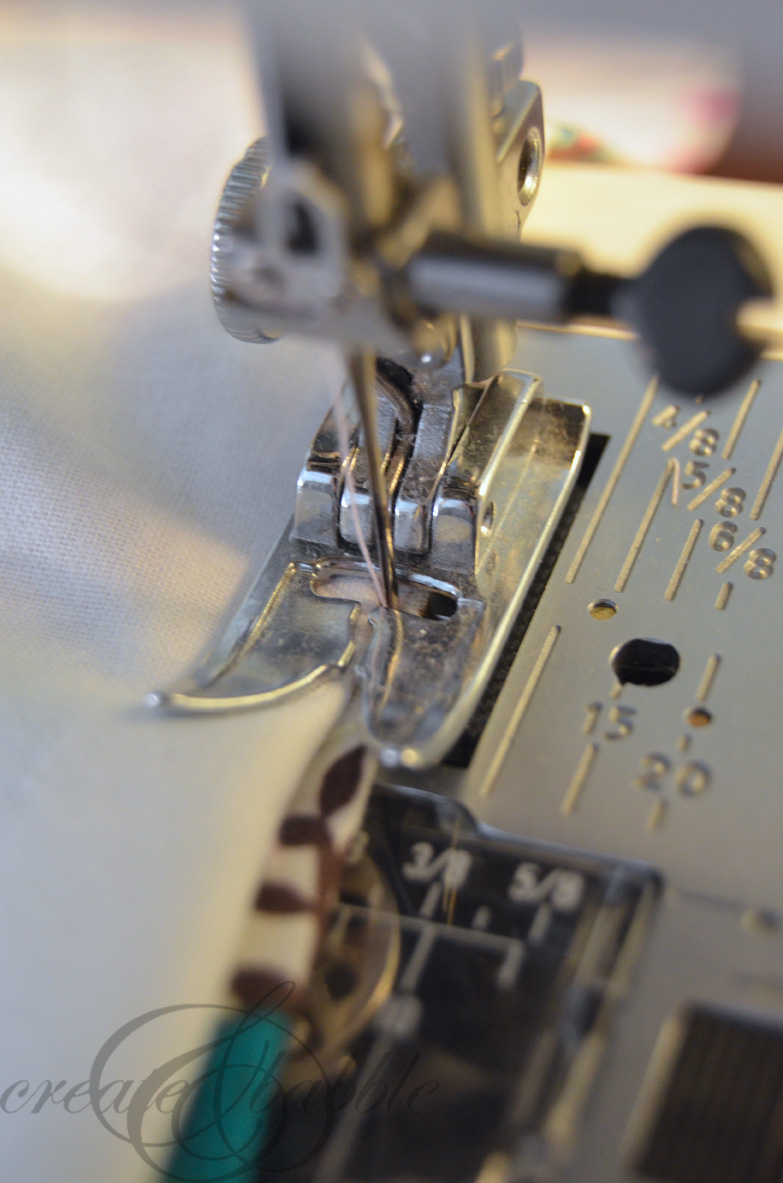
Make sure you’re using the designated foot (my machine just requires a zig-zag foot) and your machine settings are set up correctly. Slowly lower needle into the fabric on the right. The machine will stitch a few times there and then hop over to the left to catch for one stitch.
Once you’re done, take your curtain over to the ironing once again and press. If you did it right, you won’t see the hem stitch at all!
Now for the header end of the curtain. Once you have the curtain fabric folded and pressed, mark where you want the stitching lines for the pocket for the curtain rod.
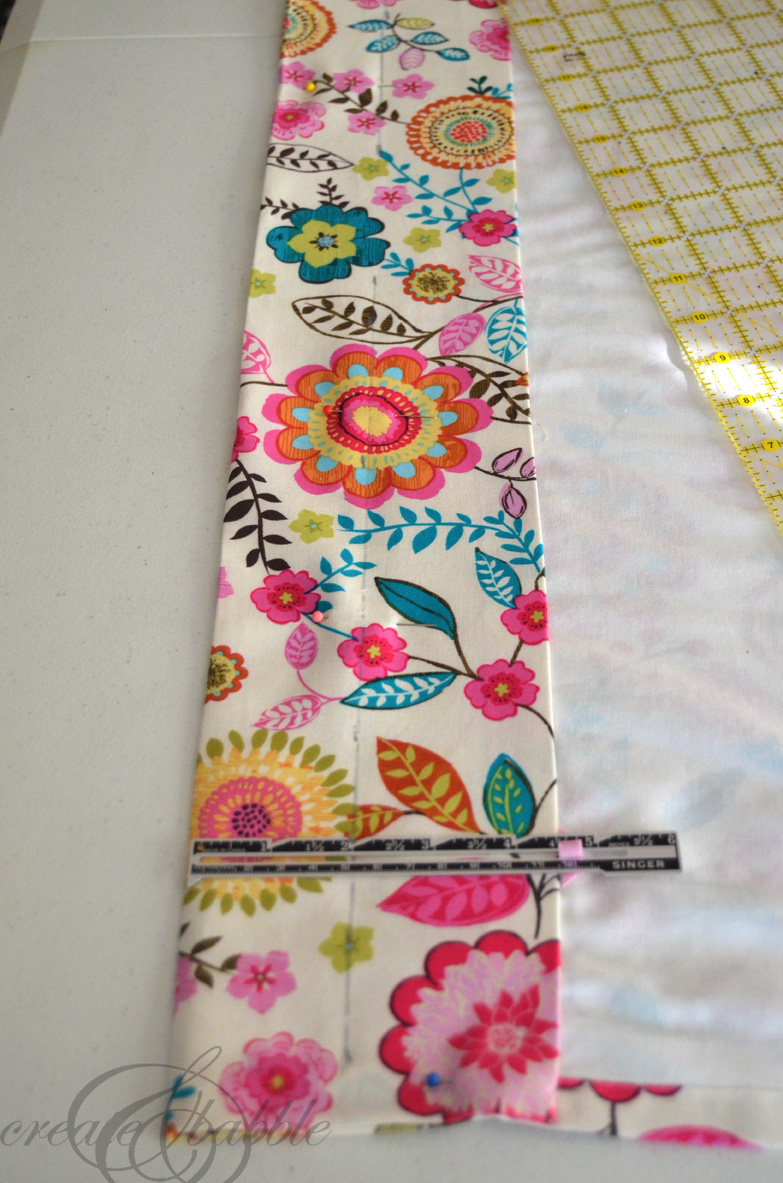
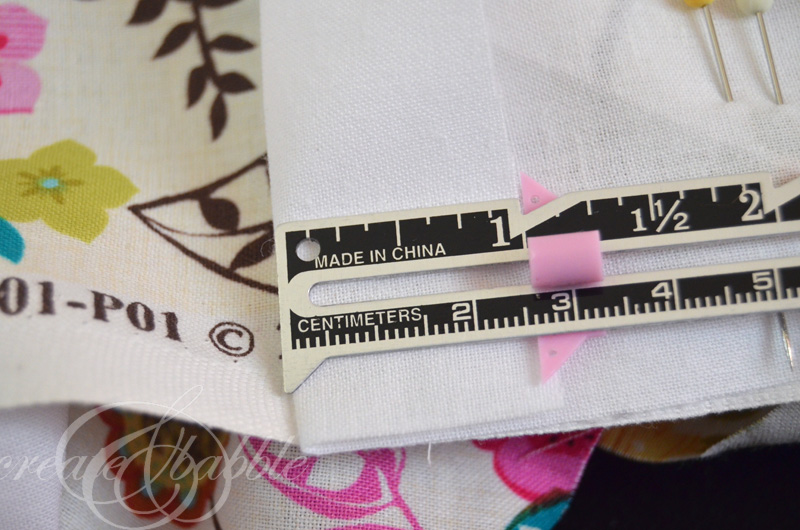
Since I’m going to be hanging these curtains on a 1″ curtain rod, I stitched two rows 1-1/2″ apart to form the pocket.
Insert your curtain and hang your lovely, new lined curtains!
credit: createandbabble.com
Basically, my method is sewing the fabric panel to the lining panel, right sides together, at the long edges and then turning it right side out. What makes this work is that I cut the lining fabric narrower than the curtain fabric. After the curtain is turned right side out and pressed, it looks just like a professionally-made curtain panel. See for yourself!
Here’s are step-by-step instructions for how I made my lined curtains:
Supplies:
curtain fabric
lining fabric
pins
rotary cutter
cutting mat
straight edge
measuring tape
iron
ironing board
sewing machine
thread
Step One:
Cut two curtain panels. Determine the length of the curtain fabric by adding the desired finished curtain length with the length of the header and hem plus 2″. I am making 2 curtain panels for a narrow window in the baby’s nursery, so I cut two 84″ lengths of 44″ wide fabric to make curtains that measure 77″ long.
Cut two lining panels. Cut the lining panels 2″ narrower and 4″ shorter than the curtain panels.
Tip for cutting long lengths of fabric: keep the fabric folded lengthwise (just as it comes off the bold) fold in half twice, keeping fold edges aligned.
Line up the clear measuring grid (what is that thing called???) and use a rotary cutter with a sharp blade and cut to desired width. Well actually cut it to HALF of the desired width since it’s folded in half. I needed my lining to measure 42″ so I lined up the fabric on my cutting grid and cut at 21″.
Open up your folded lining fabric and then fold down 1″ and press on both ends of the lining fabric. Fold and press again. Now line up and pin the long edges of the curtain fabric and the lining fabric right sides together and folds facing out. Stitch both sides.
Before turning the panel right side out, press open both seam allowances.
Turn sewn panel right sides out and press.
Now you have a nice, clean (and wrinkle-free ; ) lined curtain panel. Now, what about those ends??? I’m glad you asked!
Fold and press down about an inch from the end on the curtain fabric where the lining is shorter. This is going to be your bottom hemmed edge.
Fold up again and pin. Now you can sew in the hem by hand (what!?!?) or do what I do and use the blind hem stitch on your sewing machine. Or you could sew a straight stitch. But after going to all this trouble of making beautiful, lined curtains, you don’t really want to do that, right? Right!
I could be wrong but don’t all sewing machines have a blind hem stitch? Ever use it? I do. Ever since I learned to sew many, many … a few decades years ago ; )
Well in case you haven’t used your blind hem stitch, here’s a little picture tutorial:
With the lining side up, fold the hem to the back leaving a small amount peeking out on the right.
Make sure you’re using the designated foot (my machine just requires a zig-zag foot) and your machine settings are set up correctly. Slowly lower needle into the fabric on the right. The machine will stitch a few times there and then hop over to the left to catch for one stitch.
Once you’re done, take your curtain over to the ironing once again and press. If you did it right, you won’t see the hem stitch at all!
Now for the header end of the curtain. Once you have the curtain fabric folded and pressed, mark where you want the stitching lines for the pocket for the curtain rod.
Since I’m going to be hanging these curtains on a 1″ curtain rod, I stitched two rows 1-1/2″ apart to form the pocket.
Insert your curtain and hang your lovely, new lined curtains!
credit: createandbabble.com
No comments:
Post a Comment