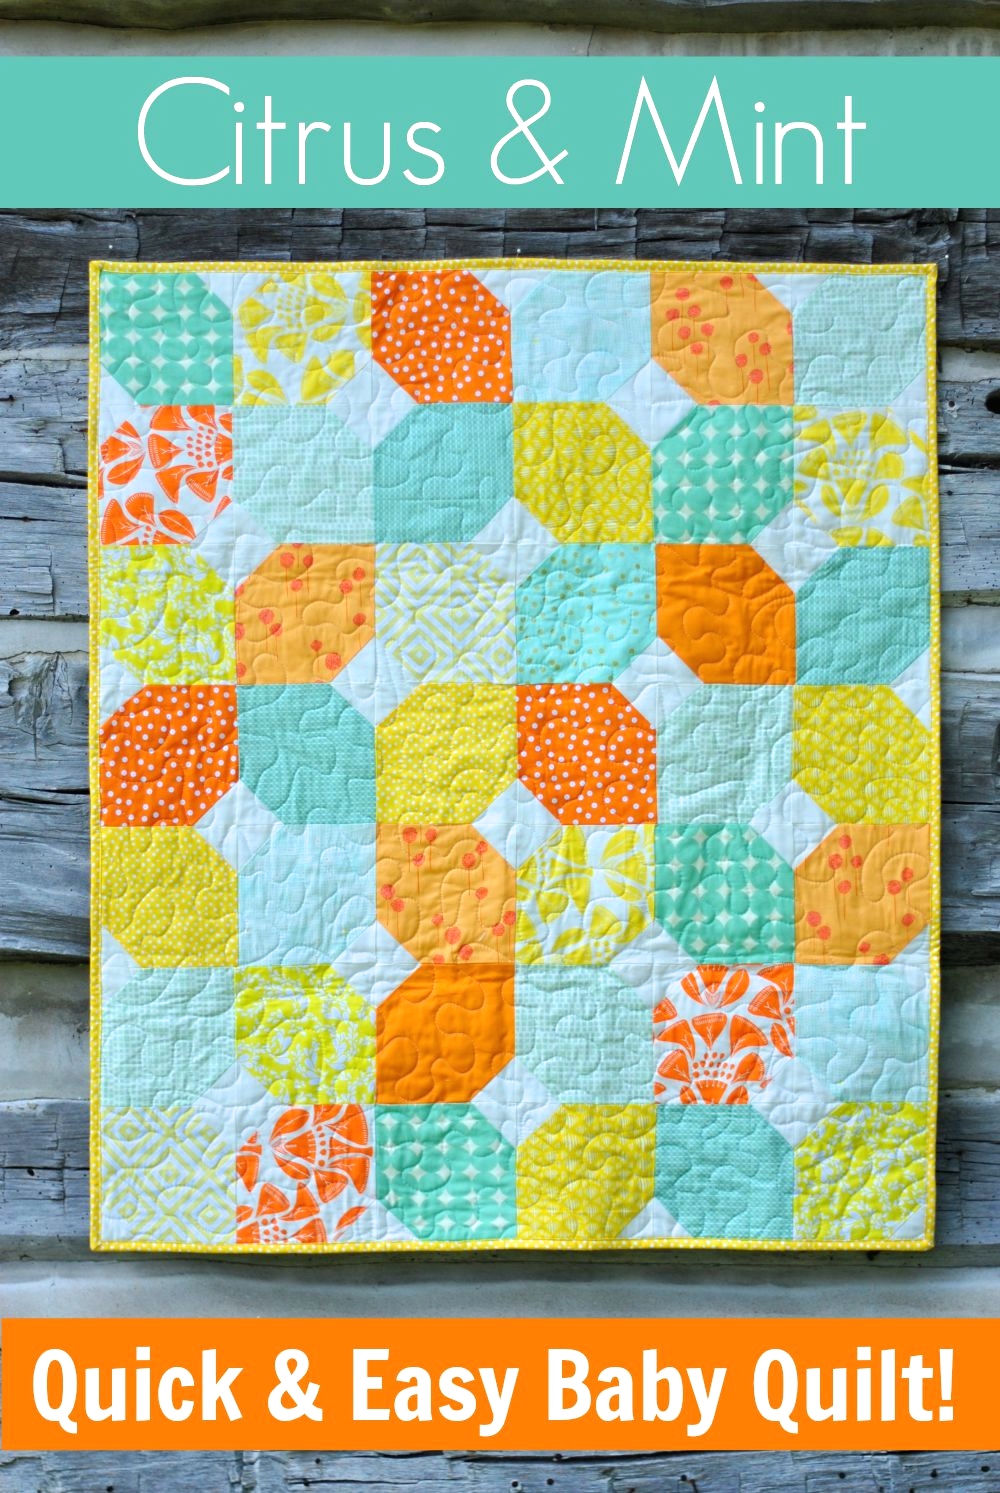
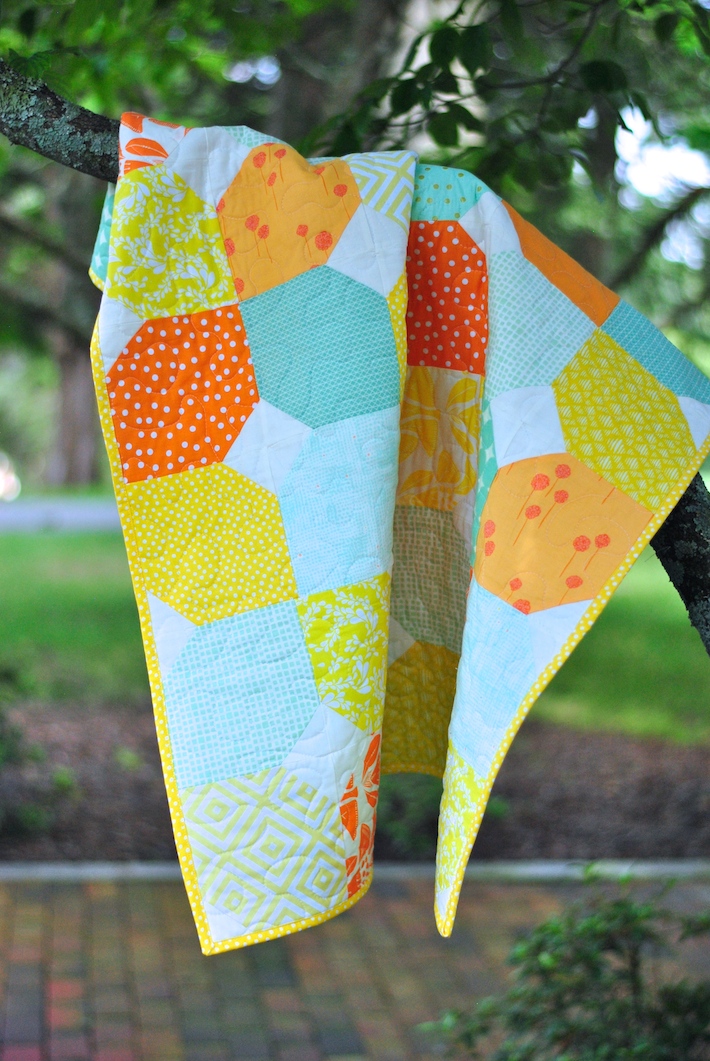
Do you love quick baby quilts? One of our most popular posts of all time on Craft Buds is my Quick Triangles Baby Quilt, and I was inspired by that project to design another free baby quilt pattern that’s great for beginners as well as experienced quilters looking for a weekend project!
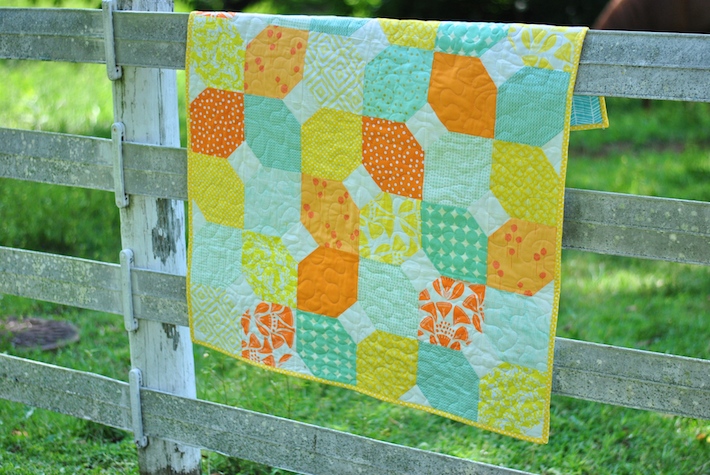
The colors of this quilt were inspired by a design seeds color palette my friends picked for their little girl’s nursery. I really loved the citrus and mint colors paired with a soft cream, but you can make this quilt in a variety of colors and it would look beautiful! If you have trouble picking a color palette for your quilt, try choosing two or three colors that work well together and pairing it with a neutral like white or grey. (One of my favorite go-to color combos is yellow, aqua and grey.)

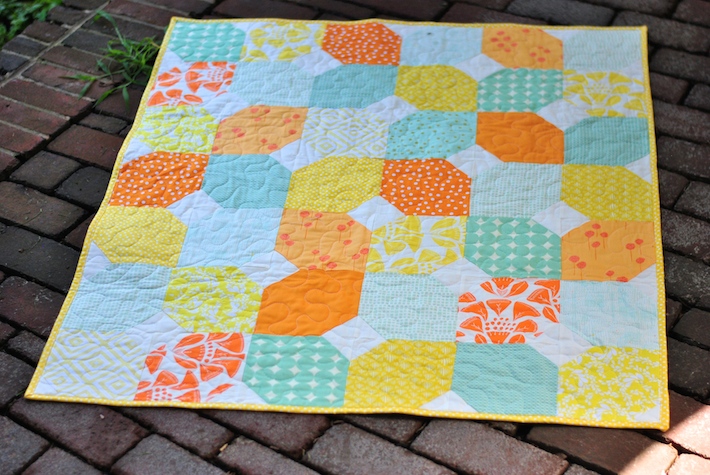
The block we’ll be sewing is called a half snowball quilt block. A full snowball quilt block uses the same technique, but with all four corners getting the triangle. This half snowball tutorial will show you how to make this block, which you can use in all kinds of projects! I hope you enjoy this free quilt pattern.
Finished quilt 36 1/2″ x 42 1/2″
Materials:
– 9 to 12 fat eighths (each makes 3 blocks), fat quarters (each makes 6 blocks) or large scraps of colored fabric in three color groups (like yellow, orange, and mint green)
– 1/2 yard of cream or white fabric for the small diamonds
– 1/3 yard of binding fabric
– Crib size batting
– 1 1/2 yards backing fabric
Cutting:
– Cut 42 squares of colored fabric 6 1/2″ x 6 1/2″
– Cut 84 squares of cream fabric 2 1/2″ x 2 1/2″
– Cut 4 strips 2 1/2″ x 44″ (width of fabric) for binding
Directions:
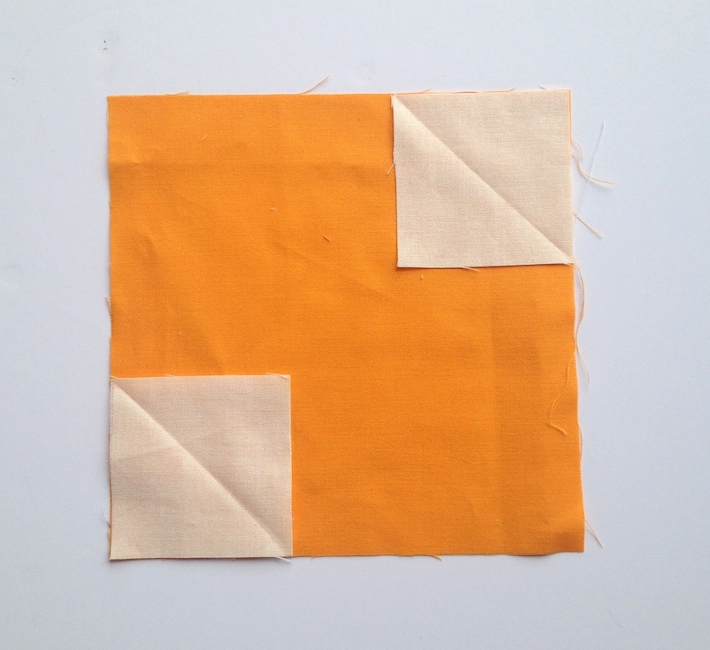
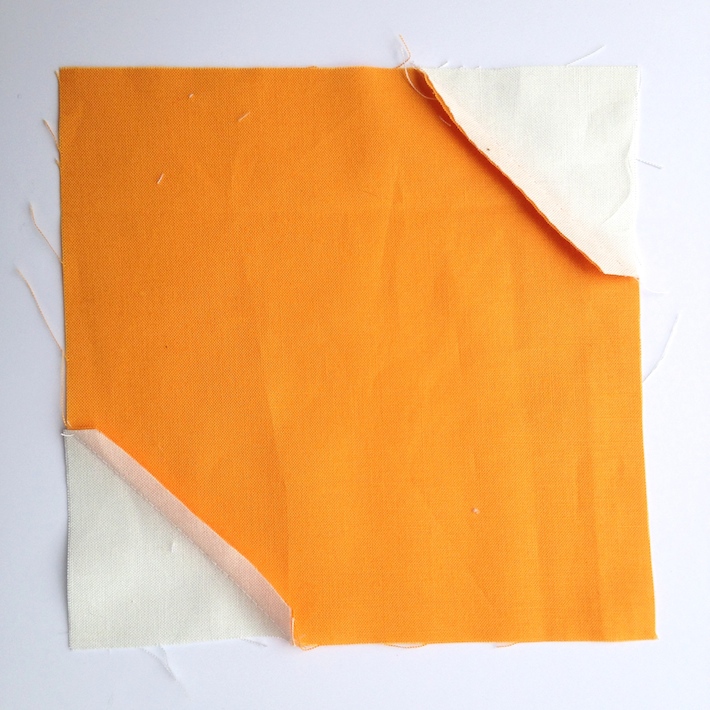
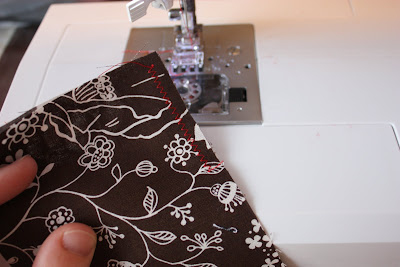
1. Fold each 2 1/2″ square in half diagonally to make a crease, and press with your fingernail. With the right sides of fabric together, place a cream square on two opposite corners of a larger square as pictured. The crease should not touch the corners of the large square.
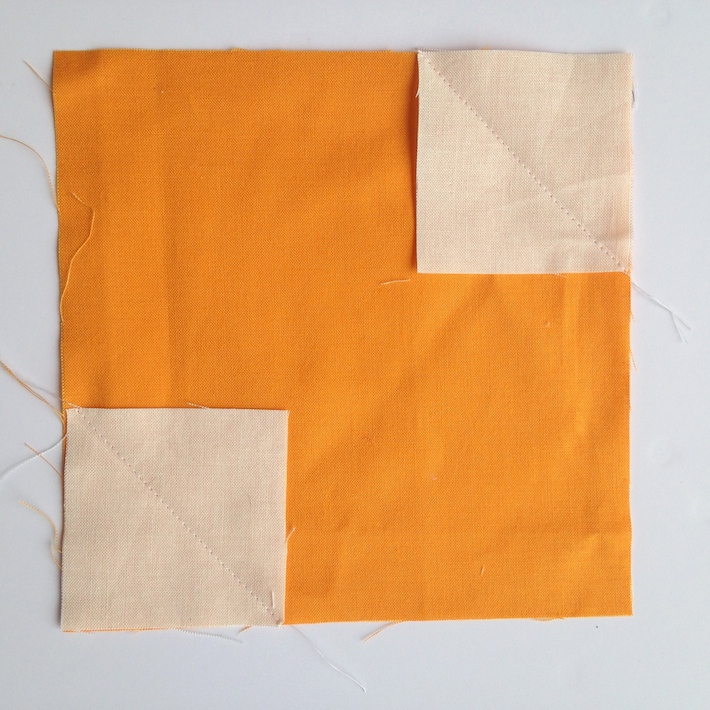
2. Stitch along the creased lines.
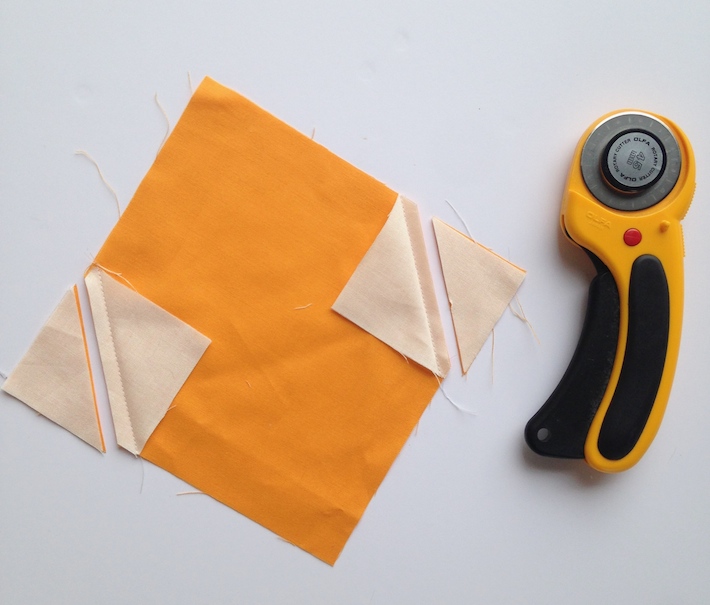
3. Use a rotary cutter and ruler to trim off the outside corners 1/4″ outside of your stitch line.
P.S. I love my OLFA 45mm ergonomic rotary cutter, and Amazon has a great price on a rotary cutter plus replacement blades! (affiliate link)
4. Press the seams toward the center of the colored block.
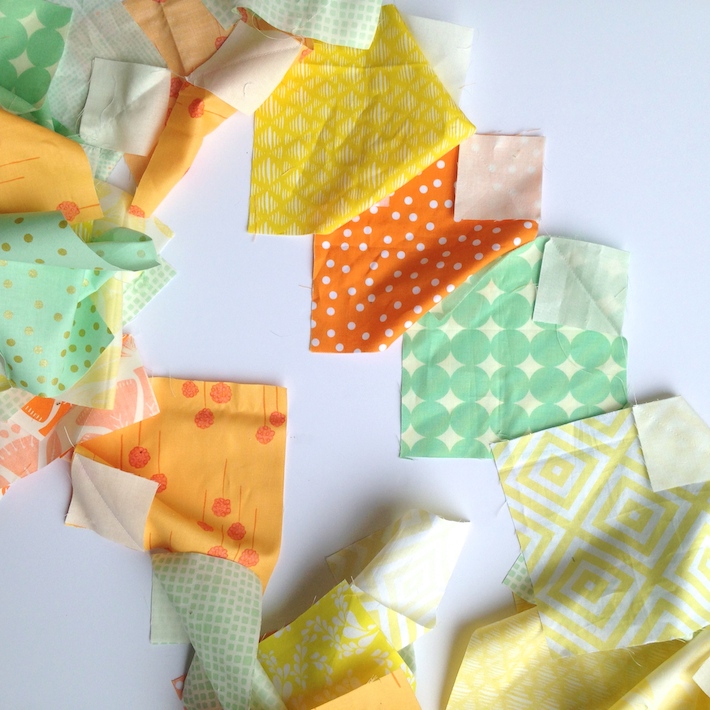
5. Tip: You can use chain stitching to speed up the process! Add one corner square to each of the colored squares without cutting your thread. Trim, press, and repeat with the opposite corner of each block.
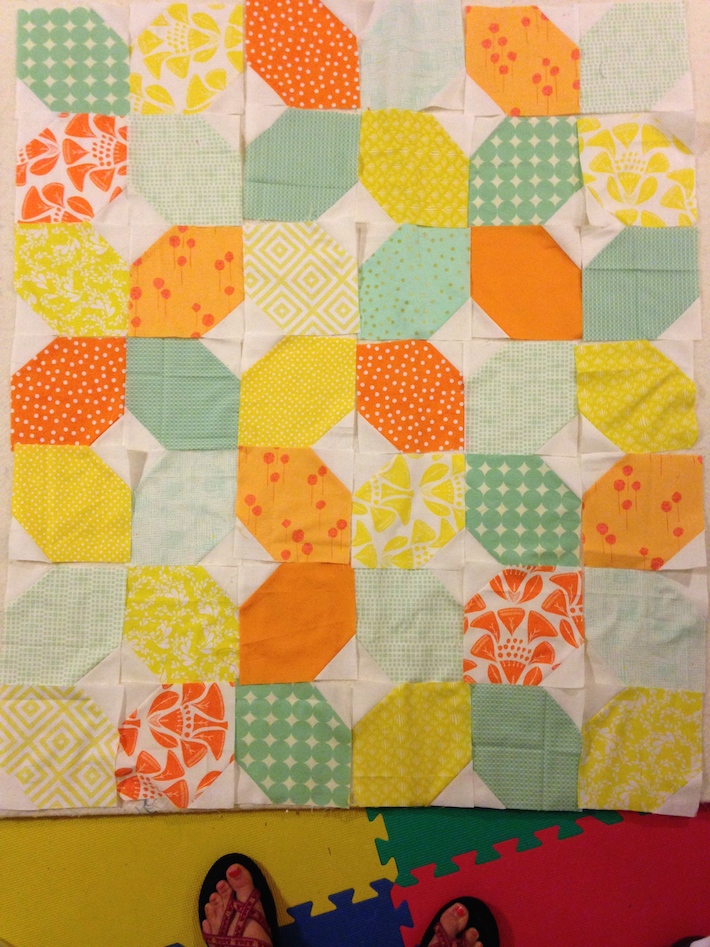
6. Arrange the blocks in 6 columns and 7 rows until you get a color placement you like. I use my portable design board to make this process easier! Tip: Once you get your final arrangement, take a picture with your phone. Nothing fancy! Here’s mine that I took with my feet in the bottom. You’ll want to refer to this while sewing, so the blocks don’t get mixed up.
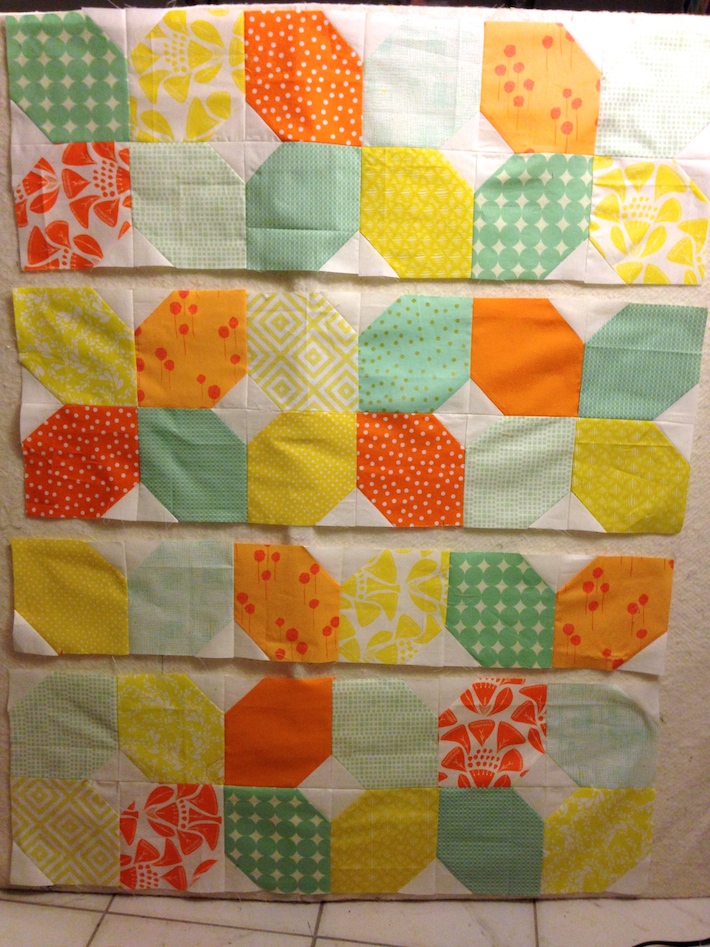
7. Join the blocks in each row with a 1/4″ seam, making sure the cream triangle seams are aligned.

8. Press the vertical seams of each row in an alternating fashion to make nested seams. To do this, take row one and press all the vertical seams to the right. In row two, press to the left… row three, press to the right… and so on. This will reduce bulk when joining together the rows, allowing the blocks to fit together snugly! I typically press all my seams open, but this type of quilt block, I really think it works better to use the nesting technique.
Once you join the rows, press the long seams between each row OPEN (as pictured above) to avoid too much bulk in the centers.
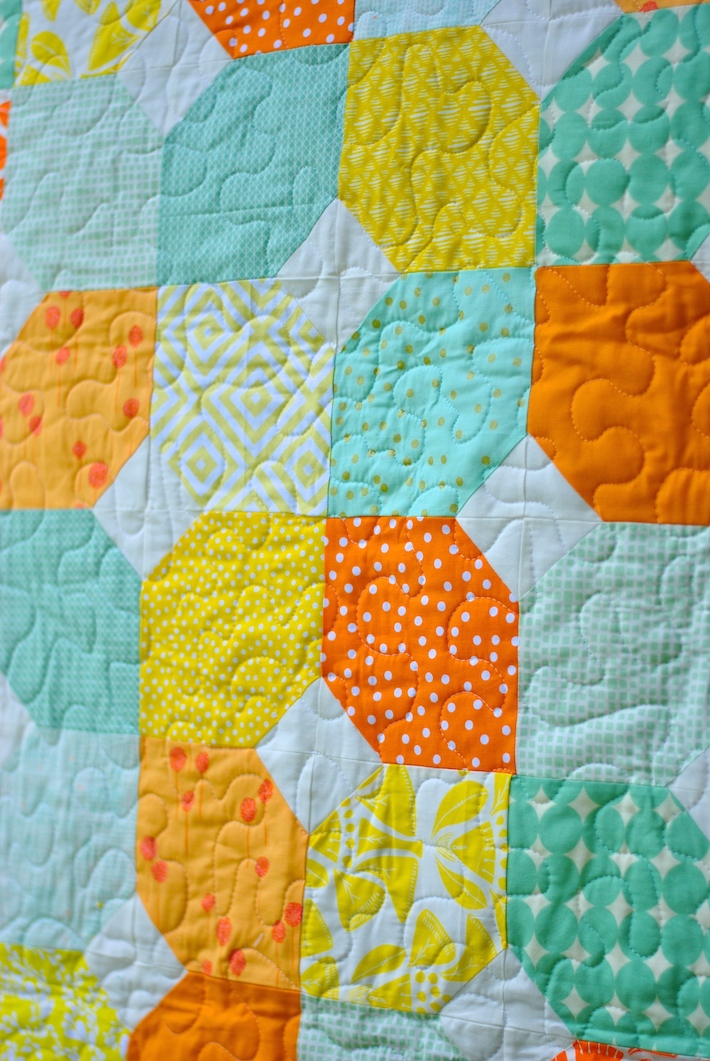
9. Baste the quilt top, batting and backing and quilt as desired. I chose a wide meandering free-motion quilting pattern, stitching through the diamonds and other seams to reinforce them.
This is a really quick and easy baby quilt pattern that you can whip up over the weekend! Break it up over 4 days if you’d like so you can spend time cutting squares, sewing the blocks, joining the blocks and rows, and quilting the top!
I quilted my project on the Baby Lock Tiara II with Madeira Thread and Quilter’s Dream batting. This was my first time using this brand of batting, and I’d have to say I’m in love! The quilt held up great and did not wrinkle during my photo shoot, and it has a really nice weight to it that I think will withstand many years of baby and toddler love!
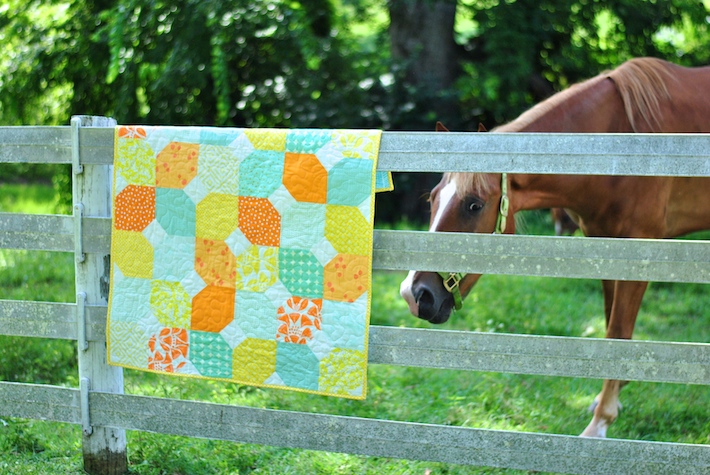
I took these photos at our local agricultural park (the same place I photographed my recent Tennessee quilt), and I was giddy that the horses were out. Of course, I was little nervous they would take too much interest in the quilt! Aside from choosing the fabrics, I really think my favorite part of quilting is taking the perfect photo of the finished product, and it helps to have really cute models.
I really hope you give this easy baby quilt pattern a try! If you make something from any of our sewing and quilting tutorials, we’d love for you to leave a comment. Happy quilting!
credit:craftbuds.com
Many times, I like to re-purpose from old clothes in my “donate to the thrift store” pile. But sometimes, I walk through the store and see an article of clothing on clearance…….and decide that the fabric used would be perfect to re-purpose. Especially when the piece of clothing is cheaper than buying un-cut fabric. (And sometimes I wish clothing stores would provide the fabric prints they have, by the yard. Especially all those great knit fabrics that fabric stores seem to be lacking.)
So, when I saw some little knit shirts at Wal-Mart (on my way to buy cough drops…..anyone else plagued with a cold this summer?)………I knew I wanted to use it to make a little dress.

(And plus, using the bottom hem of the shirt as the hem for the dress, cuts out a step.)
Comfy and light and summery. Perfect for my littlest one. And really, jersey knits seem to be the most cozything to put on her soft skin.

Little Felt Flower in her hair, tutorial here.
No need for buttons/snaps/closures…………because the braided collar stretches nicely, right over her head.

You may recognize this 5 strand braid from here. Yep, it’s made just like the headband.

Oh, did you recognize those ruffly bloomers? Yep, those are the same ones from this tutorial.

And don’t forget to throw in your tag, making it official. And one-of-a-kind. (More on my labels here.)

Nothing beats making a new little dress for a few dollars. Completely satisfying.

Go on and give it a try. Especially if you have a few items you’re getting rid of anyway.

Want to make your own little dress with a braided collar?
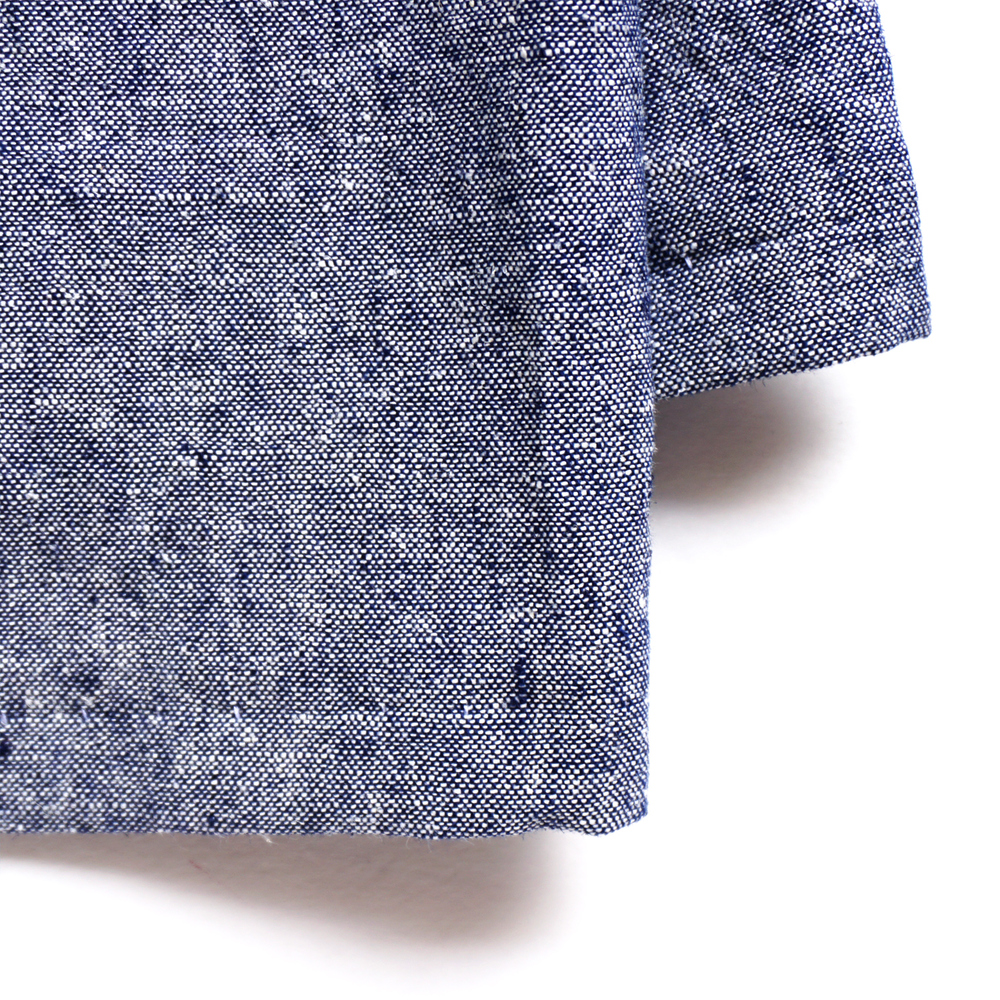
First of all, you’ll need to find a knit Tshirt (mine is jersey knit…..gives it a bit more stretch) that you want to cut up.
However, you can always start from scratch and use some great knit fabric from your fabric stash. But if you use an old Tshirt, you can use the bottom hem of the shirt as the bottom hem of your dress. Nice and easy.
***These Tshirts I have been using are the softer, stretchier Tshirts that are usually made for women. You know, the knits shirts that are usually more fitted and snug. A regular old Tshirt (like you would get if you were playing on the city league softball team or something) are a bit stiffer and will still work. But they aren’t as stretchy and semi-flowy and cozy. So I really like using these stretchy jersey knits shirts best for re-purposing. Jersey knit stretches more and is a bit softer. And when you cut a strip of it (along the stretch of the fabric) and then pull it at each end, it will stretch out a bit and curl along each long edge. A regular old Tshirt won’t stretch and curl the same way. Now, go run your hands along the shirts in your closets and drawers and you’ll see what I mean.
Place a dress that already fits your little girl (or granddaughter/niece/friend) on top of the Tshirt and line up the bottom of the dress with the bottom of the shirt. Make sure you make both layers even, as you will be cutting through both pieces of fabric at once. Now, cut a slight A-line shape for the sides and then rounded holes for the arms. (Use the dress as a guide.) Don’t cut the dress straight off at the top…….give it a slight curve so that it will curve with the rounded braided collar. Make sure that you add some extra width to the dress for seam allowances and also because the dress will be gathered in at the top.

After this picture, I made the dress slightly less of an A-line at the sides, because it made the sides too pointy at the bottom. My final A-line was just very slight. You could cut yours with straight lines at the sides and that would work too……..but I liked just a bit of an A-line better. It gave the dress a bit more shape.
Now, you have a front piece and a back piece to your dress.
Next, place the front piece and back piece together with right sides together and sew along both sides of the dress…….using a zig-zag stitch, a serger, or other knit friendly stitches (like the one here).

Now, cut two 1.5 inch wide strips from your Tshirt scraps……..make them as long as the arm hole opening. Fold the strips in half lengthwise, then open them up and fold each outer edge in towards that center fold. Iron flat. (Just like bias tape)

Now, use these strips and sandwich them around the arm hole openings…..finishing off the raw edges. Just I did to finish off a quilt (like I did here) or an apron (like I did here). Sew slowly as you sew around the curve……….lifting your needle and re-adjusting your needle presser foot as needed. (And be sure you are catching the folded fabric on the bottom side too.

Now, make a basting stitch a 1/4 inch from the top curved edge of the front and back of the dress. Gather in the fabric until it’s about as wide as your little girl is across her chest, in between her arm pits. (Need help with gathering? Click here.)

Now, make 2 more strips of folded fabric, just like you did above…….but cut these strips 2 inches wide. And make them slightly wider than your gathered front and back. Sandwich your strips along the top, just like you did with the arm holes…….making sure to hide your basting stitch and gathers. Pin in place, leaving about an inch at each end to hang off.

Sew each strip into place, making sure to catch all of your layers and folds in your seam. Then tuck under each end towards the inside and stitch in place.

Now, make a 5 strand braid (or a 3 strand words too), making sure to cut the fabric with the stretch of the fabric, so that the finished braid will stretch and will fit over the child’s head. Full tutorial on the 5 strand knit braid, found here. Turn the braid into a circle, finishing it off like the headband tutorial noted.
**Don’t braid super tight, or it won’t allow for enough stretch.
To be sure that your braided circle is large enough, try fitting it over the child’s head. See if the braid falls onto the chest where you think the neck-line should go……and isn’t too big either.
Now, fold the braided circle in half and attach the center of the front half of the circle to the top edge of the front of the dress, right on top of the strips of fabric that you sewed in place. Do this step by hand, using a needle and thread. Curve the braid along the top edge of the dress and it will stay in place and continue to curve nicely. (Unless you braided too tight, then it will have a hard time curving.) Now attach the back half of the circle to the outside of the back of the dress, right along the neck line. (Need help with hand-stitching? Click here.) Be sure that there is extra braid at each side, to fit nicely over the shoulders.

Another note, be sure that the back of the circle is lined up with the back of the dress.
And that’s it.
Your little dress is complete. And ready to be worn.

Enjoy!
credit: makeit-loveit.com
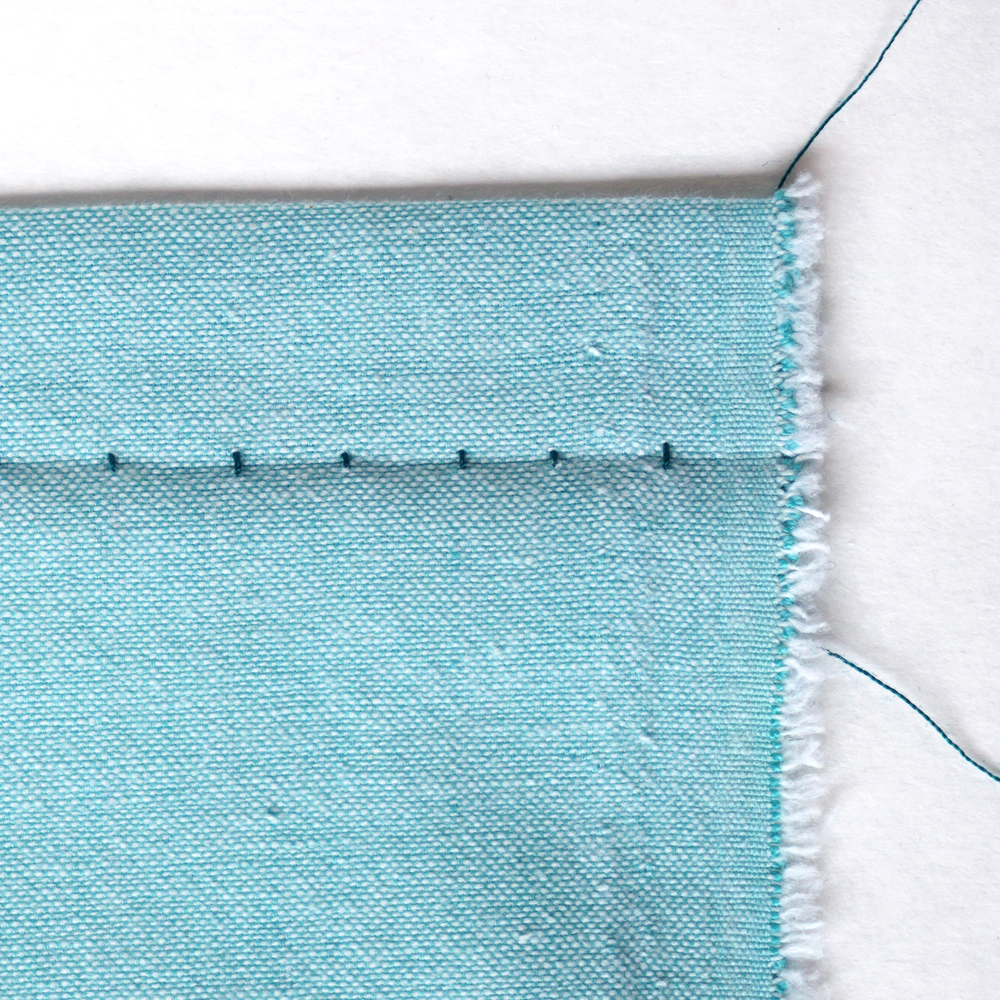
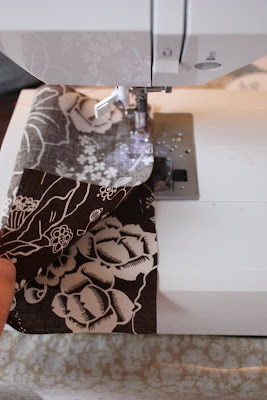
Sewing right sides together. Now, what does that really mean?
Well, most fabrics have 2 different sides. The right side has the print on it or the correct texture, or the side you really want to see on the outside of your finished product. The wrong side is the other side. When you read, “sew right sides together” in your instructions, place the right sides (or printed/outer side) of the fabric together, line the 2 pieces of fabric up, and sew them together.
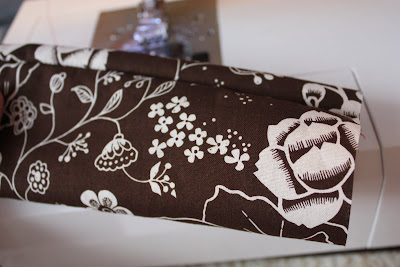
If you just sewed 2 separate pieces together, you would then flip it over and see them nicely joined, with no mess. If you were sewing 2 sides of one piece together, you would then turn right side out to see your nice new seam. Then you can iron it flat or do whatever the directions say to do next. Not so tricky now, right?
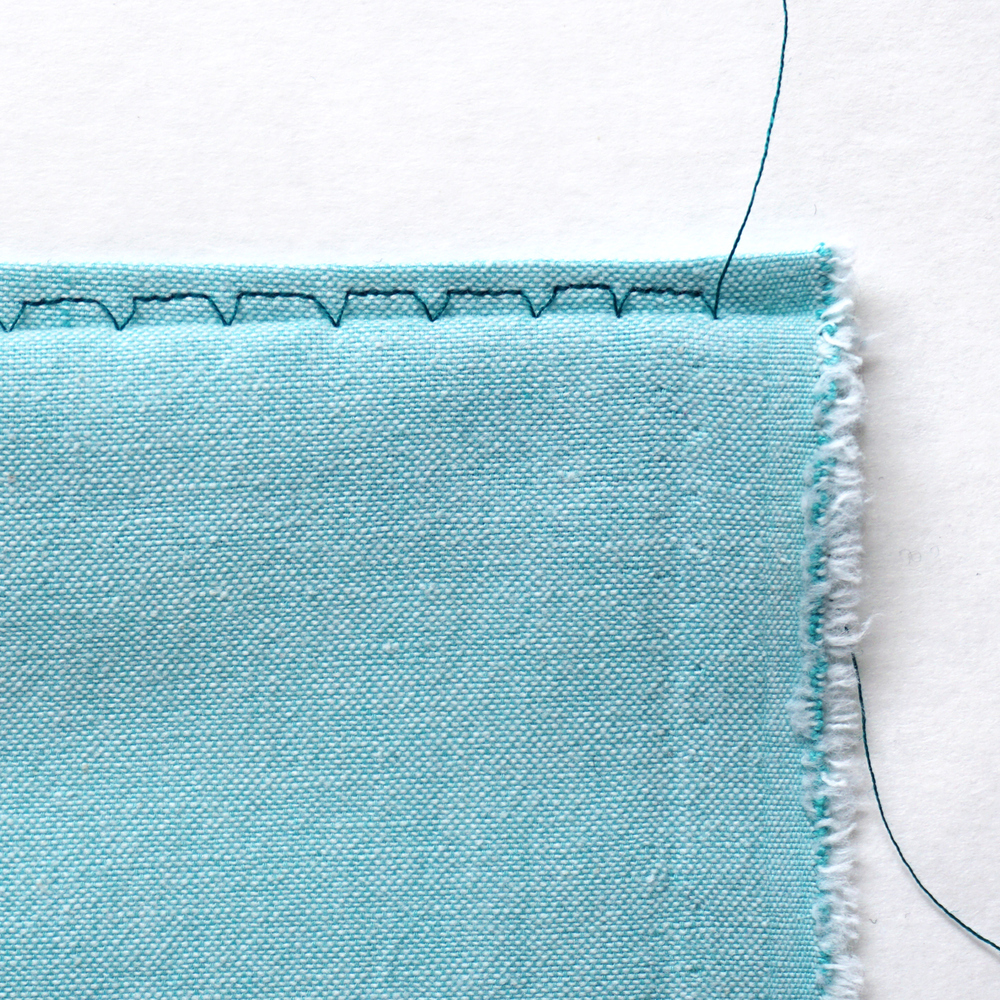
Zig-zag. How do you do it and what is it used for?
When I received this question I knew this person (any any others) was going to love how easy the answer to this is.
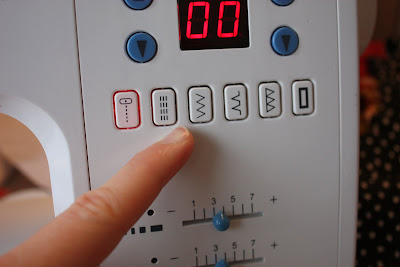
Well, somehwere on your sewing machine, there is a zig-zag function. (The macine does all the work, not you.) The zig-zag stitch is adjustable, meaning you can make the stitches wider/more narrow and very spaced/really close together. just play around with it on some scrap fabric. Here’s mine:
Then just stitch away.
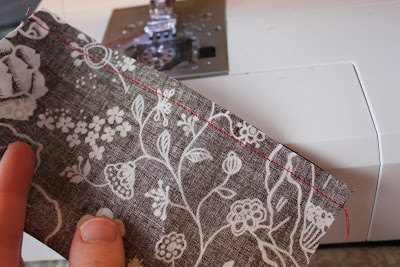
Now, why do I use the zig-zag stitch? I use it to give my seams an extra finish to them and to keep them secure. Right next to my original seam, I make a zig-zag seam (between the seam and the edge of the fabric) and then I trim off the excess fabric. This helps to keep the ends from unraveling and then weakening my original seam.
Also, I use the zig zag as a seam that has some stretch to it. Like if you sew with knit fabric (that stretches), using a zig-zag stitch will allow the knit to still stretch.
I also use it around the edges of fabric that I have appliqued to another piece of fabric.
Anyway, handly ‘ol zig-zag stitch…….try her out.
credit: makeit-loveit.com
Sewing right sides together. Now, what does that really mean?
Well, most fabrics have 2 different sides. The right side has the print on it or the correct texture, or the side you really want to see on the outside of your finished product. The wrong side is the other side. When you read, “sew right sides together” in your instructions, place the right sides (or printed/outer side) of the fabric together, line the 2 pieces of fabric up, and sew them together.
If you just sewed 2 separate pieces together, you would then flip it over and see them nicely joined, with no mess. If you were sewing 2 sides of one piece together, you would then turn right side out to see your nice new seam. Then you can iron it flat or do whatever the directions say to do next. Not so tricky now, right?
Zig-zag. How do you do it and what is it used for?
When I received this question I knew this person (any any others) was going to love how easy the answer to this is.
Well, somehwere on your sewing machine, there is a zig-zag function. (The macine does all the work, not you.) The zig-zag stitch is adjustable, meaning you can make the stitches wider/more narrow and very spaced/really close together. just play around with it on some scrap fabric. Here’s mine:
Then just stitch away.
Now, why do I use the zig-zag stitch? I use it to give my seams an extra finish to them and to keep them secure. Right next to my original seam, I make a zig-zag seam (between the seam and the edge of the fabric) and then I trim off the excess fabric. This helps to keep the ends from unraveling and then weakening my original seam.
Also, I use the zig zag as a seam that has some stretch to it. Like if you sew with knit fabric (that stretches), using a zig-zag stitch will allow the knit to still stretch.
I also use it around the edges of fabric that I have appliqued to another piece of fabric.
Anyway, handly ‘ol zig-zag stitch…….try her out. You might become fast friends.
credit:makeit-loveit.com