The blind hem stitch is one of those finishes that you see in many professionally made garments and draperies. It boggles my mind that more home stitchers are not utilizing this simple stitch more.
Today, let’s demystify the process and let me show you just how easy it is!
Blind Hem Stitch

This project is for all levels.
Skill Level- 1 ButtonSupplies:
fabric to hem
thread
Tools:
sewing machine
blind hem foot
iron and ironing board
Basic Instructions:
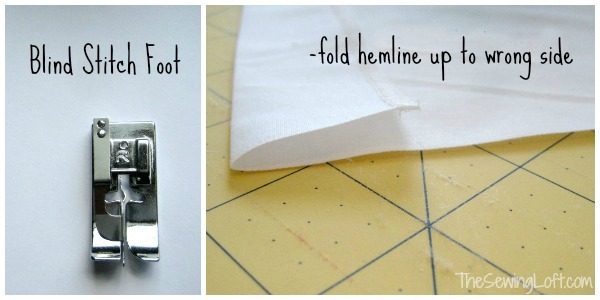
1. The first thing you need to do is find your blind stitch foot; also sometimes referred to as “R” and your blind hem stitch setting on your machine. Refer to your sewing machine manual. Depending on your fabric you will select from the standard blind hem stitch or the blind hem stitch stretch.
2. Prepare your hem line. I like to clean finish the edge with an overlock stitch. Fold up your hem -wrong side to wrong side and press.

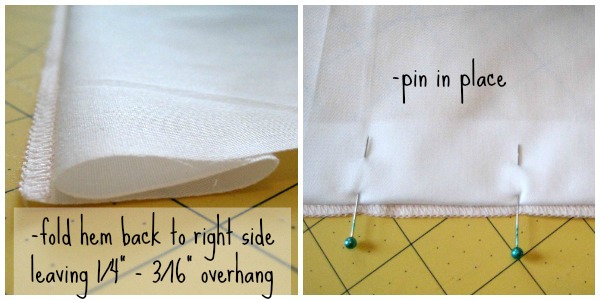
3. Flip hem back to right side leaving 1/4″ to 3/16″ over-hang; finger press or pin in place.

4. Set machine to correct blind stitch for your fabric. Line up the guide bar on presser foot along the fold line of hem and stitch. You will notice that every few stitches the needle will jump to the left side to catch the fold. This is creating a pick.

Tip: Decrease the stitch width if the needle picks up too much of the hem fold. Increase the stitch width if the needle does not capture enough of the hem fold. Use coordinating thread or dyed to match thread to allow the blind stitching to disappear into your project.
Now are you wondering where all those extra accessories are that came with your machine? Well, no worries if you can not find the blind stitch foot. You can still create this invisible hem line with some practice and your standard presser foot. Remember, practice, practice, practice!
credit:thesewingloftblog.com
Today, let’s demystify the process and let me show you just how easy it is!
Blind Hem Stitch

This project is for all levels.
Skill Level- 1 ButtonSupplies:
fabric to hem
thread
Tools:
sewing machine
blind hem foot
iron and ironing board
Basic Instructions:
1. The first thing you need to do is find your blind stitch foot; also sometimes referred to as “R” and your blind hem stitch setting on your machine. Refer to your sewing machine manual. Depending on your fabric you will select from the standard blind hem stitch or the blind hem stitch stretch.
2. Prepare your hem line. I like to clean finish the edge with an overlock stitch. Fold up your hem -wrong side to wrong side and press.

3. Flip hem back to right side leaving 1/4″ to 3/16″ over-hang; finger press or pin in place.

4. Set machine to correct blind stitch for your fabric. Line up the guide bar on presser foot along the fold line of hem and stitch. You will notice that every few stitches the needle will jump to the left side to catch the fold. This is creating a pick.

Tip: Decrease the stitch width if the needle picks up too much of the hem fold. Increase the stitch width if the needle does not capture enough of the hem fold. Use coordinating thread or dyed to match thread to allow the blind stitching to disappear into your project.
Now are you wondering where all those extra accessories are that came with your machine? Well, no worries if you can not find the blind stitch foot. You can still create this invisible hem line with some practice and your standard presser foot. Remember, practice, practice, practice!
credit:thesewingloftblog.com

No comments:
Post a Comment