Showing posts with label
#alborj #sewing #machine #needle #thread #stitching #fashion #newlook #Tips #tricks #sewingessential.
Show all posts
Showing posts with label
#alborj #sewing #machine #needle #thread #stitching #fashion #newlook #Tips #tricks #sewingessential.
Show all posts
 Everyone has bad habits. Whether you aren't the best housekeeper, you cut corners on your work projects or you eat unhealthy foods while you are supposed to be dieting, everyone has bad habits. If those bad habits are part of your sewing experience, however, it may be time to say goodbye to them. Hopefully, you also have some good sewing habits that are helpful to your efforts. Below is a list of some bad sewing habits that people who sew tend to develop. If you have one or more of these habits, it may be a good idea to work toward changing the habit into a good one instead.
Thread Storage: Is Your Thread Out in Plain Sight?
Many novice sewers tend to leave thread out on the table. Even if you opt for a basket or small box that looks organized, it is still open to the air and the dust and lint that regularly floats through the room. In order to keep thread free of dust and avoid clogs to the sewing machine, thread should be stored in a sealed container.
Fabric: Do You Know What You Have Stashed at Home?
Some crafters choose to head to the fabric store and see what they can find. However, if you do this and don't check your current inventory at home, you may end up with fabric you already purchased. This means money spent on fabric you still may not have determined is good for a project. This means you have a lot of fabric laying around and no use for it.
Work Ethic: Do You Take Breaks or Work for Hours on End?
If you work on a lot of projects, you may get sucked into the project at hand and forget to take breaks. While this may seem like a good habit to be in, it actually is bad for you and the sewing machine. This isn't even considering the other household tasks you miss or meals you don't make. Hours at the sewing machine means your eyes get tired, your hands start to hurt and other parts of your body ache. This can mean the project suffers too. If you want a better result, it is a good idea to take breaks and give yourself a chance to recover from the time you have spent on the project.
Holding Sewing Pins: Do You Put Them In Your Mouth?
This may seem convenient, but it is a very bad idea. It is far too easy to swallow pins, which is not good for your health. Not only can the pins end up in your stomach, but you can accidentally inhale a pin into your lung, which can do a lot of damage.
Starting a New Project Using an Untested Technique
You may find a new technique for sewing that seems like a great idea. However, before you start a project using material that you have in limited supply, try taking extra material you don't have a use for and testing yourself and the new technique on that. In this manner, you can get a handle on the new technique, then you can have better results with the project where you want to see it used.
Fabric and Designs: Make Sure They Mesh Well
There is a reason to use specific types of fabrics for certain garments or specific designs. It is not helpful to try to use any fabric for a project, when that project would work best with specific materials. Certain fabrics are far too challenging to use for a project. Pay attention to the fabric suggestions on the pattern and save yourself some hassle.
Fabric Marking: When Ballpoint Isn't Your Friend
If you have a sewing room, make sure all of your ink pens are stored elsewhere. A water soluble pen and a chalk pencil will be the best tools to have on hand. Make sure to test to see if a water soluble pen will stain the fabric you are using for a specific project. If that is the case, then use the chalk pencil instead.
Fabric Scissors: Keep Them In The Sewing Room
In direct contrast to your ink pens, your fabric scissors should be stored in the sewing room. Likewise, they should NOT be used for items other than fabric. This dulls the scissors and makes them less effective when you are trying to cut fabric for a project. Keeping them in the sewing room keeps them safe for projects and avoids accidental use as well.
Measurement: Measure Twice, Cut Once
There is a reason old sayings get to be old sayings: they have a point. Even if you think you know the measurements for a certain project, take them again before you start cutting. You may find a change in the measurements or realize you made a mistake the first time. Either way, measuring twice saves on wasted material.
Sewing Machines: Create and Stick to a Maintenance Schedule
Lint and dust tend to build up in the moving parts of your sewing machine. If you ignore this important fact, your work could be ruined when the machine stops running. To avoid this, make sure you do regular maintenance on your machine. It is also a good idea to take it to a professional who works at an authorized repair shop when issues get out of hand.
Now that you know some of the common bad habits crafters pick up in regard to sewing, you may be able to avoid them. That can mean positive changes for your sewing projects and a boost to your budget.
If you have any other bad sewing habits you would like to share, please help your fellow sewists out and leave a comment below!
credit: so-sew-easy.com
 I must admit, I am new to blogging, but I wanted to start with a topic that is near and dear to my heart.
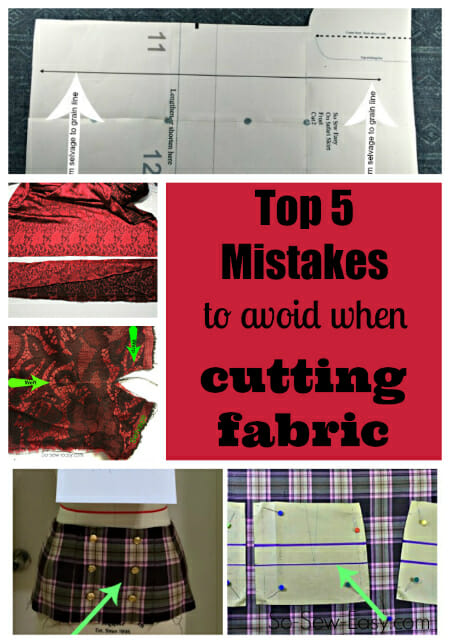
So many people spend hundreds of dollars on a good sewing machine, use it for a few months and then they give up, and put it back in the box in the basement where it remains for years –untouched. Somewhere in their sewing journey, many aspiring sewers become afraid or demotivated because the project did not turn out the way they wanted. A big pile of unfinished garments is a dead give away! Our brain is trained to look for inconsistencies and it is how we judge beauty. Unconsciously, we know something is off and we give up before we finish.The reason for this doomed journey starts at the fabric store but is often made worse by how we end up cutting the fabric. Here are my top 5 mistakes to avoid when cutting fabric.
The reason for this doomed journey starts at the fabric store but is often made worse by how we end up cutting the fabric. Here are my top 5 mistakes to avoid when cutting fabric.
#1. Not washing the fabric before cutting.
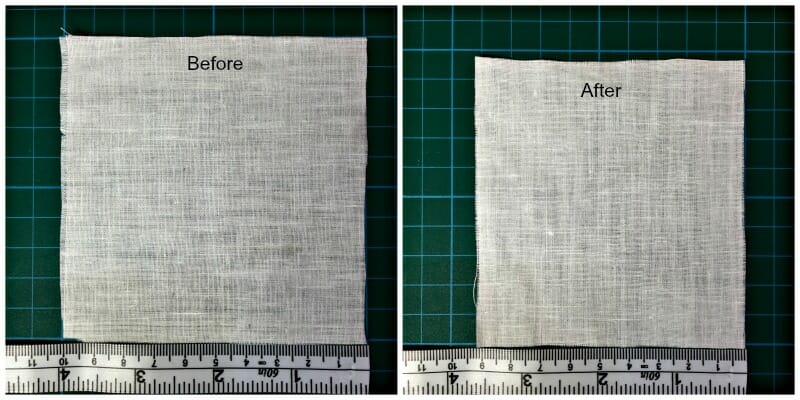
Natural fibers come from vegetable material (cotton, hemp, flax etc) or animals (wool, cashmere, silk, alpaca etc). Below I have tested a 100% cotton swatch measuring 10 x 10cm, I soaked and washed the swatch and ironed it with a very hot iron. As you can see in the second photograph the swatch shrunk considerably, this is because when fabrics are being woven the fibers are being tensed.
When these fibers come in contact with water they relax, but by applying heat once again, the fibers go back to their original state. This process is similar to how a spring works. Normally it will take several washes for some fabrics to relax as it would in a spring. A good example of this is cotton and linen. Both fabrics become smooth after a few washes, but when too much heat is applied –for example when we forget the cloth in the dryer for too long– the size of the garment will shrink considerably.
#2. Not squaring and truing the fabric.
To understand squaring and truing we need to learn a couple of terms that relate to fabrics. On the picture below, the yarn being pulled is called the weft. The yarn that runs perpendicular to it is the warp. In order to true the fabric we need to make a cut on the weft, pull the thread and cut in the space that is left by the thread, as is seen on the picture.
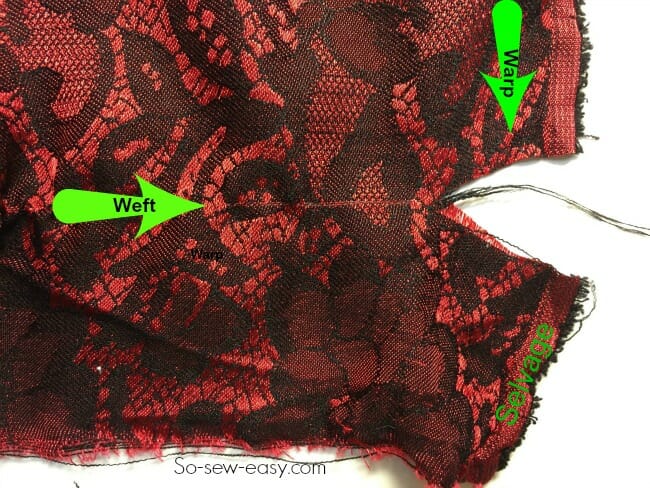
The weft, wrap and selvage of fabric
To be able to square the fabric one most cut away the selvage which is the fuzzy edge that runs along the length of the fabric or, as is known, the warp of the fabric. Cut away the edge by making a cut and pulling the thread and cutting the same way you did with the weft or the horizontal thread.
Sometimes when you go the fabric store, the chatty woman at the counter makes a cut in the fabric and rips your piece out, this action actually distorts the shape of your fabric. In the following picture, you can see the effect of this action. I lost almost a bit more than a 1/4 of a yard getting the fabric to have a uniformed edge!
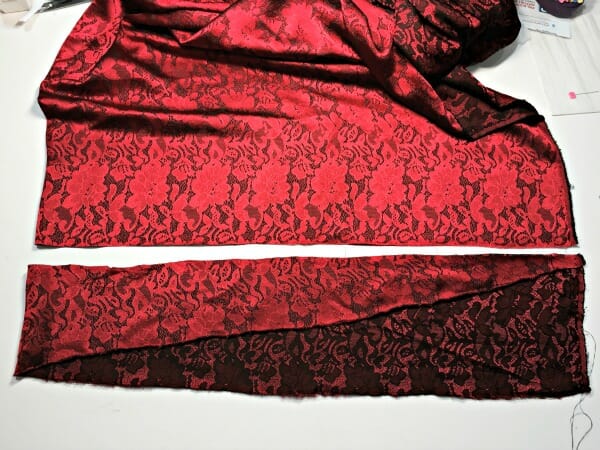
Find the true edge of the fabric to cut on grain.
To square the fabric, after you have taken the selvage out, get someone to help you pull one corner of the fabric while you pull the diagonal corner, change and do the other corners. You are trying to restore the shape of the fabric. This step is particularly important if you are using cotton/elastane combination.
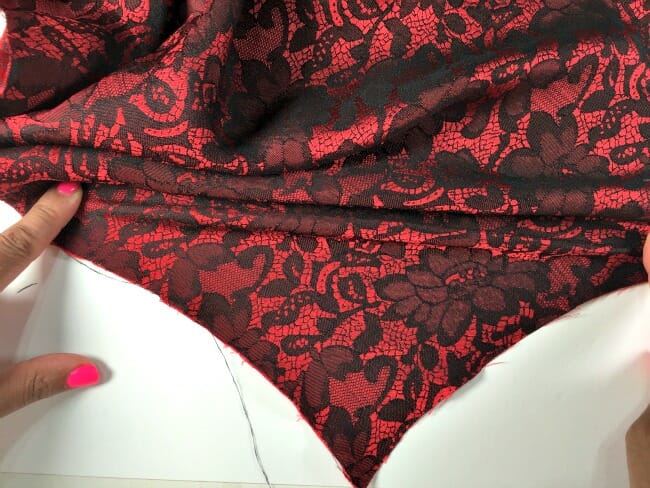
#3. Not following pattern instructions for placement of the fabric grain.
Ending up with something so tight that it looks like Shapewear or a too-short mini skirt because you didn't shrink your fabric before sewing is still not as bad as not using the grain of the fabric to place your pattern. To find the grain of your fabric, all you have to do is square and true the fabric, join the side where the selvage was and fold the fabric.
The fabric grain is indicated on the pattern as the long arrow that runs the length of the pattern piece it will cause the fabric to hang correctly because it will be cut at a right angle. Not only does it look bad, it's annoying to wear because your skirt or pants will keep twisting around or clinging to you, but more importantly, the pieces of your pattern will not match. This is simply because the fabric will stretch at an angle. A perfect example of this is a skirt cut on a bias. We've all had t-shirts where they cut slightly off grain to save time and it twists around the torso.
Avoid this by making sure to place your pattern pieces accurately on grain when you cut out your patterns. You can achieve this by measuring the distance from the selvage to the grain arrow and making sure it is equidistance, as show on the picture below.
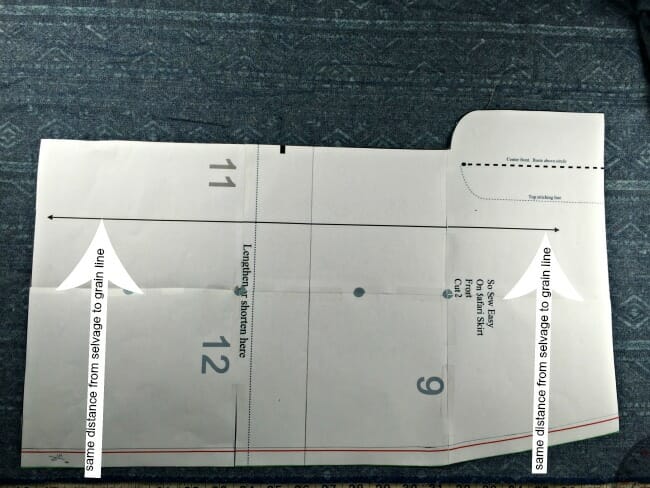
#4 Not having enough fabric to match plaids or stripes.
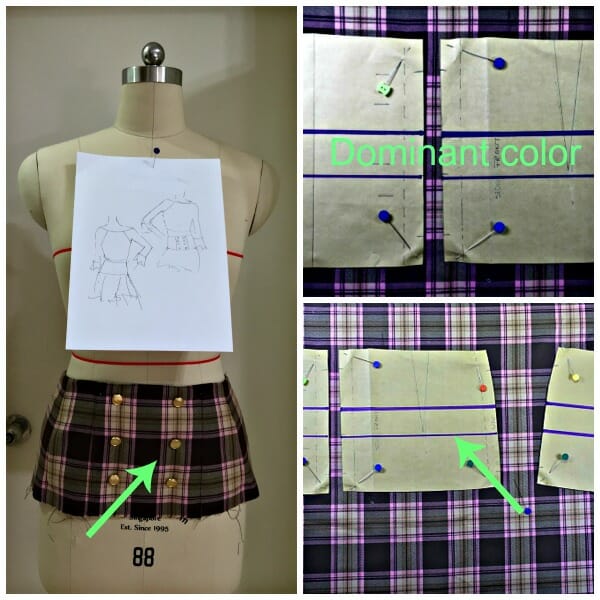
This is the classic mistake easily avoided by buying more fabric and placing the pattern so it matches the prints or plaid. On your pattern, mark where the most prominent color. In my example below, I have marked the brown color in all the pattern pieces, because is the most dominant, notice how you actually will use more fabric because not only you have to use the direction of the color, but also you have to maintain the grain of the fabric. As a rule, how much fabric you will need, will always depend on your size and the width of the fabric you intend to use.
#5 Using the wrong fabric.
A thin silky fabric will not make an appealing jacket due to its lack of structure. It would however, make a very good lining. A knit fabric will perform differently from a woven fabric because of the stretchability of the knit, therefore, the pattern pieces on a knitted garment are going to be less wide than normal patterns. All Patterns will give you suggestions for what fabrics to use. It is possible to substitute the fabric according to its drapability.
Follow the instructions on the back of the envelope to the letter. It will be clearly marked what kind of fabric will be best suited for the pattern, study the drawing, see how the garment falls away or clings to the body. Look at the illustration and try to match what the designer have used. For a sample of swatches and their common uses please watch this video
credit:so-sew-easy.com
 Knowing good basic sewing skills always comes in handy. But sometimes, challenging fabrics can still be too much to handle. Indeed, what may seem like simple tasks of folding and cutting a fabric can become frustrating –not to mention the difficulties that will be encountered when we start running our sewing machines through these uncooperative fabrics.
Generally, when dealing with challenging fabrics, there are some things we can do to immediately improve the situation. Adjusting your machine’s thread tension up and down until you identify the best setting for the particular fabric can do wonders. Speeding up as well as slowing down the sewing may make your sewing machine run smoothly over the fabric. You may just have to experiment a little. Simply making sure that the fabric is free of dust or any adhesive residue may also make it cooperate better with your sewing.
However, if these quick tips don’t work, then you can read on and take note of some of these helpful hacks and tips for sewing difficult fabrics.
Fragile and Thick Fabrics
 Sometimes we work with fabrics that are so fragile that there is a possibility that they tear up when we try to cut them. Soaking these delicate fabrics in lukewarm water can give us better results.
Long bladed scissors are also helpful in cutting these fabrics aided by a heavy ruler along the edge so that there is less stress exerted on the fabric. You might also try a rotary cutter.
Use strips of starched fabric under the seams that will provide extra resilience to your delicate fabric when you start sewing. Simply pick the starched fabric off after you finish. And make sure that you are using fine sharp needles.
Another great tip is to let the hems take on a rounded shape as opposed to pressing your hem flat. And as much as possible, try using the least number of pins on your fragile fabric.
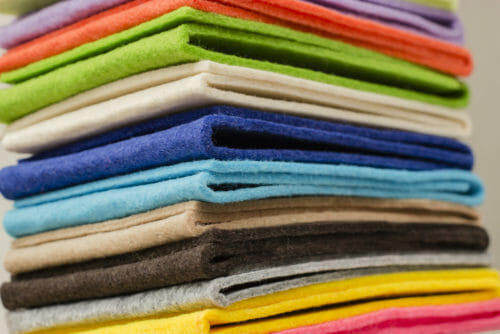 If you cut through a thick fabric and it seems like cutting through leather, then it is time to use a craft knife. Place your fabric over a piece of wood or cutting mat wrong side up when you cut. In this way, you will not scratch the fabric surface if you accidentally slip with the knife.
When storing thick fabrics, it is sometimes best to roll them up like you would a poster to prevent permanent creases from forming in your fabric.
In some cases, thick fabrics don’t need edging, while other thick fabrics may need a double row of close stitches without a fold to make a hem.
Leather-grade heavy needles are best suited for thick fabrics to prevent your needle from breaking. It is also important to use strong thread with thick fabrics and finishing is often best done by hand.
Slippery and Furry Fabrics
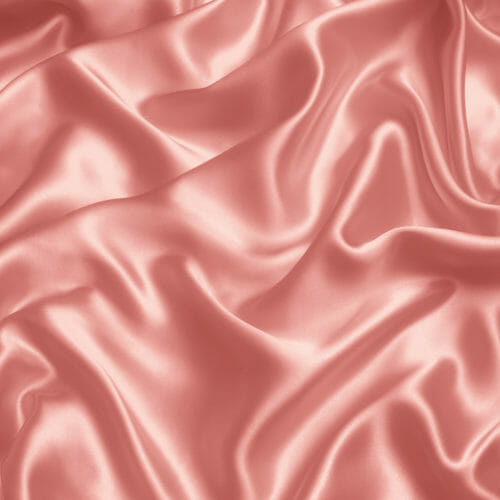 The problem with slippery fabrics is that they usually don’t stay in place while you are sewing on them. Putting your slippery fabric between two layers of tissue paper should prevent them from slipping away from you and your sewing machine. This can also help you avoid snags that could destroy the smooth surface of the fabric.
Always press from the wrong side of shiny fabrics. You should always use a pressing cloth if you ever need to press the right side. You may also want to put paper under your seams when you press them open to avoid making creases on the right side of the fabric.
When preparing hems and seams of shiny fabrics, tacking by hand or hand basting is a good idea before you use your sewing machine. This will help prevent distortion in the final product.
Lastly, try using some regular spray starch –the kind you’d use for ironing a shirt– and applying a light spray across the fabric. This will stiffen it up the fabric making it much easier to handle while you’re cutting.
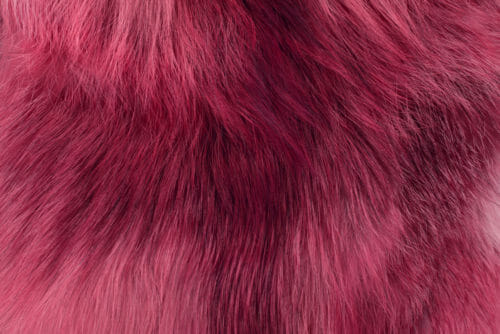 Furry fabrics, on the other hand, can prove to be the most difficult to sew especially when the long fur fibers get entangled with your stitches.
Before you start sewing, brush your furry fabric using a soft hairbrush and make sure all the fibers are lying in one direction. When sewing and make sure the fibers are flat and in the same direction, arranged parallel to your stitches.
Remember that furry fabrics tend to have fragile bases so use double rows of stitches for your seams. A coarse thread and long stitches will also help in securely gripping your furry fabric. For more tips on sewing with fur, please review the linked article.
Final Thoughts on Sewing Difficult Fabrics
There is no doubt that working with fragile, thick, slippery and furry fabrics can sometimes become a troublesome task. Each of these fabrics have special characteristics that can make cutting and sewing them a challenging job. Some of these difficult fabrics have the tendency to move during the cutting stage so that having neat edges could prove to be elusive. Others can prove to be a handful when you try to feed them through your sewing machine. Deciding what stitch to use on these fabrics to produce the best result can already be intimidating to many.
Have you ever had silk charmeuse and chiffon slither away from you, oblivious of the feed dog traction, or struggled to sew a bulky denim or wool seam? I know a sewing machine technique tip that will change your life.


There is a little known option for the sewing machine’s presser foot that will make all of your struggles with challenging fabrics go much easier. It’s the tension knob for the presser foot.
The knob is usually found on the left side of the machine. If you are facing your sewing machine and stick your hand out as if to shake hands with your presser foot, the knob should be just above your hand. It’s generally marked with a picture of a presser foot.
You can adjust the presser foot tension knob according to your fabric. For heavier fabric, you will want less tension so that that fabric slides easily between the presser and the feed dogs. For lighter fabrics, you will want more tension, or pressure, so that the presser foot holds the fabric securely to the feed dogs and keeps it from sliding away.
It’s amazing what this simple trick can do for your final sewing project. Stitches will be smoother and more even, and you will have more control over the fabric overall as you manipulate it in the machine.
credit: www.sewdaily.com
Understanding about fabric grain is an essential element to know when sewing with woven fabrics. It’s something that new sewists tend to skip over and seasoned sewists occasionally brush off.
 Why is fabric grain important. It’s extremely relevant when sewing garments, especially pants. Have you ever owned a pair of jeans where one of the seams twisted towards the front or back?
The reason for this is the manufacturer didn’t bother to look for the fabric grain when cutting out the fabric. Finding the fabric grain is also important when sewing pillows, especially ones with a distinct pattern.
Before starting, there are a couple of steps that need to take place to get you ready to make an envelope pillow.
Pre-Project Steps:
You will need to be familiar with your sewing machine. Have it threaded in a complementary color thread with a new needle (80/12). You may want to sew a few practice seams on some fabric scraps before moving forward.

Another pre-project step would be to wash, dry, and press your fabric. You NEVER want to work with wadded up wrinkled fabric.
What is the Fabric Grain Line?
All woven fabrics (like 100% cotton) have a grain line. This occurs during the manufacture of the fabric when it is being woven. Picture a loom with its long threads stretching out. Those long threads form the fabric grain or the warp.
In the weaving process, shorter threads are woven under and over across these long threads, thus forming a woven fabric. The shorter threads form the crossgrain or the weft.
The bias runs 45-degrees across the grain and will stretch. There are times you want to cut along the bias, but this isn’t one of them.
 The grain line runs parallel with the selvage edge. This is the factory edge that is stamped with the manufacturer’s name.
There are two selvage edges on cut fabric, one with the manufacturer’s information and the other that matches the fabric.
 The grain lines are the strongest threads in a woven fabric and in most instances, you will want your pattern to run along these lines, making it sturdy.
Try this experiment: Pull your fabric along the grain line (or selvage). Notice that there is hardly any stretch.
 Now, pull it across the crossgrain {this would be the edge where the fabric was cut at the store} and notice how it gives a little.
 Lastly, pull it along the bias and see how it really stretches.
 If you ignore the fabric grain, you may end up with your fabric being cut on a bias, which runs across the grain. The bias will cause your fabric to pucker and stretch; and your project will not fit correctly or may hang funny.
Finding the Fabric Grain Line
What if you are using a scrap of fabric that no longer has a selvage or perhaps you are repurposing something? There is still a way to find the straight grain. Below is a scrap of fabric with unknown grain lines. Since the fabric’s pattern in non-directional, I will need to find the grain.
 Pull on the fabric (like I did above) until you find the warp, or grain. Make a 1” snip.
 Now, pull and tear across the fabric, leaving a frayed edge. Pull out the excess threads until the top threads are on all along the same line.

That even thread line is your grain line! Now, all you need to do is set this grain line on a straight edge, like a cutting mat, and you will be able to square up the other side.


Isn’t that easy? Please, please remember that the cut edge from the fabric store rarely is square and you will need to find the true grain line before cutting out any project.
credit: www.seasonedhomemaker.com
Today I am fixing a mistake I made with a tutorial I posted last summer. Okay, using the word mistake might be a bit dramatic. The problem was that the post was a HUGE and very photo heavy tutorial for sewing my wave skirt from start to finish.
Some might ask what in the world the problem with doing that could be....well, I actually showed one of my favorite invisible zipper tricks (or rather finishing it up with lining etc) in it and I think it sort of drowned in all the other information.
SO I have done a few improvements to it and is now just showing you the tutorial to one of my favorite sewing tricks.
The tutorial is starting with the photos for sewing an invisible zipper (without a special foot) in case you were interested in that too and the second collage is THE TRICK to a perfect finish.


I needed a bit more space to explain this step.
SO this is a trick to sew your lining/inner waistband/facing to an invisible zipper. It is actually super simple but the result is gorgeous!
You are probably used to placing the inner waistband - right against right side - and sewing down along zipper. Well, you are still going to do that BUT first you are going to shift out your inner waistband so it sticks out 1 cm (3/8 inches) at the very top and 0.5 cm at the bottom of the waistband (see photo). The rest of the way (the lining) you just do as usual and no shifting. And NOW you sew down along the zipper. See graphic stitches on photo.
You will need to look at the last photo in the tutorial before you see the point with the shifting....but I promise you that you won't be disappointed!
credit: www.sewinglikemad.com
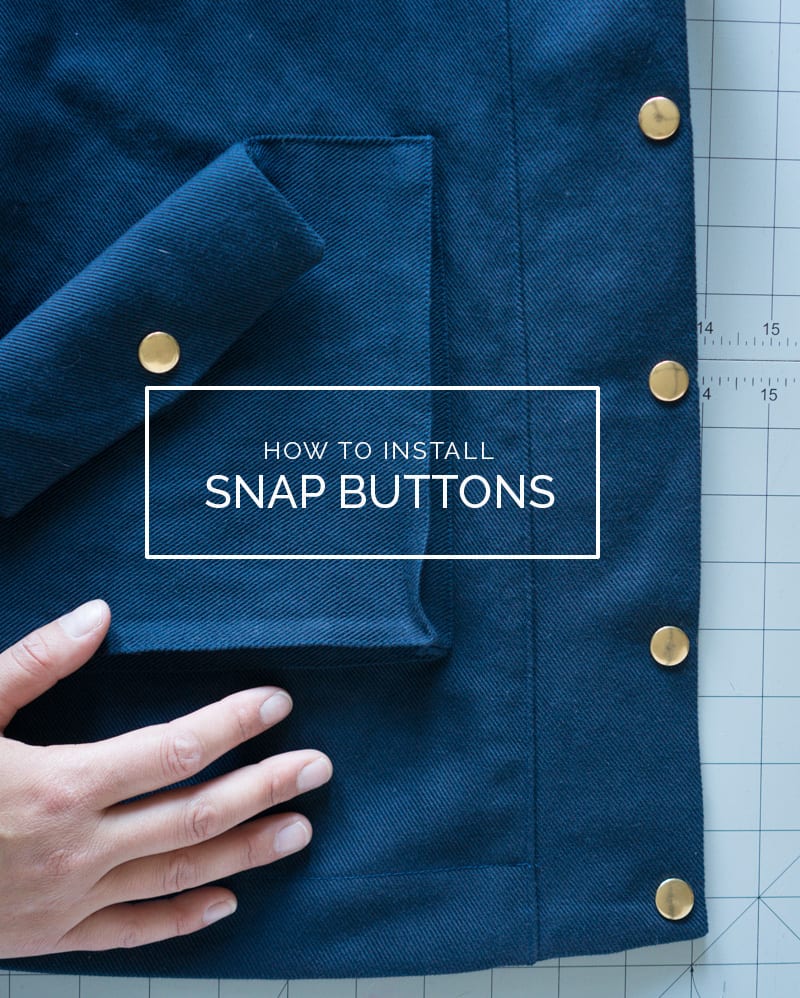
Snap buttons are one of those things I always assumed were much harder to work with than they actually are. I made over a half dozen samples of our Kelly Anorak before I talked myself into installing them, and I was downright shocked to discover that they are easy to install at home with only a few tools. We have the entire kit (snap setting tool included) available in our shop, but snaps are relatively easy to find online and in fabric stores.
TYPES OF SNAP BUTTONS
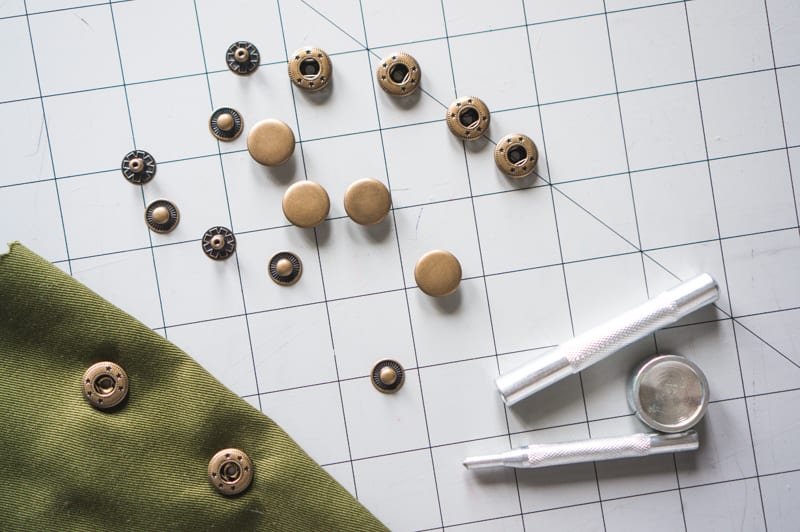
Spring snaps
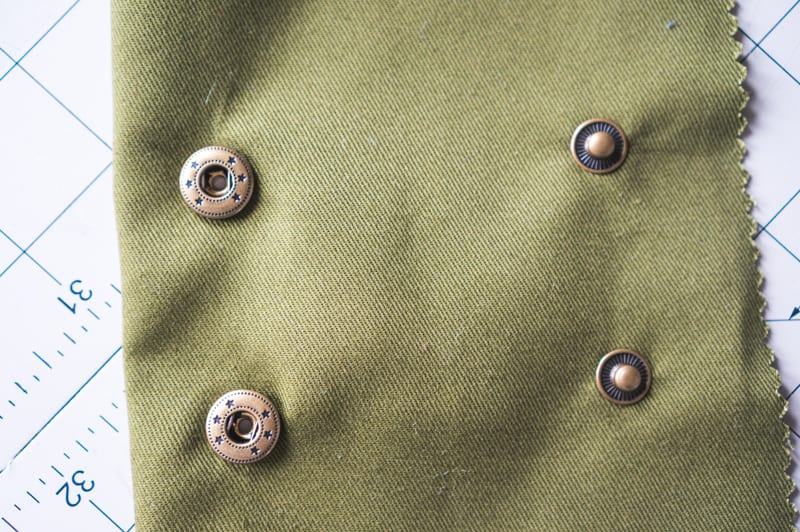
There are two sorts of snap buttons, spring and ring snaps. Ring snaps are probably the ones you’re most likely to encounter at your neighborhood fabric store, and while they are good for heavy duty applications, they simply don’t look as nice installed. When possible, go for the spring snaps. They are a little gentler on fabric, and look great from all sides when installed, giving that professional, ready-to-wear look we’re all after. I’ll show you how to install both in this post.
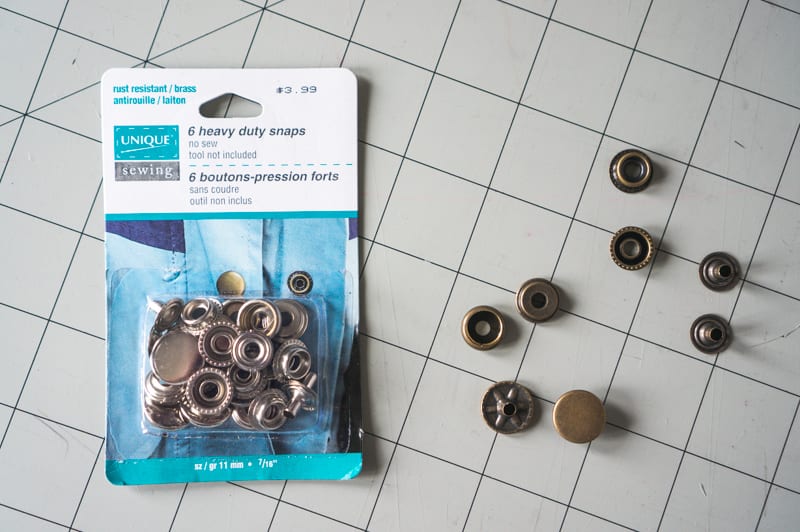
Ring snaps
WHERE TO BUY SNAP BUTTONS
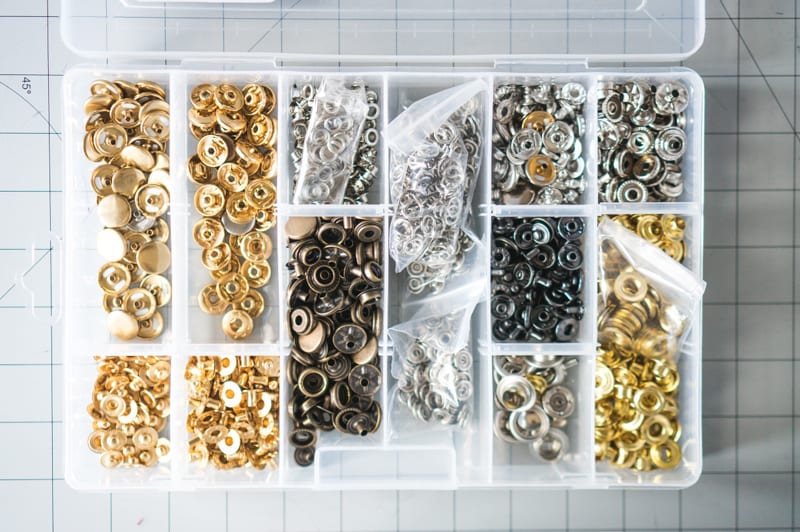
For the Kelly Anorak, I suggest buttons that are 12-15mm wide; anything bigger or smaller will look awkward on a coat. Besides the high quality, rust proof hardware in our Kelly kits, my favourite source for snaps of all kinds is Gold Star Tools. They have spring snaps in a variety of finishes and sizes, and they also sell different tools for installing them. You can purchase a simple hammer and anvil set (like the ones I’ll be using in this post) but they also sell an industrial press that I recently bought and now use all. the. time.
If you’re buying snaps from a store, make sure at least one set includes the handsetting tool you’ll need; once you have the proper sized tool you can purchase packages of snaps without it (these are the types of snap packages I’ve seen most often; make sure you get the corresponding setting tool).
INSTALLING SPRING SNAPS
You’ll need a small circular anvil and two different snap setting tools (all are included in our kits, along with a metal hole punch). You’ll also need a hammer and an awl if you have one (I think it makes better holes than the holepunch). Please note that it is very, very important that you interface any area you will be applying snaps to; without the added stabilization your snaps will likely fall off, ripping your fabric in the process.
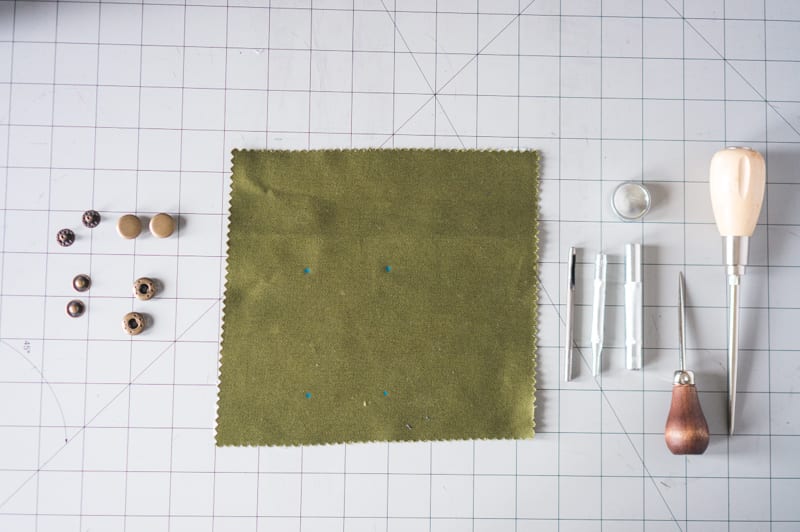
Each snap button has four parts; the button cap with socket, and the stud with corresponding post. The snap setting tool for the cap and socket is a little narrower on the end, while the stud/post tool is wider with an indent at the bottom to accommodate the post.
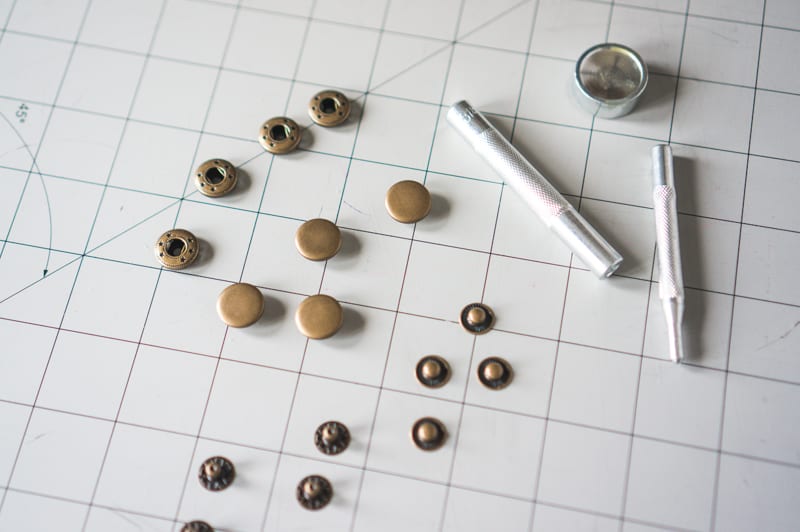
Install the cap and socket first. The plain cap goes on the outside of the garment while the donut shaped socket goes on the inside; it is what receives the stud (Will not make dirty joke. Will not make dirty joke).
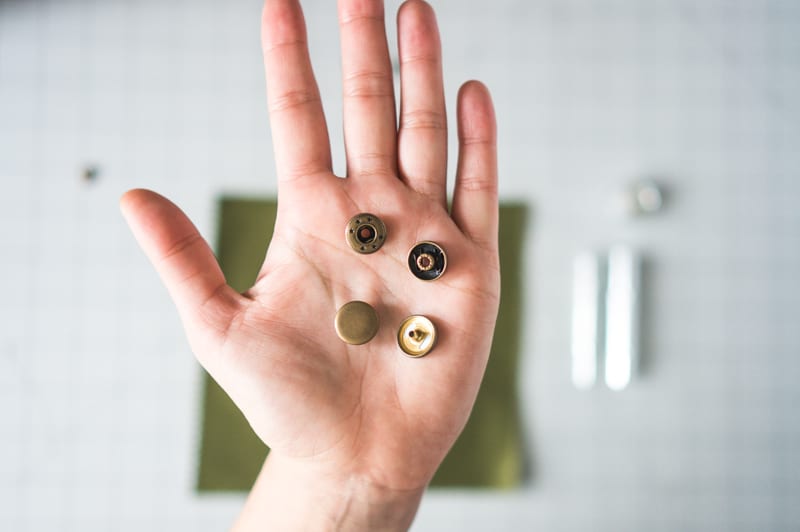
Begin by determining where you will locate the snap and mark the location with a pencil. Make a hole in the fabric with the holepunch or awl, and insert the button cap post into the hole, again ensuring cap is located on the outside of the garment.
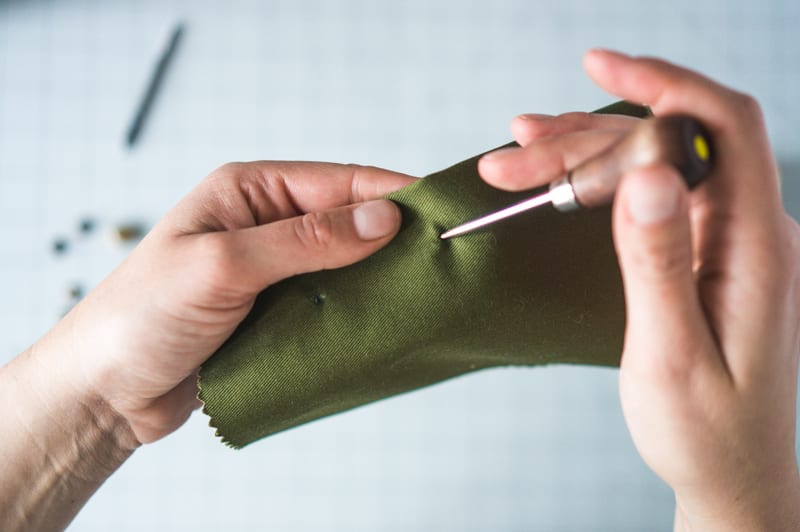
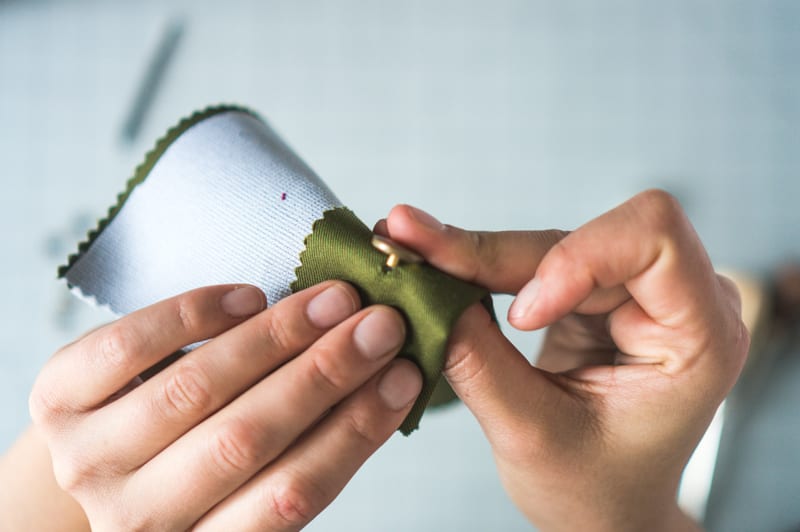
Place the spring socket on the cap post and then place the base of the cap inside the indent of the anvil so the socket is facing up.
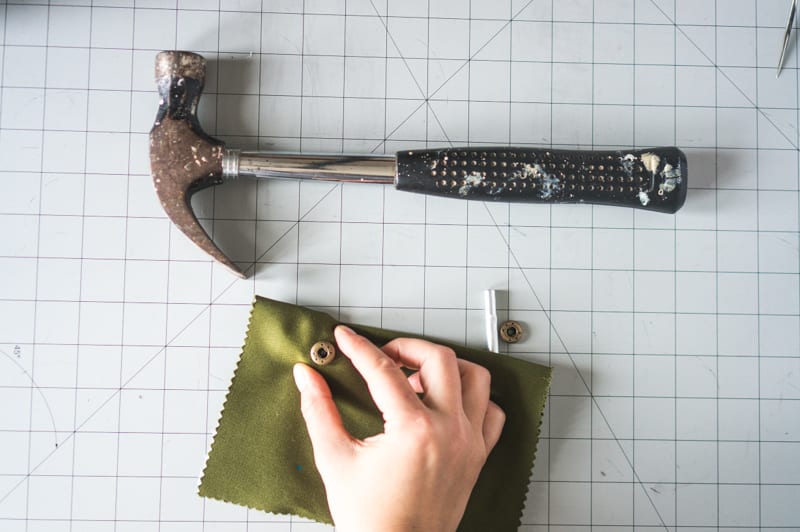
Place the end of the narrower tool through the socket and align it with the post, ensuring everything is lined up straight. Give the setting tool a few hard wacks with the hammer to smoosh down the cap post; it will flatten out and lock against the inside of the socket.
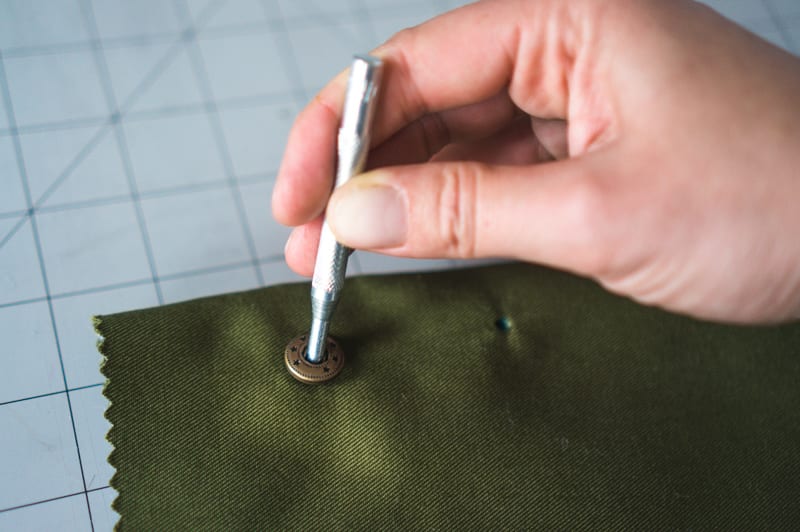
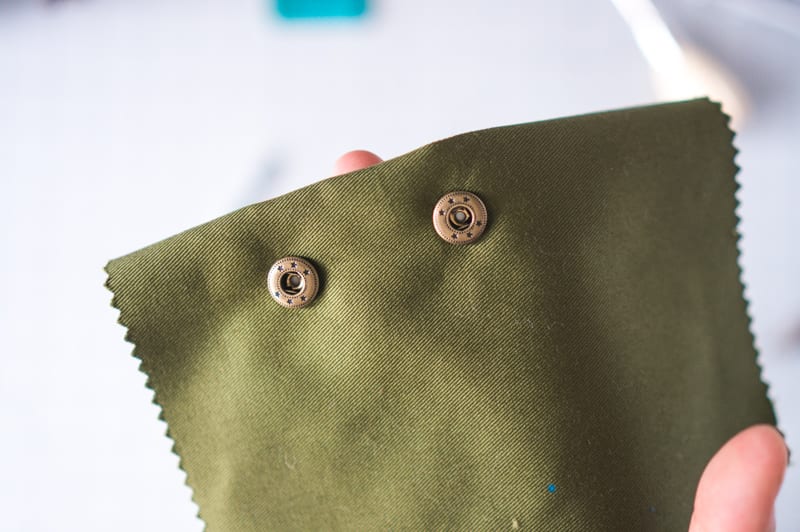
Install all your caps and sockets before installing the stud and posts. If you’re making Kelly, pay close attention to the location of the buttons; we include a suggested location on the pattern but you may want to line up one with the drawstring and grommet, in which case they would shift a little.
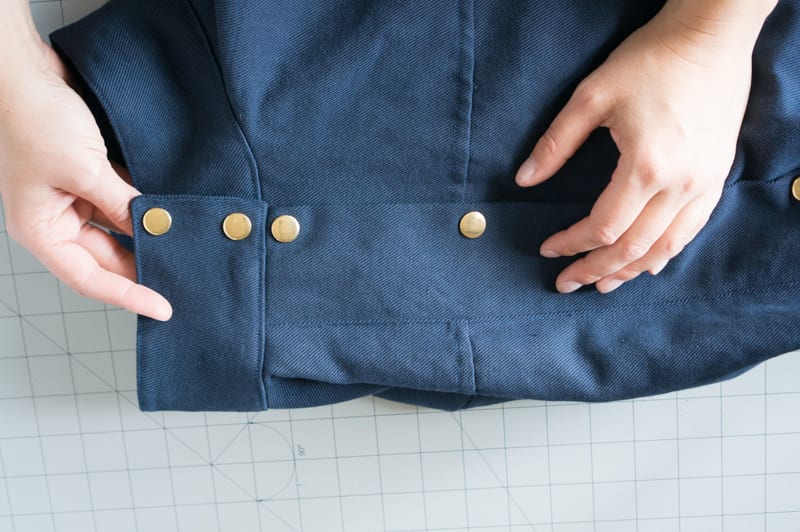
Once installed, close the fly placket and use a pencil to mark the location for the corresponding stud and post. This area will be the trickiest since you have to poke holes through multiple layers of fabric. A wider awl is indispensable here.
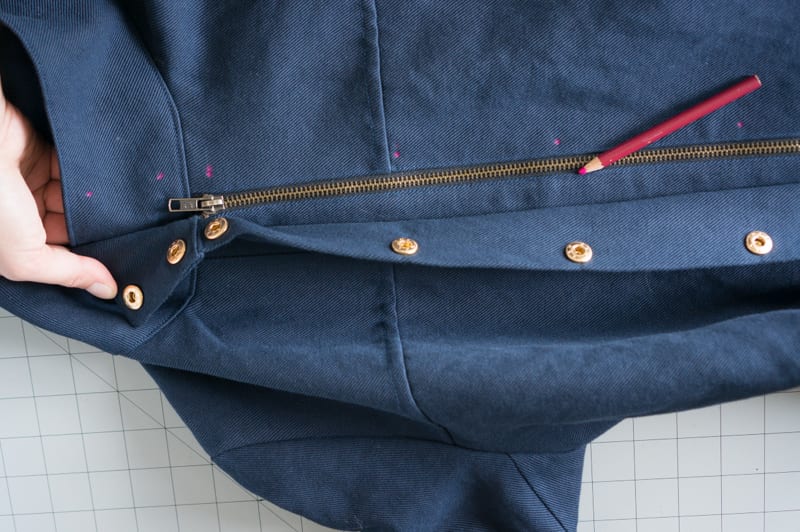
The stud and post look markedly different from the other half of the stud. The part with the longer post goes against the wrong side of the fabric; the part that looks like a little bowler hat will go on the right side. This stud will lock with the socket on the corresponding side.
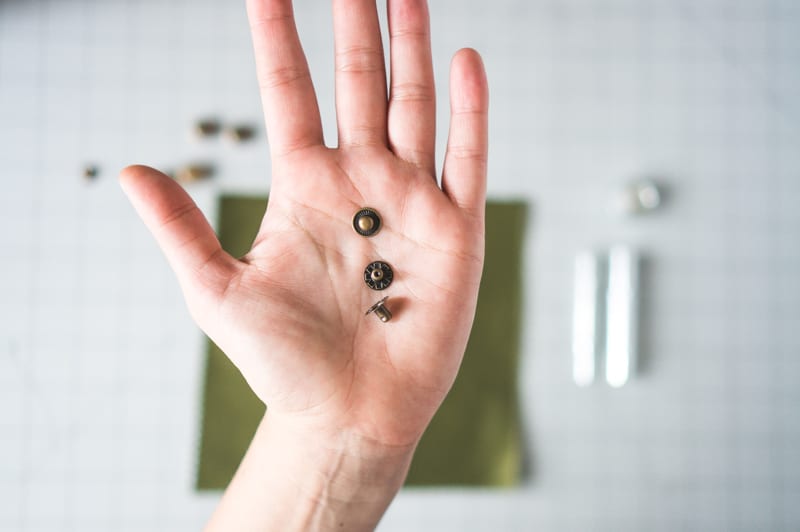
Use an awl or the holepunch to make room for the post. The stud post is quite a bit wider than the cap post, so you may have to make that hole a little bit bigger. I have two sizes of awls and I like to use the bigger one to widen the hole for the stud. Again, make sure you are placing the post and stud on the right side so that your buttons snap together correctly.
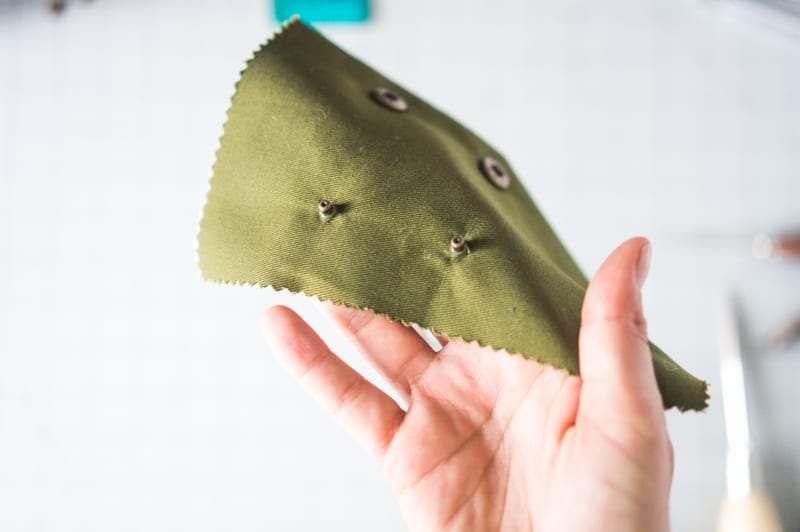
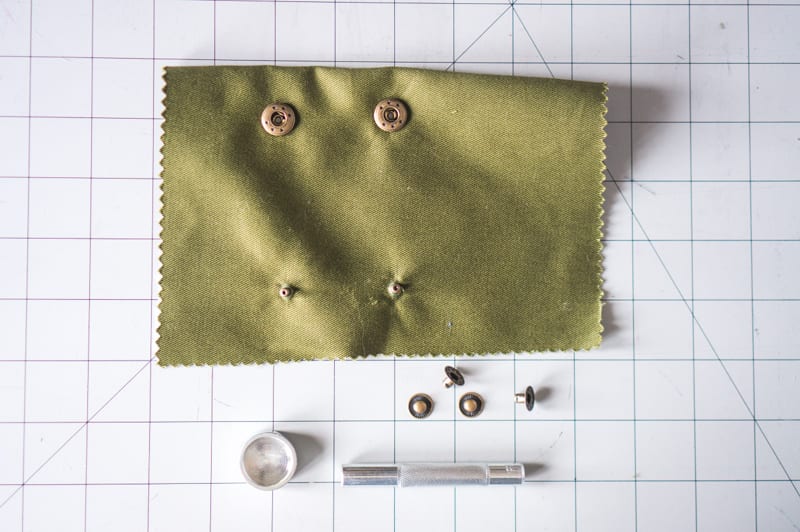
Place the stud on top of the post and place the base of the post on top of the anvil.
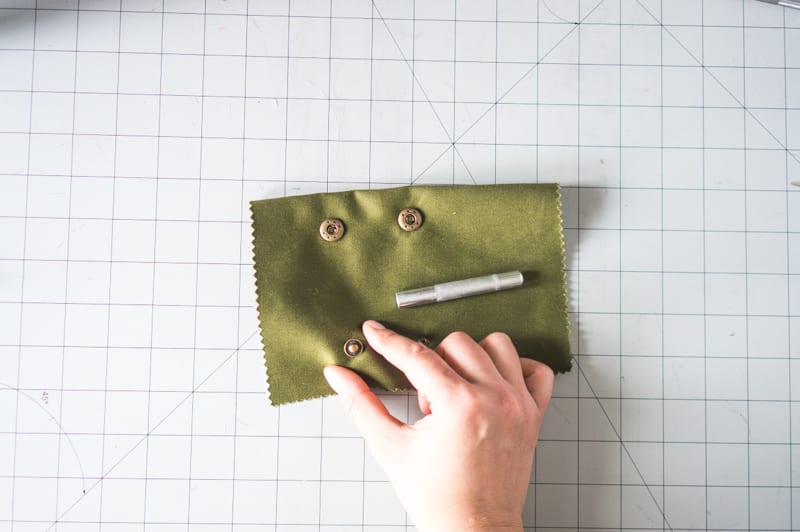
Use the wider setting tool with the indent at the bottom, and align the indent with the stud. Hammer the setting tool a few times to lock it on the post.
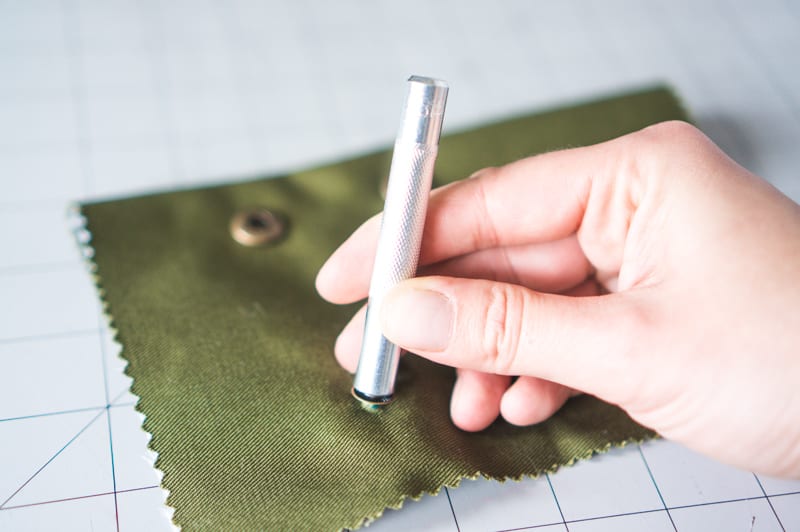
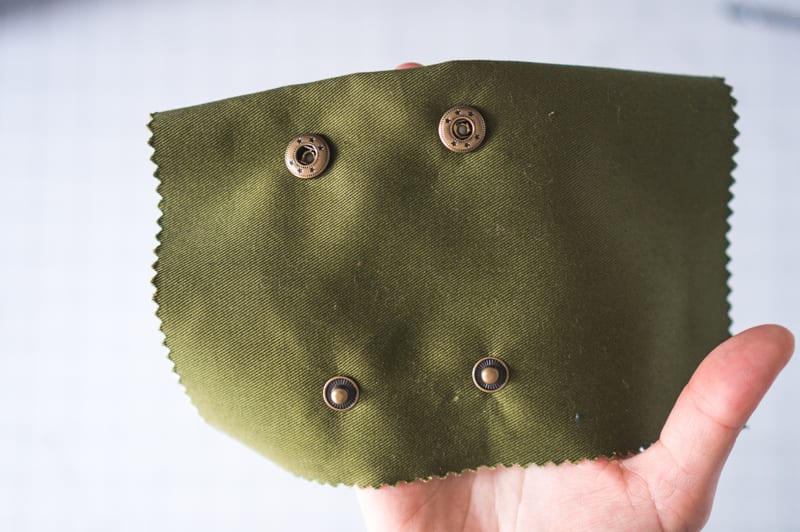
Finish up by testing each button to make sure they are correctly installed.
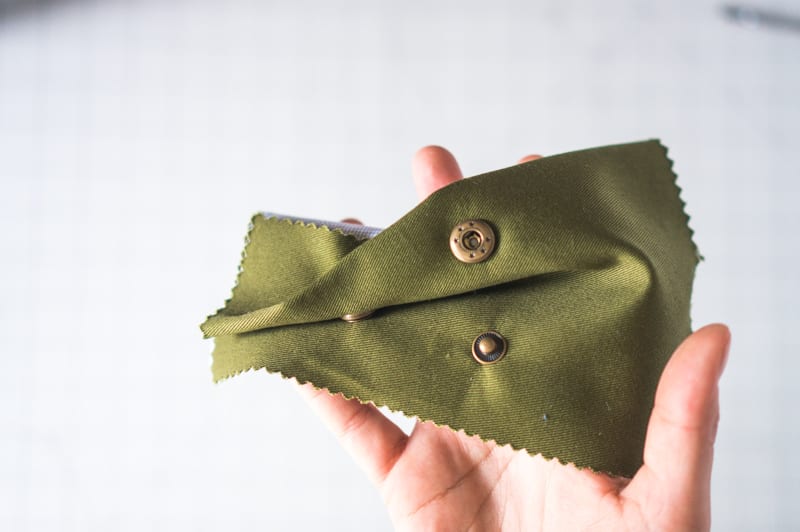
Installing them on the cuffs of the Kelly Anorak is the same; install caps first and then close the cuff to determine location of corresponding stud and post.
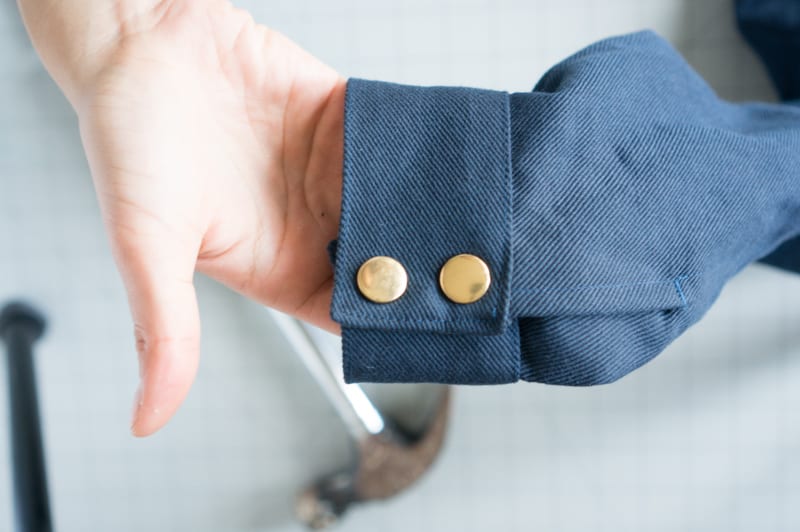
INSTALLING RING SNAPS
The process is much the same if you are installing ring snaps, although you will not need the wider setting tool since there is no post and stud to install (I suspect that most snap kits available to the average sewist are ring snaps for this purpose; one less tool means they are cheaper to make). The setting tool is slightly wider than the one you will use for spring snaps, but don’t worry about sourcing it since it should come in a set.
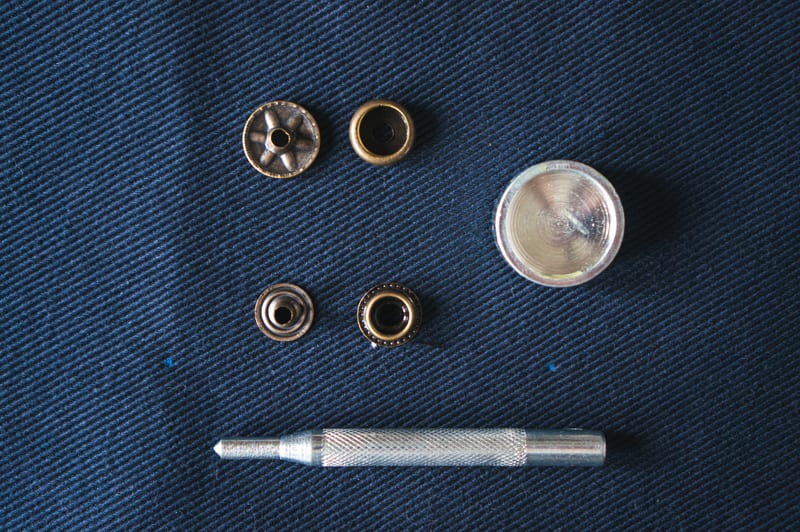
Install the caps first, and use the awl or holepunch to make room for the cap post.
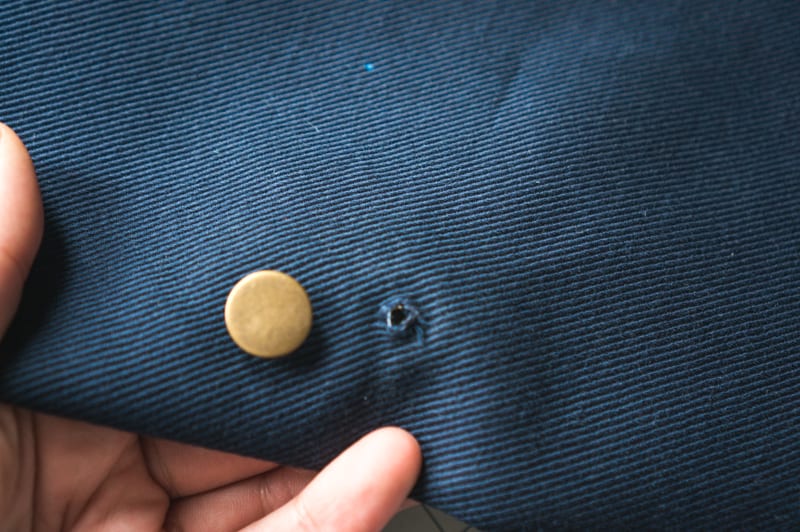
Place the corresponding ring socket on the post, and use the setting tool and hammer to lock into place.

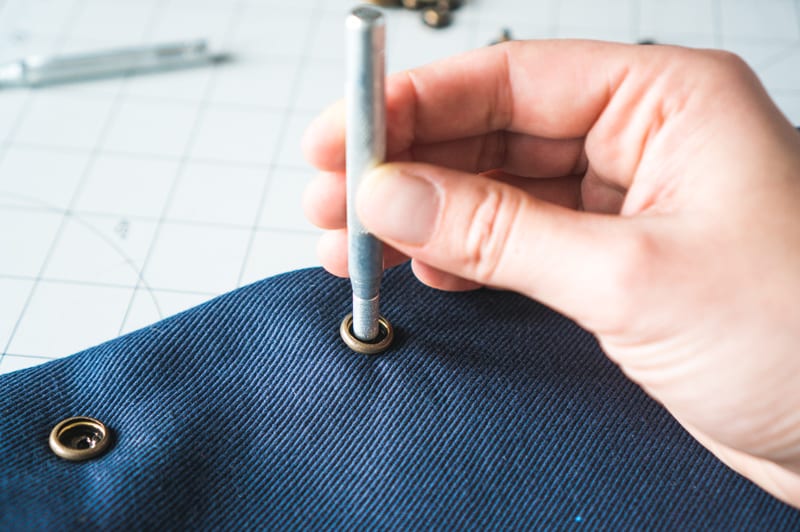
Follow the same procedure for the bottom ring snap.
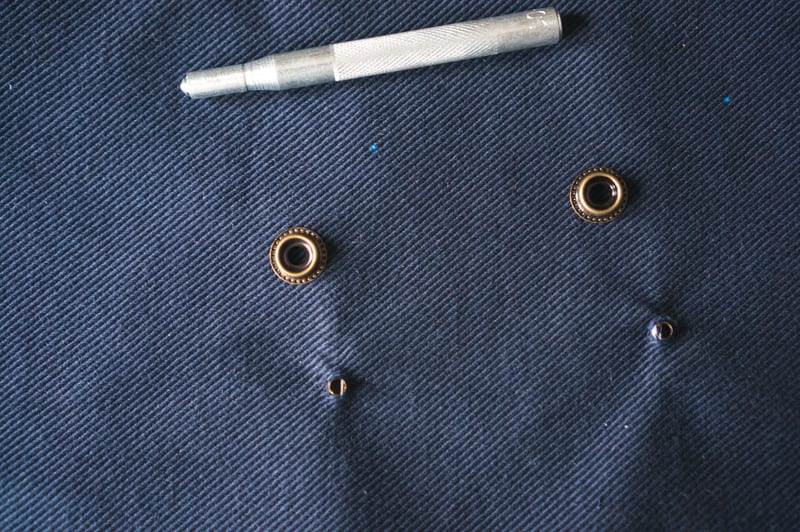
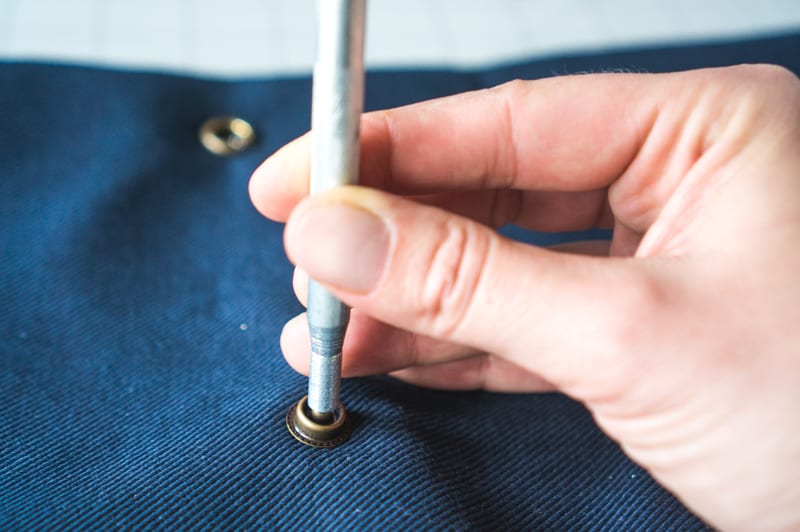
While these snaps lock nicely, I take issue with how they look. The post has to be crushed to lock into the ring, and I don’t think it looks very nice when the buttons are undone. The spring snap does a better job of hiding the crushed post and looks better undone.
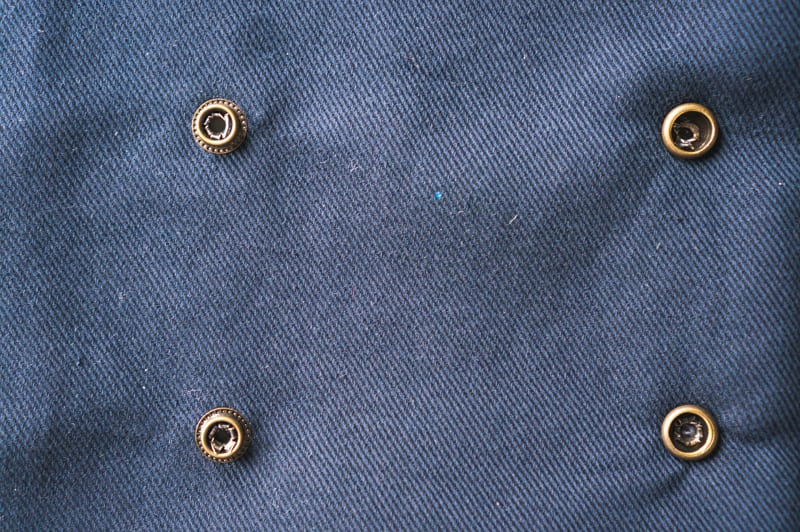
Ring snaps installed