Handmade clothing is good. Clothes that look homemade-not so much. Why? Because in sewing the word homemade is usually associated with poor quality. It can refer to the way the garment is sewn or a poor choice in fabric, to the way the garment fits. Today, I’m going to talk about 10 sewing mistakes that will definitely give your clothes a homemade look.
There are more mistakes in sewing than what I discuss here, like using the wrong sewing tools, not sewing straight lines and choosing styles beyond your sewing skill set-to name a few. Trust me, I’ve made plenty of them. But if you avoid the 10 below, you’ll be well on your way to a beautifully sewn, HANDmade garment.
So, here they are: 10 sewing mistakes that will make your clothes look HOMEmade.
1. Using fabric that’s unsuitable for your pattern design
It’s okay to stray away from the fabric recommendations on the back of your pattern. That’s the beauty of making your own clothes, you get to choose what you want in fabric and style. But it’s best to use what’s recommended as a guide for your fabric choices.
If the fabric is wrong, no matter how good you sew, (you can use every professional construction technique you know), your garment will still look homemade. If the fabric is stiff when it should be soft and drape nicely or soft when it should have body and stand firm, it will scream “homemade!”.
2. Laying pattern pieces in both directions for napped fabrics or one directional prints
I guarantee you, if you make a satin dress or stretch velvet pants and the front and back look like 2 different shades of the same color, everyone will know you made it. Or if you make a blouse with a beautiful print, but on the back it’s obvious the print is upside down…well you get the point.
We all like to lay our pattern pieces in a way that will use the least amount of fabric, especially when the fabric is from our sewing stash and we know we can’t buy more. But when it comes to napped fabrics like satin, velvet, corduroy (and there are others that fall in this category) or one directional prints, all of your pattern pieces are going to have to lay in the same direction. Otherwise, your fabric color will look 2 different shades and your one directional print will be upside down. You may need extra fabric, depending on your pattern pieces and fabric width.
Below is an example of fabric layouts for fabrics with nap and without. Click the image to enlarge it.
A-Without Nap: the pattern pieces can lay in either lengthwise direction. The fabric’s color will look the same shade from any direction.
B-With Nap: the pattern pieces must lay in one direction. The fabric’s color will look a different shade in each direction. Any additional pattern pieces like pockets, yokes, etc. would also have to lay the same as the pant legs.
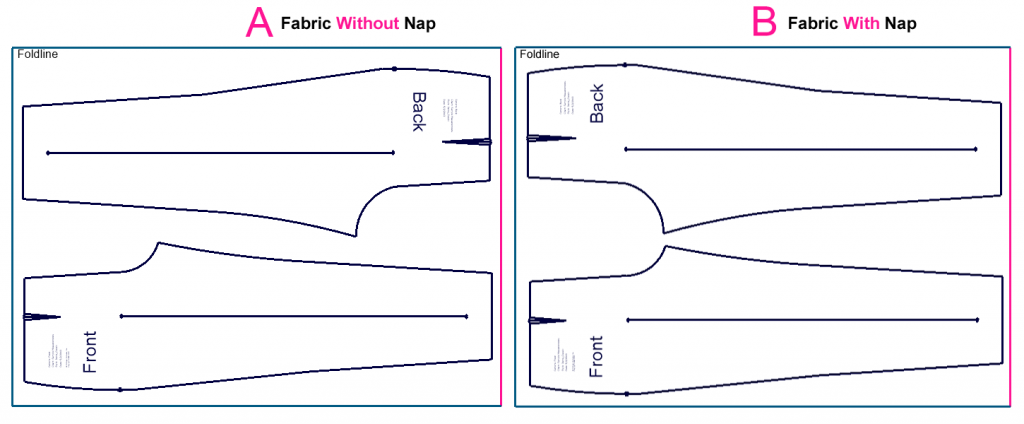
Fabric without nap (A) and with nap (B).
Most pattern instructions will have a “fabric with nap” layout. Just remember to get more fabric than what your pattern suggests, taking the width of your fabric into consideration. How much more depends on the pattern and fabric.
If you don’t fully understand fabrics with nap or would like more information, go to *Sewing.org, 4-Fabric~Napped Fabrics. It’s a free .PDF file you can download and save for future reference. You can also go to The Sewing Partner for a full explanation of fabric with nap.
3. Cutting fabric without making sure pattern pieces are straight
A pattern piece is straight when its grainline is parallel to the selvage of the fabric. When you lay a pattern piece on fabric, it’s very tempting to “eyeball” it for straightness. To the natural eye, the piece may look straight. If you measure from the grainline to the selvage, you may find that it’s not as straight as you thought. The result is a garment that doesn’t hang right and may look and feel lopsided and uncomfortable.
Once the pattern pieces have been cut off grain, no alteration can fix them. The only fix is to re-cut them, measuring to make sure the grainline of the pattern piece is parallel to the selvage of the fabric.
4. Using the wrong interfacing or no interfacing at all
There are so many different kinds of interfacing that it can be a chore to figure out which one is best for your project. Sometimes interfacing seems like an extra step that can be skipped altogether. But interfacing is necessary to give your garment a clean, neat finish as well any extra structural support it may need.
When I started altering lined jackets years ago, I was surprised to find that manufacturers interface the entire front (and sometimes back) of the jacket-not just the front & back facing and collar. They use a quality fusible interfacing that molds to the fabric like a second skin and gives the jacket a smooth finish, no matter the weight of the fabric. All hems, including sleeve hems, are also interfaced.
Interfacing prevents ripples, folds and just plain old droopiness. It gives necklines, collars, sleeveless armholes and hems a crisp, neat look. It gives jackets and coats body and support.
For more information on interfacing, *Sewing.org explains the basics under 5-Linings & Interfacings~Interfacing 101. Download it and add it to your sewing library to use when you need it.
5. Ignoring pattern markings
Oh those pesky notches that slow down your cutting. Or that extra step of marking those big & small circles when you’re ready to go straight to the sewing machine.
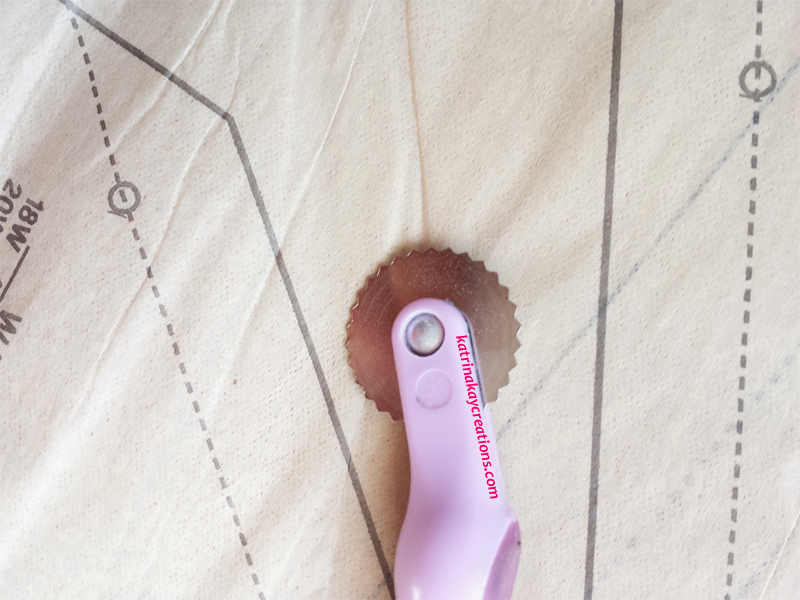
Pattern markings will save you a lot of headaches at the sewing machine.
I ignored these markings all the time because I was in such a hurry to sew. But as we all know in sewing, a small step skipped in the beginning can cause us a lot of time and frustration in the end. When I realized how much easier those markings made my sewing life, I could have kicked myself several times.
Ignoring your pattern markings will cause you to have to guess or go back and mark them later after the garment is partially sewn. And sometimes it won’t be as accurate as it would’ve been had you marked it in the beginning. Save yourself the time and headache, while avoiding the homemade look.
Misplaced design features like pleats or gathers or cross seams not matching when two pieces are sewn together will make your garment look homemade.
For basic refresher information on pattern markings, go to *Sewing.org, 3-Understanding Patterns~Pattern Markings Part 1 & 2.
6. Pressing seam allowances after they’re joined to another seam
 I know you’ve heard “press as you go” repeatedly since you’ve been sewing. And surprisingly enough, some people still don’t do it. And you can tell.
Pressing has a major impact on how good your garment looks when it’s finished. Skipping this step will make your hard work and the time you put in at the sewing machine all for nothing.
A small ironing board or ironing pad close to your sewing station will make pressing nice and convenient. And if you have to walk across the room to the ironing board, take several unenclosed seamed pieces at one time and save yourself a few trips. When you see the result, you’ll be glad you made the extra effort.
7. Folding under & top stitching a neckline or armhole instead of using a facing or bias binding
Nothing says homemade like this one, and I cringe every time I see it. You cannot get a good result from turning under a curved seam allowance and top stitching at the neckline and armhole. Instead you’ll get ripples and possibly stretch the area so it becomes wavy instead of laying flat. No matter how well you’ve sewn the rest, this will mess up the entire garment.
Adding a facing or a bias binding is going to take longer, but the end result makes it worthwhile. Oh, and if you add a facing, don’t forget the interfacing.

8. Leaving your seams unfinished and unraveling
Your garment should look as good on the inside as it does on the outside. That’s what they taught us in school and I just can’t get it out of my head. “The inside, really Katrina, no one’s going to see it!” I know, but it’ll make you feel better. Okay, it’ll make ME feel better.
But seriously, unfinished seams may be seen only to you and seem like no big deal, but if they’re unraveling, it can become a big problem. Aside from having to cut strings every time you wear your garment, if it ravels too close to your stitching line, you’re going to end up with a hole. And fixing the hole will cut into the wearing ease of your garment. Even if you don’t have a serger, check out the link below for other possible seam finishes you can do with a sewing machine.
While I’m talking about seams, let me take this one step further-using the wrong seam finish for the type of fabric you have will also give your garment a homemade look. A perfect example: chiffon. You can see through chiffon, so the best seam finish is a french seam that encloses the seam allowances, gives them a uniform, neat appearance and solves the unraveling problem. Chiffon loves to unravel, so enclosing the seams is a must. You will thank yourself for using the seam finish your fabric demands.
For more information on seam finishes, go to *Sewing.org, 11-General How-To~Seam Finishes Part 1 & Part 2. French seams are at the end of Part 2.
9. Using the wrong hem finish
Use the wrong hem finish on your garment and it will stick out like a sore thumb. For some reason the eye just goes right to it. It will overshadow all of the hard work you did on the rest of the garment.
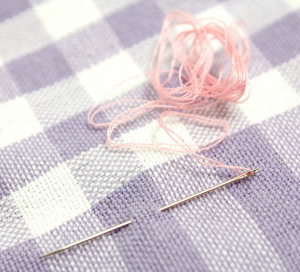
Hand stitching is not the enemy.
The hem is usually the last step to finishing your garment. Confession time: by the time I get to the hem I just want to get it done the quickest way possible, which usually means top stitching on the sewing machine. But that’s not always the best choice, especially for dressier clothes.
Taking the extra time to hand stitch your hem (I know, I hate hand stitching too), or investing in a blind hemmer will help you make a garment you’ll be proud to wear.
For information on hem finishes go to *Sewing.org,11-General How-To~Simple Hems.
10. Wearing your garment as is, without making any alterations to your pattern
You take your pattern out of the envelope, cut the fabric from the pieces you need, sew it up and try it on. You can’t believe it. Without any alterations, it fits perfectly! And then you wake up.
But that was a nice dream, though.
It’s safe to say that 99.9% of the time, you’re going to have to alter your pattern in some way-whether it’s a minor or major alteration. That’s just the way it is.
Before you put in all that work at the sewing machine, make sure it fits your body so you don’t waist your time or your money. Use muslin to test every new pattern. Yes, it’s going to take extra time but you won’t mess up your good fabric and you’ll get a garment that’s made for your curves. Doesn’t that make it worth it?
credit: katrinakaycreations.com

No comments:
Post a Comment