Wednesday, July 27, 2016

Tips and Tricks | Learning The Basic Parts Of A Sewing Machine

This article is for those who are inexperience using sewing machines. It is intended for novices who have basically no knowledge of these devices but want to begin to learn about them. Which means that if you have intermediate or advanced sewing machine knowledge, then you are probably going to be quite bored with it. That’s because today we are learning about the parts of a sewing machine.

Some of you might scoff at the idea that someone needs to be taught the basic parts of a sewing machine, but let me tell you that it isn’t funny at all. This is the kind of knowledge that one needs as they are beginning to use this machine and judging from sewing machine reviews, is a topic that really needs to be addressed. So without further adieu, let’s begin with basic sewing machine anatomy.

The Power Switch
One of the most important parts of a sewing machine, as well as one of the parts that is most frequently used, is the power switch. This turns the device on and off and is located in different places on different models. Usually on the top or the back of the machine.

The Spool Pin
After finding the power switch, you can now look for the spool pin. This is a small pin that is designed to hold your spool of thread. It is usually located on the top of the machine and is made of plastic or metal.

The Bobbin Winder And Bobbin Winder Stopper
Located next to the spool pin is the bobbin winder. It’s a small horizontal wheel that is used to wind thread onto your bobbin. Next to that is a small pin called a bobbin winder stopper.

The Thread Guide
This is a small funny shaped guide with a simple purpose. It’s designed to guide thread from the spool to the bobbin winder.

Stitch Adjustment Buttons
This may be manual buttons or switches or an electronic one, depending on your sewing machine model. However, no matter which one it is, the point of it is the same. To select the length, type and direction of the stitch.

Take-Up Lever
This is the part that moves vertically as you stitch.

Tension Dial
This is a wheel with numbers on it. It is usually located near the take-up lever.

Needle Clamp Screw
Located under the arm of the machine. Its used to hold the needle in place while you are sewing.

Presser Foot
This is under the needle clamp screw. This holds your fabric or material in place.

Needle Plate
This is the plate underneath the needle.

The Feed Dog
Located under the presser foot and on the needle plate. It’s a guide that feeds the fabric while you are sewing.

Bobbin Cover Release
These is the last part on the machine. It releases the cover so that you can access the bobbin and insert or remove it.

And that is all there is to it. This may not be the best sewing machine anatomy lesson, but it is one that will allow you to learn your machine quickly and easily.

DIY TUTORIAL – PLEATED BUTTON FRONT SKIRT


The pleated skirt is one of my all time favorite things to make. It's basically just a rectangle with lots of folds (aka pleats) attached to a waistband. I've shared a tutorial for making a pleated skirt before but I thought I would take it one step farther and show you how to make one with a button band in the front. You don't need a pattern and I've done all the math for you. Read on and find out how to make one yourself.


This tutorial provides measurements for a fully pleated skirt. If you only want a few pleats or don't have a lot of fabric, just cut the front and back widths smaller than the given measurements but still larger than your waistband. For this skirt I used a 1 inch gingham and made a pleat every 1 inch.


HOW TO DIY A PLEATED BUTTON FRONT SKIRT

Supplies:

Fabric (about 2 yards)
Interfacing
5-6 buttons for exterior
1 button for interior waistband
1 slide style hook and eye

NOTES: Seam allowance is .5 inch. Hem allowance is 1.5 inches.

INSTRUCTIONS:

Step 1: Take some measurements. You need to figure out the finished waistband width and the finished skirt length. First, measure around your waist where you want the waistband of the skirt to sit. If you're not sure about ease, measure the waistband of a skirt that you like the fit of. Next, measure how long you want the skirt to be. Now write those numbers down before you forget.

Step 2: I made a handy-dandy chart for you so you don't have to do a bunch of calculations. Find your waist measurement in the far left column and read across to the right for the width dimensions of the waistband, front and back pieces. You can click on the image to make to bigger. For example, if you have a waistband measurement of 32 inches and length of 36 inches, you will need to cut the following:

Waistband: 34.5 x 4 inches (cut one from fabric and one interfacing)

Back: 49 x 36 inches (cut one)

Fronts: 24.25 x 36 inches (cut two)

Interfacing for button bands: 24.25 x 3 inches (cut two)


Step 3: First, fuse interfacing to waistband. Then fuse button band interfacing to front of skirt .5 inch from raw edge. Fold seam allowance (.5 inch) to wrong side and press. Then fold again 1 inch, dividing button band in half.


Topstitch in place. I like to topstitch .25 inch from the folded edge then do a double line of stitching next to the edge of the button band. Use the guides on your presser feet to keep the stitching lines parallel.

Tip: If your fabric is being uncooperative, you can use glue to stick down the button band before topstitching. This check fabric is kind of cheap not was getting wonky. A quick swipe of glue really helped keep it in place.


Step 4: With right sides together, stitch front pieces to back at side seams. Finish seams


Step 5: Fold waistband in half lengthwise right sides together. On one end, mark 1.5 inch from finished edge for tab overlap on left side. Stitch from folded edge, pivot at corner and stitch to marking. On other end stitch from fold to .5 inch before edge.


Step 6: Pin pleats of desired direction and width to one edge of waistband. Make sure to place tab end on right side when looking at the wrong side of fabric (see below photo). Baste and then stitch in place.


Turn in raw edge of waistband. Stitch in place by hand or machine. I prefer to stitch in the ditch from the right side, just catching the waistband and holding it in place.


Step 7: Overlap front of skirt with tab end of waistband on the bottom. Mark where you want the buttonholes to be placed. Make buttonholes and attach buttons to button band. If the buttons aren't too bulky (like these ones), I like to use my sewing machine to attach the buttons. It's kind of scary the first time but so fast.


Attach hook and eye to tab overlap. On tab overlap stitch a buttonhole sized to the inner waistband button. Attach the inner waistband button invisibly by hand.

Step 8: Hem skirt. 


And that's it! You have a classic skirt all ready to hit the town.


I love this skirt so much. I feel like I need to hop on a plane to Paris and cavort along the Champs-Elysees. I'm wearing it here with my low-back Nettie bodysuit. The bodysuit has no match in creating a smooth line at a fitted waistband. I hope that you enjoy this tutorial and find it useful. Happy Sewing!

Tuesday, July 26, 2016

Sewing Tips and Tricks | How to Make Straight Grain Binding

Now that we’ve discussed the debate between bias binding and straight grain binding, it’s time to round-up our Binding Basics series with a tutorial on making your own straight-grain binding. As a bonus, this “cheater binding” method will have seams that are angled to resemble bias binding.


This project is for all levels.

Skill Level- 1 Button


Ready to get started?


Step 1: Calculate yardage needed

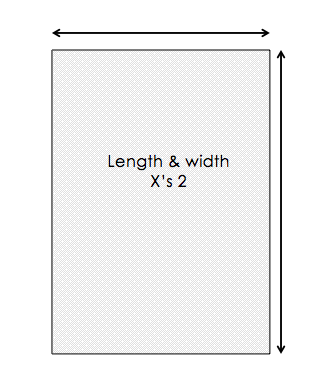
Take the dimensions of your quilt – length and width – and multiply those by the width of your desired binding (remember that you’re going to fold the binding in half so the finished width of the binding will be half the width you calculate here). Use the following set of simple equations:
 Length*2 + Width*2 = Quilt Perimeter

Quilt Perimeter/Width of fabric = number of strips to cut

Number of strips*Full width of binding = inches of fabric needed

Inches of fabric/36 = yardage needed

So for a sample baby quilt that is 36” wide by 42” long, let’s see how this plays out:

36*2 + 42*2 = 72 + 84 = 156 inches (quilt perimeter)

156/40 (standard post-washing width of fabric) = 3.9 (round-up to 4)

4*4 (for 2-inch binding we will cut 4-inch strips) = 16

16/36 = .44 yards (round-up to ½ yard just to be on the safe side)

Step 2: Cut your strips.

Place your fabric onto your cutting mat. Using your rotary cutter and ruler, cut strips that are as wide as you need them to be, according to the math we worked out in step 1. Cut the number of strips you calculated as well (so for our sample quilt we would cut 4 strips that are each 4 inches wide). Make your strips selvage to selvage as you cut.

Step 3: Sew your strips together.

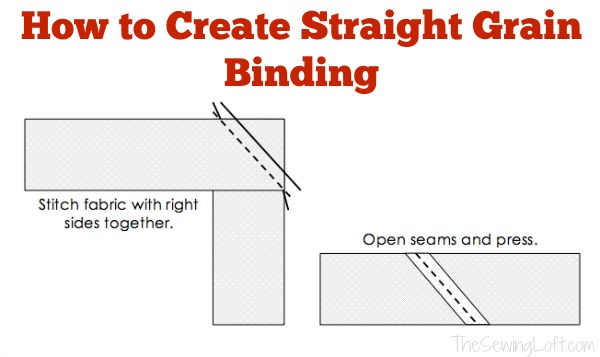
Position the end of one strip on top of the end of another, putting them at a 90-degree angle from one another. Sew a diagonal line at a 45-degree angle, and trim the corner, like so:


Open your seams and press, then repeat this process until you have sewn all 4 strips into one continuous line.

Press the binding in half, with wrong sides together, and proceed to use it in your project.

Have you ever made straight grain binding before? What do you use it for in your sewing room? Share with us in the comments below!

DIY TUTORIAL - THERAPY RICE PILLOW


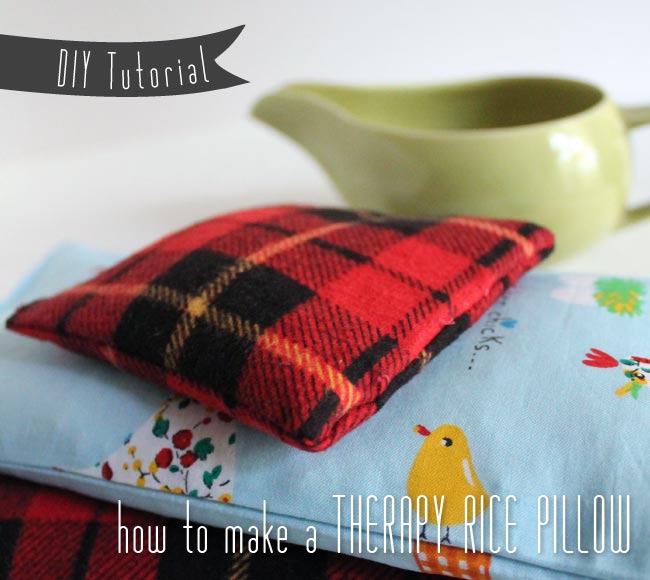
A therapy rice pillow is a wonderful last minute handmade holiday gift. A therapy rice pillow can be used like a heating pad, hot water bottle or ice pack when heated in the microwave or cooled in the freezer . I like to use mine as you would a hot water bottle to warm the end of the bed and keep my toes nice and comfy. You can reuse the pillows over and over again. They really last for years. All you need is fabric and rice. So it's pretty affordable too.


Make them in any size to suit your needs. Make a small one to warm your hands, a medium size to soothe a sore belly or a long skinny one for a stiff neck. A cotton flannel fabric is the coziest of all but any tightly woven cotton will do. 


Supplies:
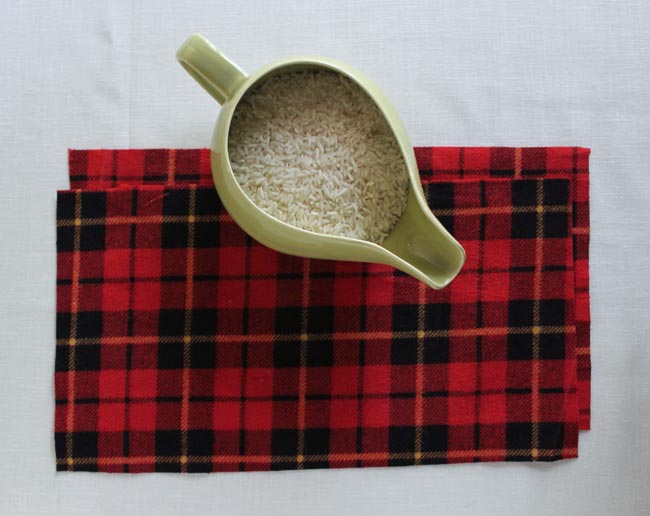
2 pieces of fabric 13 x 7 inches
About 5 cups of uncooked rice (The cheapest rice available will do just fine. Although I've read the Minute Rice is not recommended.)
Thread
Sewing machine


Step 1:
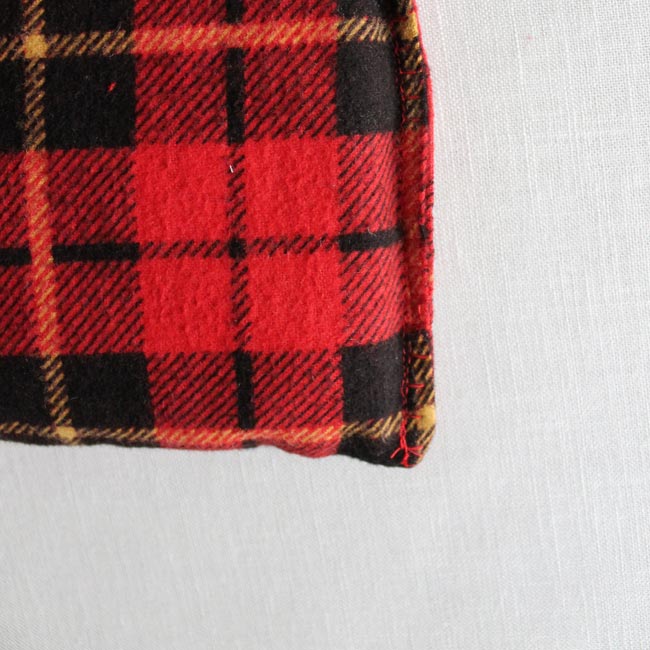
Place fabric pieces right sides together and stitch around all sides leaving about a 3 inch opening on one side. Don't trim the corners. (Don't believe me? Go read this post from Tilly. It will change your life.) Turn fabric right side out and press.


Step 2:
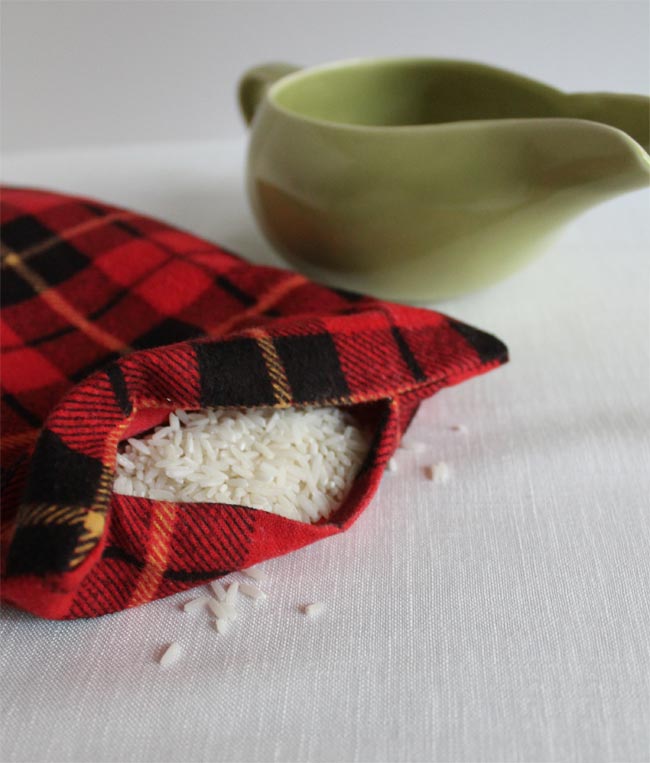
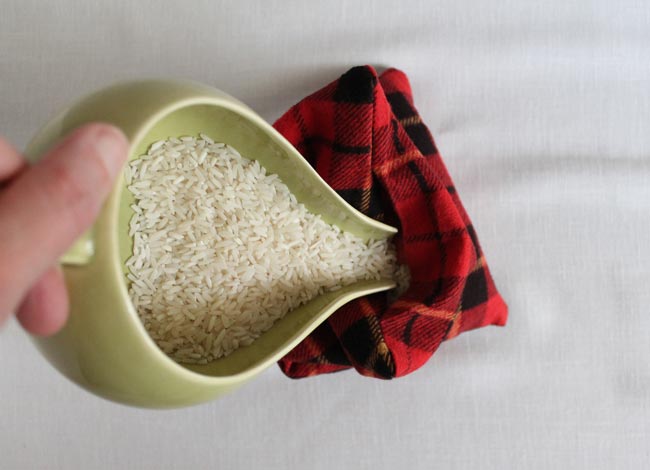
Pour rice into bag but don't fill it up all the way. You want the rice to be able to move around freely so that it feels comfortable against the body. Five cups was just about right for this medium sized bag. If you stand the bag up on one end, the rice should fill it up about halfway.


Step 3:
Stitch over the opening to close the bag. I used a straight stitch and a blanket stitch to make sure it's really sealed.


To heat your pillow, just put in the microwave for 2 to 3 minutes. You might remember that I made one of these bags a few months ago with a removable cover (see it here). The removable cover is optional. Just know that the bag itself can only be spot cleaned.


You can also make tiny little pillows to use as hand warmers (like here on the Swoon blog) and when you're not using them for warmth you can practice your juggling or have a little game of bean bag toss.

credit: sewdiy.com

Monday, July 25, 2016

DIY TUTORIAL – HOW TO SEW A FRENCH KNOT


How to Sew a French Knot

Step 1:

Push needle from back of fabric to front where you want your knot to be, leaving a tail of thread in the back. Wrap thread around needle 2 times (or more depending on your desired look).


Step 2:

Insert sharp end of needle down into fabric next to entry point. Pull thread tight around needle.


Step 3:

From the back, pull the needle and thread all the way through. Congrats! You have now made a French Knot.


I recommend practicing making these on a piece of scrap fabric and you'll be ready to start decorating all your projects in no time. I like to do a two wrap french knot but you can wrap the needle as many times as you want. The more wraps, the bigger the knot will be. In the sampler above I stitched french knots using 2, 3, 4 and 6 strands of embroidery thread in different colors. Then from left to right I stitched 1, 2, 3 and 4 wraps around the needle. You can see how the knots are bigger with thicker thread and more wraps.

If you're looking for more info, there are lots of tutorials out there about the french knot like this great one from Sublime Stitching.


credit: sewdiy.com

LEARN TO SEW A SEWING DICTIONARY

If you are new around here please check out my Learn to Sew series AND my Sew Crazy Monthly Challenge. Both are great opportunities to improve your sewing skills or to learn how to sew!

I know that learn to sew can be hard, so, I am creating a Sewing Dictionary with pictures to help you in your sewing journey. Bookmark or pin this page so that you can refer back to it as needed while learning to sew.


SEWING DICTIONARY WITH PICTURES:

Applique: To applique is to sew one piece of fabric on top of another, done with a satin stitch (a very tight zig-zag). The eyes in the picture below are appliqued in place:


Back-stitch: To back stitch you will simply hold down the reverse lever or button on your machine and the machine will sew backwards. You will do this when you need to knot your fabric. (See Knot below.)


Baste: A baste is a long and loose stitch-the longest possible that your machine will do. To baste you will need to set your stitch length to its longest setting (how to do that here). When you baste you won’t knot the thread at the beginning of the end. A baste is usually used just to hold fabric in place prior to sewing or to gather fabric. See how the stitches in this picture are long and farther apart than a typical straight stitch and it is not knotted at the beginning?


Bias: The bias of the fabric is the 45% angle from the grain of the fabric (see grain below). So basically, if you turn or cut your fabric 45% (or diagonally) from the straight up and down direction that the fabric would typically go, you are cutting on the bias. This is sometimes called for in a clothing pattern because it changes how the fabric hangs (like in a skirt or dress).

Bias Tape: Some patterns you use will call for bias tape. You can buy this at the fabric store (you can also make your own, but I always buy mine). It will come in a package (see the first picture) and is typically used to edge things. It is cut on the bias which means that it bends easily around corners, making it perfect for finishing an edge on some items.


Bobbin: The bobbin is the thread that comes up from the bottom and meets the thread from you spool to form the stitch. You will have to wind your bobbin and then insert it in your machine properly (learn howhere). Wound bobbins look like this:


Buttonhole: A button hole is a hole sewn to pull a button through. Many machines will sew one automatically for you. If you are doing it yourself it is done by sewing 2 parallel satin stitches the length of your button that are connected at the top and bottom and then sliced open in the middle to create a hole.

Fat Quarter: A fat quarter is a particular cut of fabric. Imagine a yard of fabric laying in front of you. Then imagine that you cut it straight down the middle going lengthwise and straight down the middle going horizontally. (So basically like cutting a cross or a plus sign into it.) You will now have 4 pieces of fabric, each of which is a fat quarter.

Foot Pedal: This is the part of you sewing machine that you press with your foot to make the needle sew. It goes on the floor where you can comfortably reach it with your foot:


Fusing: You can buy fusing at your fabric store (also called Heat ‘n’ Bond). It will adhere one piece of fabric to another. To use it you will iron it onto your fabric then peel off a paper backing and iron it onto whatever you are wanting to adhere it to.

Gather: When you want to create ruffles you will need to gather your fabric. To gather you will do a baste stitch on your fabric and then, holding the threads that are at the end of you baste, gently pull the top thread while keeping the bottom thread steady. This will pull your fabric so that it starts to create a gather. Once you have it gathered as much as you want it to be, you sew it in place to make the gather permanent:


Grain: Look very closely at your fabric and you will see threads that go up and down and sideways, perpendicular to each other. This is the grain (as opposed to the bias).


Hem: A pattern will often tell you to hem the bottom of an article of clothing or other item. To hem you will first fold the fabric over about 1/2″ and press it in place. Then fold it over 1/2″ again (so now no raw edges are visible) and press it again and then stitch it in place. This image shows a finished hem on a pajama pant leg:


Interfacing: Interfacing can be bought at your fabric store just like fabric but in a special section. It is used to stabilize fabric or make a project a little more sturdy and is sewn on the inside of the fabric. In some patterns you will be asked to use interfacing. There are many different weights of interfacing, so refer to your pattern to determine what you need. If it says fusible interfacing it will need to be the type that can be ironed onto the fabric to adhere it in place. Interfacing will look something like this:


Knot: To knot your fabric while sewing you will sew forward about 1 inch, reverse (or back-stitch) back over those stitches and then sew forward again. It should look something like this when you are done: (though you will typically keep sewing beyond the knot instead of quitting after it like I did in this picture)


Lining: Lining is a layer of fabric that goes underneath whatever you are sewing. Think of it like this, if you lined a skirt, the skirt would have the outer fabric that is seen by all and then an under fabric that would give the skirt a little more substance and make it less see through. Some patterns will call for lining. Typically the fabric you use for lining will be a neutral solid color that blends well with your main fabric.

Notions: Notions are the accessories you will need to sew a project such as a zipper or buttons, thread, possibly bias tape, etc. It could also include the tools like the seam ripper or pins.


Pin: You will use pins a lot while sewing. Pinning helps hold fabric in place before you sew it. When you pin you will want to place the pins so that you can sew through them without hitting the pin head or so that you can easily slide them out of the way as you sew towards them. In the first example I could easily sew along that raw edge without removing the pins because the pin heads are well out of the way. In the second example you would sew towards the pins and then slide them out before you sewed over them, just before you got to them. Either way is acceptable:


Pin Cushion: A pin cushion holds you pins for easy accessibility. It’s not always a “cushion.” Mine is magnetic:


Press: Iron

Presser Foot: The presser foot is the little metal piece near your needle. You will lower it to press down the fabric (there’s a lever just above it and to the right) while you are sewing and then lift it again when you are finished. It’s function is to keep your fabric in place while you sew. There are also other feet that you can use while sewing including a zipper foot or button hole foot, but the main foot is your presser foot.


Raw Edge: The raw edge of the fabric is the edge that is cut (as opposed to selvage-see below).


Right Side (of the fabric): The right side of the fabric is the side with the pattern or pictures or design on it. On some fabrics it won’t really matter one way or another, but on some fabric there is a definite right side:


Right Sides Together (RST): This means that you put your 2 pieces of fabric together so that the right sides of the fabric are touching each other on the inside and the wrong sides of the fabric are showing on the outside.

Satin Stitch: A stain stitch is a very tight, close together zig-zag stitch, like this:


Seam Allowance: A seam allowance is the amount of fabric that is between stitch you are sewing and the very edge of your fabric. For example, if you are instructed to sew with a 1/2″ seam allowance, you would have 1/2″ between the stitch you are sewing and the edge of your fabric.


Seam Guides: The seam guides are built into your machine and will help you sew the correct seam allowance. They are marked with various seam allowances and are found right down near your needle and presser foot-in the area you will be sewing. If you are told to sew a 1/2″ seam allowance, find the 1/2″ seam guide on your machine and guide you fabric as you sew so that the edge of your fabric stays steady with the 1/2″ seam guide. This will create a 1/2″ seam allowance. In the image below the seam allowance would be the amount of space between where the needle is sewing and the edge of the fabric that you see to the right of the needle. In this case that would be a 1/2″ seam allowance. Notice the etching in the metal below and also to the right in the plastic. Those are the seam guides:


Seam Ripper: A sharp pointed tool that you use to rip out a seam when you make a mistake. Take the sharp point and poke it underneath a stitch to break the thread. Continue to do this on any seam that you need to take out.


Selvage: The selvage of the fabric is the finished edge of the fabric that is on it when you buy it as shown in this picture along the bottom edge of the fabric. It won’t always be printed like this one is (this one has the brand of the fabric and also shows coordinating colors to use with the fabric) but sometimes will be the same pattern as the fabric:


Sewing Machine Needles: These are special needles that are inserted into your machine to do your sewing. There are a few varieties, but Universal is the standard (you can also buy needles that are heavy duty, twin needles, etc.) You will want to have extra sewing machine needles on hand so that if you break a needle while sewing (which will happen sometimes) you can replace the needle without a trip to the store.


Sewing scissors: When you are cutting fabric you want very sharp scissors. You need a pair of scissors that is used for only cutting fabric because cutting paper or other things will dull the blades.


Straight Stitch: A straight stitch is a simple, straight line.


Spool of Thread: The thread that you use to create the top part of the stitch (coupled with the bobbin). You will need to thread it onto you machine (learn how here) and you will want to buy a variety of colors. You will typically want your thread to match the fabric you are sewing on as closely as possible.


Top Stitch: To top stitch is to do a finishing stitch on top of an already sewn seam. For example, on a bag strap you might sew the strap together, turn it right side out and then do a top stitch to give it a nice finished look:


Turn: Often in a pattern you will sew with right sides together and then be asked to turn your project. This simply means to pull the fabric through an opening so that the right sides of the fabric now face out.


Webbing: A braided strip of fabric-like a belt-that you might use for straps on a bag or backpack. It can usually be purchased by the yard at the fabric store:


Wrong side (of the fabric): This is the underside of the fabric. On some fabric it won’t matter, but on many fabrics there will be a clear difference between the right side and the wrong side:


Zigzag: A zig-zag stitch is just that-a stitch that zig-zags. It’s often used to sew along raw edges to prevent them from fraying. It is also used in a satin stitch and applique:


Zipper: You can buy zippers at the store in packages. They come in a variety of lengths and colors so know what you need before you go:


This dictionary is a work in progress and I will continue to add to it as needed, so let me know what other terms you need defined. And be sure to join me for the Learn to Sew Series!