

We visit family and friends often. Sometimes we end up staying late and our kids start to get tired.

If we pack this “sleepover pillowcase” before we leave, the kids can have their favorite toy, and a soft place to lay their head down.

It’s also a great item to bring in the car while traveling long distances close to bedtime.

Or sometimes Grandma and Grandpa have them over for a sleepover. They can stuff their pj’s and favorite blankie into the pillow portion. The button closure will help these things stay in! Let them pack their favorite stuffed animal or some books in the zippered pocket. With the handle at the top, they are ready to go equipped with everything they need in case they
get a little homesick.

(The dimensions used for this pillowcase with the contrasting band around the opening came from the wonderful Dana of MADE. She has a wonderful, simple pillowcase tutorial you can find here.)

What You’ll Need:
-Two 21” x 26” main fabric (mine is the green argyle)
-Two 21” x 11” coordinating fabric (for top border on pillowcase)
-Two 21” x 18” pieces of fabric (for zippered pocket)
-One 6” x 14” piece of fabric for the handle
-12” zipper
-Two 2” x 13” fusible interfacing
-1 LARGE button (optional—if you are worried about your child pulling it off and putting it in their mouth, skip this! You can use velcro for a closure instead to be safer)

Take the 6” x 14” piece of fabric for the handle. Fold in half and sew a 1/4” seam.

Turn, moving the seam into the center of the back of the handle, and topstitch each side.

Fold the strap in half and baste onto the right side of one of the 21” x 26” pieces of fabric, along the 26″ side. Baste it about 1.5” down from the top.

Take the two 21” x 18” of pocket fabric. Mark a line 3” down from the 21” top. Center a piece of fusible interfacing on the line and in the middle of the fabric and iron, following the directions that come with the interfacing.


Place the two pieces of pocket fabric right sides together. Pin around the interfacing.


Draw a box that measure 1/2” x 12” around the line you already marked 3” down. So the ends are marked in 4.75” from the sides and then 1/2” on either side of the line (the 3” down from the top line).

Sew all along the box you just drew, making sure that you backstitch at the corners.

Insert your seam ripper and cut inside the rectangle as pictured.

Make diagonal cuts at the end, making sure to cut all the way to, but not through, the
corners.

Insert one layer of the pocket fabric into the slit, pulling all the way through so it’s on the other side.

: Iron so it lays flat and is even all around the edges.

Place the zipper behind so that you see the top on the side of the pocket you want facing out. You can use a glue stick to help hold it in place (I didn’t and I should have because mine ended up going in a little unevenly!).

Use your zipper foot to sew around the zipper.


Along the top of the pocket, iron down 1/2” towards the inside as pictured below. Alternatively, you could zig-zag or serge the edges, then iron them down 1/4” towards the lining fabric of the pocket.

Place the pocket piece evened up on the edges and bottom of the 21” x 26” with the strap. Pin the pocket along the top and sides, tucking in the top portion of the pocket that you ironed down. If you are worried about getting it even, mark a line onto the main pillowcase that you can follow while “top-stitching” the pocket on.

Topstitch the top of the pocket piece onto the 21” x 26” piece of fabric.

Baste the sides and bottom of the pocket onto the fabric.

Fold one of the 21” x 11” in half lengthwise, wrong sides together, and iron. Make sure that if you have directional fabric that it will be the right direction when you fold it back up). Line up the unfinished edges along the top. Sew with a 1/2” seam.


Zig-zag stitch or serge the raw edge. Fold back up and topstitch along the seam. Repeat with other 21” x 11” and 21” x 26” pieces of fabric. Pin the handle down.

Place the two pieces of fabric right sides together. Pin around sides and bottom, leaving the
 top band open for the pillow.
Sew 1/2” seam around the sides and bottom.
top band open for the pillow.
Sew 1/2” seam around the sides and bottom.

Zig-zag stitch or serge all the raw seams.

If desired, find the center of the band and sew a buttonhole and button on where needed. I wanted to do this so if my kids carried it around they could stuff pj’s, stuffed animals, etc. and they won’t fall out as easily if it was just the big opening.


Flip the pillow onto the non-zippered side (so hair will not get stuck in the zipper) and let your child rest his or her adorable little head.

**Please be careful! Contains small parts. Be aware of the zipper pull and the button. Little kids should not pull on them and kids under 3 or 4 should not sleep with these!**
credit: lemonsqueezyhome.com
Welcome to week 2 of the Learn to Sew series! If you survived Week 1 you are going to breeze right through Week 2 because it’s not too much different. You’ll still be sewing a straight line, but with a zigzag stitch instead of a straight stitch this time.
Now, let’s talk about how to sew a zigzag stitch.

HOW TO SEW A ZIGZAG STITCH:
First of all let’s talk about what a zigzag stitch is and why you would use it. A zigzag stitch is just that-a stitch that zigzags. It looks like this:

Pretty basic right? But why would you use a zigzag? There are a couple of reasons:
1. A zigzag is a more sturdy stitch, so if you need something held extra tight, a zigzag is the stitch to use. That’s what I use when attaching the hood on my hooded towels because I know it will hold nice and tight.
2. A zigzag can be used to prevent fraying. If you are sewing clothing or something that you want to have be really nice and you don’t want any raw edges to fray, you can zigzag them first. (That is if you don’t have a serger.)
3. Zigzags are used in applique and button holes. We are going to learn about those more in Lesson 7.
So, let’s get started sewing.
To sew a zigzag stitch you are going to start out just the same as you did with your straight stitch fromLesson #1. Thread your bobbin and your machine. Somewhere on your machine is going to be a way to change from a straight stitch to a zigzag. Up above you can see a picture of how mine does it (mine is computerized). It may be a picture of a zigzag or it may be a number or letter that indicates what stitch you are doing. Check your manual for help on this. (See also the Meet Your Machine post.)
Set your machine to zigzag. The basic zigzag stitch is going to be of average length and average width:
But you will be able to change the stitch width and the stitch length as needed. Here are some examples:
On this one I have adjusted the WIDTH of the stitch to be larger. See how the zigzag is very big and wide?

But on this one I adjusted the LENGTH of the stitch-making the stitches long and farther apart:

Here they are closer together, meaning I adjusted the LENGTH again and in this case I also adjusted theWIDTH and made it a little smaller:

And on this one I adjusted the LENGTH almost as low as it could go:

When you have a really tight zigzag where the stitches are right up next to each other, that’s called a Satin Stitch.
Are you getting a sense of how you can adjust your stitches? Find where you do this on your machine and play around with it a little.
Now, typically when using a zigzag you can just keep your stitch width and length at a nice average setting. But it’s good to know how to change it as needed.
To sew a zigzag, LOWER your presser foot and your needle into the fabric. Make sure your machine is set on zigzag and sew an inch forward. Just like with the straight stitch, now push the reverse button and sew an inch backwards (back-stitching) and then go forward again. You have now knotted your thread and can continue sewing. Again, you can still use the edge of the presser foot or the seam guides to help you sew straightly.

One more thing to note. You’ll notice that sometimes that zigzag will make the fabric kind of gather in a tunnel underneath it. This can happen on lightweight fabric. There is a way around this. On your machine, the setting next to zigzag will look like a zigzag but dotted. This will do a zigzag but with three stitches per zig to help prevent the tunnel effect.
And that’s it. Not too hard is it? Do you have questions?
YOUR ASSIGNMENT:
Now we need to practice and sew something new! Here’s how your assignment works:
Pick a project-I will give you several options here, you are also welcome to choose something of your own, just be careful to make sure that it is in your ability range. Sew it up this week! Take some pics and share online if you would like. Tag me! @crazylittleprojects
Come back and enter to win a big package of thread in the giveaway below!
Advanced Track:
Your option is to select a stitch on your machine that you are not familiar with, learn about it and try it on a project. For example, try a stretch stitch and make a Maxi skirt!
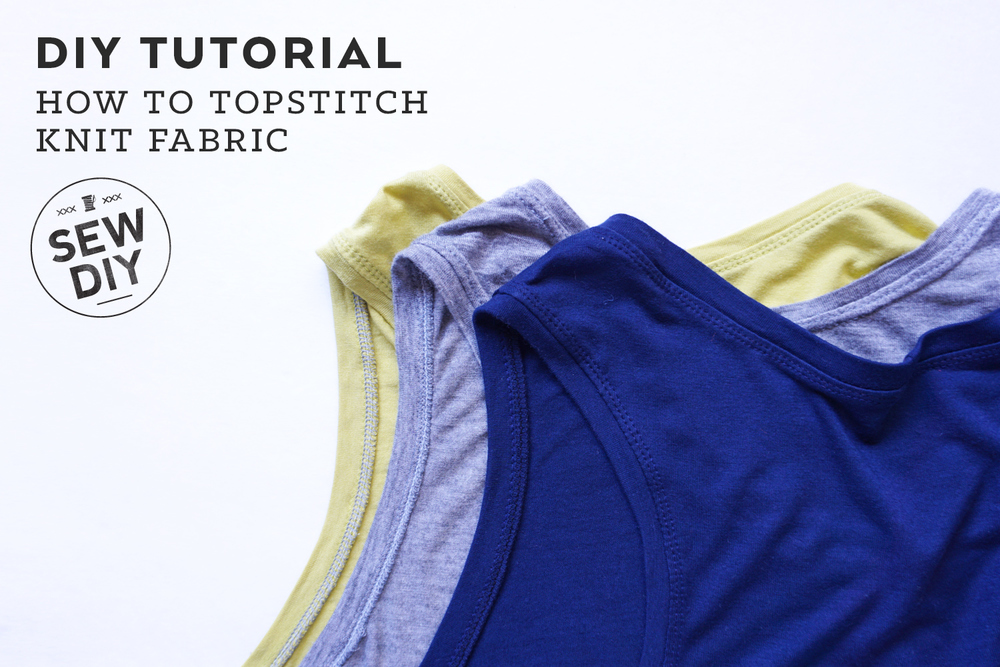
Knit fabrics are great to wear and fun to sew with but they can be a little tricky to handle. I was intimidated by them for a long time but with a lot of practice and a few tricks I picked up along the way, I’ve been able to conquer those stretchy beasts. Today, I’m going to share my favorite method for topstitching knit fabrics plus some tips and insight on why knits can be so bothersome. And don't worry, you don't need a fancy machine, this can all be done on a conventional sewing machine.

TIP ONE: Feed your fabric.
The big difference between sewing knits and woven fabric is the stretch. A basic sewing machine does a great job of feeding your woven fabric under the needle but it can be challenging to feed a stretchy knit fabric. The fabric can bunch up, get stuck in the throat plate and the stitch length will be uneven and wobbly.
I have two methods for helping feed your fabric through a conventional machine. Option 1, use a walking foot (on left in photo above) when stitching knits. The walking foot has feed dogs on the top that help move the fabric evenly under the needle. Option 2, (if you don’t have a walking foot) place strips of tissue paper underneath your fabric as you stitch. When you’re done, gently tear the paper away. The paper creates a stable base for the fabric that the feed dogs can grab onto and push under the needle.
TIP TWO: Stitch with stretch
Your fabric is going to stretch as you wear it, so you want your stitches to stretch too. If the thread can't stretch, the stitching can break (you can actually hear a pop when this happens). To create a stretchy topstitch, use a twin needle or a zig zag stitch. The twin needle has two threads on the top and one on the bottom (the bobbin). The bobbin thread will be slightly stretched between the two top threads. I like to use wooly nylon (or fluff thread) in the bobbin. It’s a stretchy thread that will help your stitching lay flat. The zig zag stitch is also a great option for topstitching. It looks a little less professional than the twin needle but if your thread matches the fabric quite well you probably won't be able to see the stitching anyway. And sometimes the zig zag looks really cool.

USING A TWIN NEEDLE
My machine (Brother CS-6000i) has specific threading instructions for using a twin needle and I recommend reading your manual to make sure you do it the way your machine likes. I first tried a twin needle when I was in high school and I just couldn’t get it to work. I bet if I had read the manual (or if sewing blogs existed back then :) I would have been able to make it work. I was scared to do it again for a long time after that because it didn’t work just that one time. But I finally gave it another go, read the manual and now I love it.
A twin needle is the best way to get two lines of stitching that are perfectly spaced from each other. There are varying widths of twin needles so you can have a little fun and try different looks. Above you can see the 2mm on the left and a 4mm on the right. I really love the wider needle but if I'm topstitching a narrow seam allowance in place (like on a neckline) I prefer the narrower needle. The wide needle can end up topstitching with one needle on the seam allowance and one on the outside which then creates a ridge.

WOOLY NYLON THREAD
Discovering this thread was something of a revelation. The wooly nylon thread is a stretchy thread that's made up of multiple strands. I've read that it's often used when serging and with undergarments. So far I've only used it in the bobbin when topstitching and I totally love it. When using regular thread in the bobbin, the two top threads can pull together a little and create a ridge. The stretch of the wool nylon lets the two top threads lay flat. Yay! I have one spool in off white and one in black and that's so far worked well for any project.
Now that you have all the background you’re ready to topstitch your knits! You don’t need a fancy machine but I do recommend a few supplies. This method can be used on hems or to finish a neck or arm binding.

HOW TO TOPSTITCH KNIT FABRIC
SUPPLIES
2 spools regular thread (You don't need to buy to full spools of the regular, just wind up a bobbin with the regular thread to use as the second "spool.")
Wooly Nylon Thread (aka fluff thread)
Twin Sewing Needle
Sewing Machine with Walking Foot
(or if you don’t have a walking foot, some strips of tissue paper as discussed above)
INSTRUCTIONS
1. By hand, loosely wind wooly nylon thread around bobbin.
2. Attach walking foot to machine and insert twin needle. Thread machine according to your machine’s manual.
3. Set your machine to a straight stitch. (I like to use a 3.0 stitch length, just slightly longer than normal.)
4. If you are starting at the edge of the garment, place a strip of tissue paper under the garment with a tail hanging out the back. (This will help prevent the fabric being pushed down into the machine by the needle.) Place garment under needle, lower presser foot and stitch.

5. At end of stitching, raise presser foot, pinch garment at stitching line and pull away from the machine about 8 inches. Cut thread leaving a 4-5 inch tail. Gently pull the ends of the top threads to the wrong side and tie in a knot with bobbin thread. Trim ends. Repeat with threads at beginning of stitching. (This will secure the threads and create a clean look on the right side of the garment.)
I hope these tips will help you in your sewing adventures. And remember it's ok if your topstitching isn't perfect. Mine rarely is! If you want more info on sewing with knits I recommend a couple of books that have really helped me: Sew U Home Stretch by Wendy Mullin and The Colette Guide to Sewing Knits by Alyson Clair. Do you have any tips or tricks for stitching knits? Please share in the comments. Happy sewing!
credit: sewdiy.com


 top band open for the pillow.


