
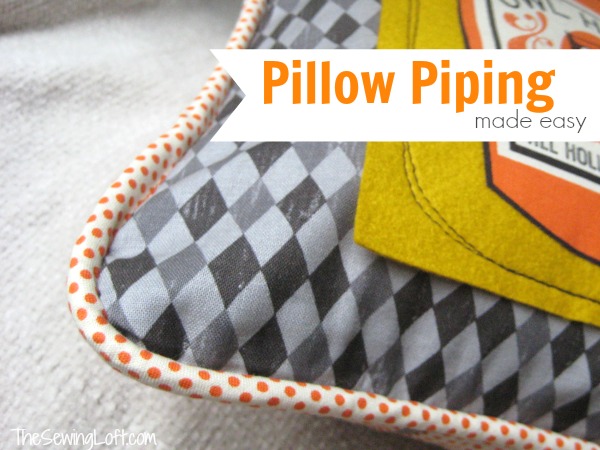
We have learned how to make custom piping in 4 simple steps but never really talked about what to do with it. Today, I’m going to show you just how easy it is to install custom piping on decorative pillows. This simple trim can really create that WOW factor on a limited budget.
Install Pillow Piping
This project is for all levels.
Skill Level- 1 Button
Supplies:
custom piping
pillow pattern
Tools:
sewing machine
zipper foot
basic sewing supplies
Basic Instructions:
Attach your zipper foot to your machine and check the needle position.
Determine the starting point of piping on your pillow. I suggest in the middle of the bottom of pillow to hide.
Position piping; pin in place all around pillow matching seam allowance.
Straight stitch as close to the cording as possible, clipping corners as needed to turn the seam.
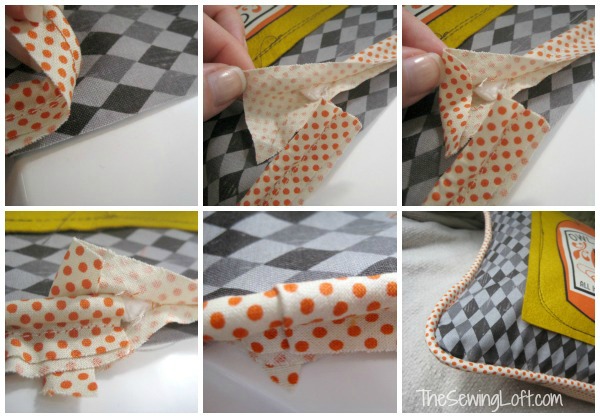
To join piping, unpick a few stitches on piping and fold back fabric to expose cording. Clip cording to match evenly; fold under the fabric edge and overlap to cover the seam; continue stitching piping in place.
Custom pillow piping is an easy way to add that decorator touch on a shoestring budget. The key is to take your time and not to be caught short. With a few minutes of prep work and somesimple calculations, you can transform even the simplest pillow insert into a decorator pillow.
credit:thesewingloftblog.com
Install Pillow Piping
This project is for all levels.
Skill Level- 1 Button
Supplies:
custom piping
pillow pattern
Tools:
sewing machine
zipper foot
basic sewing supplies
Basic Instructions:
Attach your zipper foot to your machine and check the needle position.
Determine the starting point of piping on your pillow. I suggest in the middle of the bottom of pillow to hide.
Position piping; pin in place all around pillow matching seam allowance.
Straight stitch as close to the cording as possible, clipping corners as needed to turn the seam.
To join piping, unpick a few stitches on piping and fold back fabric to expose cording. Clip cording to match evenly; fold under the fabric edge and overlap to cover the seam; continue stitching piping in place.
Custom pillow piping is an easy way to add that decorator touch on a shoestring budget. The key is to take your time and not to be caught short. With a few minutes of prep work and somesimple calculations, you can transform even the simplest pillow insert into a decorator pillow.
credit:thesewingloftblog.com
No comments:
Post a Comment