This post is part of the Sew Basic Series (remember the fabrics 101 + heatpad and the tools & notions posts?)
If you need some help visualizing on your sewing machine (or if you still don’t have one but you’d like to start learning) all the tools and knobs below, check my Sewing Machine: Dissected! Part 1 and Part 2: a lot of pics and descriptions are there Just For You (opens in a different tab!)
Now, you’ve decided to start the most rewarding crafting in the world (am I partial to this?), could you use some of my top sewing tips (listed in strictly random order)?
Sewing Tip #1. Say: “Cheese!”
Snap some shoot to existing threading, just to be sure you’ll be able to re-thread when you’ll need to (and you’ll need it soon, promise!)
Sewing Tip #2. Leave the thread guide up
This is an important tip! When you start sewing, the thread guide right above the needle have to be in its higher position.
If it’s not, as soon as you’ll turn the handwheel to start (see next step) the needle will unthread!

To be sure you’ll never skip this step, I’d suggest you to create a habit of checking it
Every. Single. Time.
you stop sewing (and eventually turn your hand wheel to put the thread guide in its higher position)!
Sewing Tip #3. Start by Hand
To be sure everything is perfect while you start, always do the first 1-2 stitches turning your hand wheel anticlockwise, so you can check if the needle is getting smoothly in the fabric, see if your fabric’s thickness is a problem (think hemming your jeans!), and avoid thread jams, plus, you’ll accurately define the first stitch placement.
Sewing Tip #4. Keep it down!
Never stop with your needle up, out of the fabric,while sewing a corner or when you need to slightly move the fabric (such as in a curved seam) or to pull out a pin.
Leaving the needle down and pivoting in the fabric, will help you to achieve a perfectly aligned seam.
Sewing Tip #5. When things goes bad, rethread
This is a rule, whenever you find in your seam a thread too tight or too loose, or your machine is skipping stitches, try rethreading everything, spool and bobbin (also if you think it’s all perfect!) – 99% of the times you’ll solve your problems!
To help yourself, keep the pics you took in Tip 1 on your phone or tablet, ready to check!
While you’re repositioning the bobbin, check for lint/bird’s nest right below the needle plate… this is often what causes thread wonkyness or missing stitches!
Sewing Tip #6. Check needle type and conditions

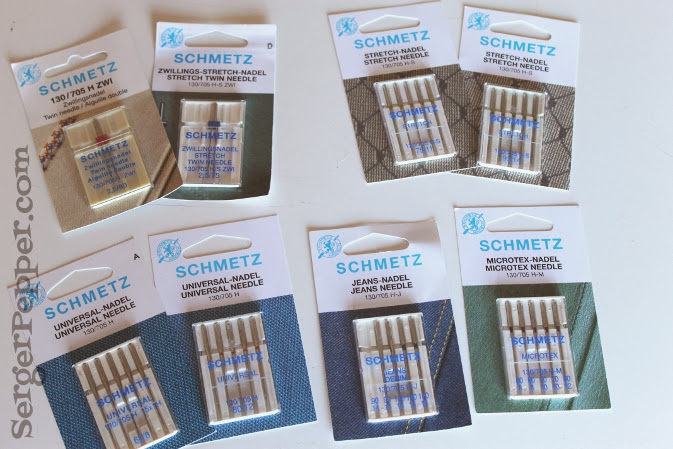
While an Universal needle can be perfect for starting (a n° 90-14 will be the right choice), with special kinds of fabric you’ll better choose the proper needle:
lightweight fabrics (like sheers or thin cottons) want a smaller needle (n° 60-8 or 70-9)
with thicker fabrics like denim, better use a bigger needle (like 100 or 110!)
to hem with a coverlock look (if you don’t know what it is, simply look at your double row t-shirt hem!), a twin needle will be your best friend

The most important kind of needles, for me, is the knit/stretch/jersey one: we call them ballpoint needles because they have a rounded tip that goes between knitted threads, separating them; if you use a Universal needle, chances are that you’ll end with unwanted holes in no-time… believe me or not!

If you need a visual reminder, check this guide, pinned in my “Sewing for Beginners” Board in Pinterest!
One more thing: always use a sharp/new needle – a bent or over-used needle can create a thread jam and suckyour fabric inside the needle throat or (worst) break and spring into your eyes!
Sewing Tip #7. Check thread type
A rule of thumb is to use the same thread type in both bobbin and spool (unless you need to use embroidery thread, that will go only in your spool).
There’s no problem using different colors in your upper and lower thread (and it’s nice when you are topstitching a lined dress, to match both outer and inner fabric’s color with thread), but choose them from the same family (no polyester spool and cotton in the bobbin…) to avoid thread jams or breakages.
Sewing Tip #8. Clean her!
This sewing tip is a rule for your sewing machine health and longevity: try using an air duster or, better, acompressor to blow out any tiny thread or lint, hidden inside your sewing machine.
Check your sewing machine’s manual to see if you can unscrew something to clean your machine more in-depthand if you have to oil it and where.
Check this FREE Craftsy lesson or this one to learn more!
Sewing Tip #9. How to sew a straight line
The trick is: never look at your needle! Being steadily in movement, can’t be a focal point for your eyes, it would be confusing!
Measure your seam allowances distance from the needle and (if your needle plate is missing those tiny parallel etched straight lines) mark the one you need on the needle plate somehow (an elastic band, Washi tape, painter’s mask tape, sticky notes are all perfect candidates!), creating a repositionable seam guide.
Try now to keep your fabric’s edge aligned to your improvised seam guide, then admire your straight seam!

Sewing Tip #10. Try on scraps first
When you cut out your pattern pieces, never throw away your fabric’s scraps, but keep them for practicing (and calibrating) your stitchings!
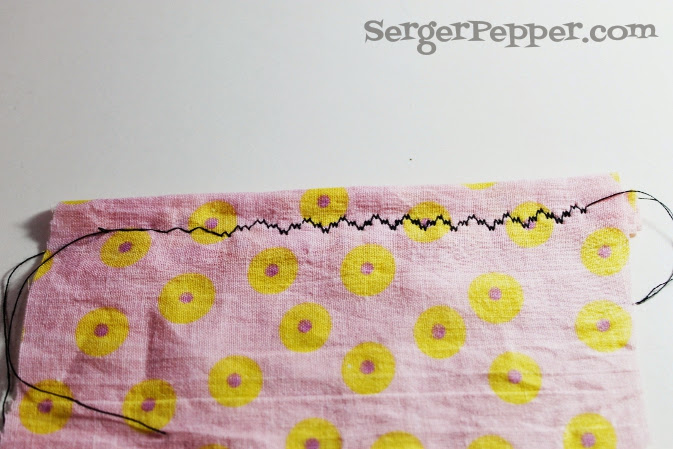
From left to right you can see I’ve adjusted stitch length and width to have a perfect decorative stitch!

Nobody can sew perfectly the first time that tries, and a seasoned seamstress too will choose to try a particular stitch or a stressful kinds of fabric (think slippery sheers, or buttonholes in knits…) on scraps before going on garment and eventually ruin her precious fabric!
Always recreate the same circumstances: if you’re going to sew on 3 layers of denim on your garment, practicing in only one layer won’t mean a lot!
Sewing Tip #11. Check the amount of thread on bobbin
…this may sound silly to you but, basing on Murphy’s Laws, if you have to guess exactly when your bobbin’s thread will finish, you can be sure that it will happen right in the middle of a princess seam (or any other complicated stitching), and you’ll notice it only after 30 cm of unlocked stitching….
Been There, Done That, Got the T-shirt

Better change this nearly empty bobbin if you need to sew a challenging part of your garment!

Sewing Tip #12. Go Back & Forth
Start 1/2 cm inside your fabric edge, backstitch, then sew the seam: you’ve just fixed your seam’s head!
Do the same at the other end of the fabric: when you reach the edge, reverse your sewing machine direction, sewing a couple of stitches, then cut the thread tails.

In some particular situation (like on a dart’s head, for example) it’s better to simply sew off the edge leaving long thread tails, knot tails together then shorten them.
Sewing Tip #13. Lefties
To avoid messes (imagine your sewing machine needle throat gobbling your fabric, forcing you to cut a hole in the fabric… ask me why I know that…) start any seam holding threads tails on your left hand.
This is mostly important on lightweight fabrics and/or knits that are more apt to be swallowed!

Believe me, it’s not a good thing when it happens, and you have to re-cut two pieces of your pattern… and have no more fabric…
Can you see me tear my hairs out?
Sewing Tip #14. Control your speed!
Especially when you are a beginner, it’s better to go slowly, never push your foot down the pedal!
A little (but of a certain weights) sewing tip I learnt a long time ago (and I want to share with you now) is to put your naked (or with sock, if you live in a cold country, like me) foot on foot pedal: this gives you much more control than if you were wearing shoes!
Sorry – no pics of my naked foot LOL
Sewing Tip #15. Never skip a good press
One of the most important things to learn is how to properly press seams while you sew: this make the difference between (poorly) homemade and (shining) handmade!
You should never cross a seam with one other seam if the first isn’t pressed (either opened or to one side, as per instruction’s request)

No comments:
Post a Comment